PC overheating, what’s the optimal CPU fan curve setting?

Understanding the Importance of CPU Fan Curves
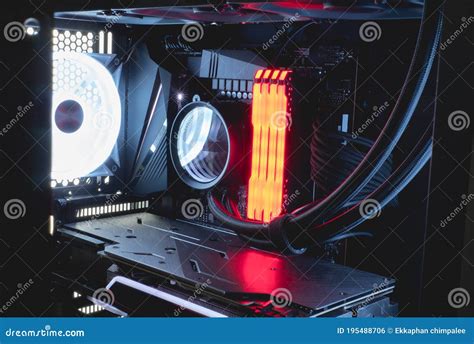
PC overheating is a common and serious issue that can lead to performance throttling, system instability, and even permanent hardware damage. While dust accumulation, poor airflow, and old thermal paste are frequent culprits, an often-overlooked aspect of effective cooling is the CPU fan curve. This setting dictates how your CPU cooler’s fan speed adjusts in response to the CPU’s temperature, playing a critical role in maintaining optimal operating conditions and system longevity.
Why Your CPU Fan Curve Matters
The CPU is the “brain” of your computer, and it generates a significant amount of heat during operation. Your CPU cooler, comprising a heatsink and fan, is designed to dissipate this heat. The fan’s speed (measured in RPM, Revolutions Per Minute) directly impacts its cooling efficiency. A well-configured fan curve ensures that the fan spins faster when the CPU is under load and generating more heat, and slows down when the CPU is idle, reducing noise levels. Incorrect settings can either lead to inadequate cooling at high temperatures or unnecessary noise at low temperatures.
Deciphering Fan Curves: RPM vs. Temperature
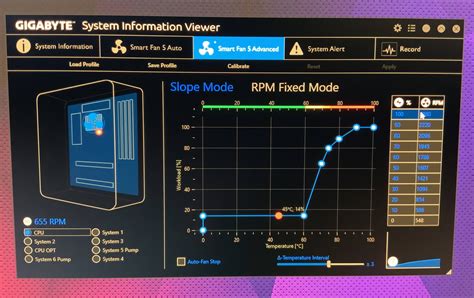
A fan curve is essentially a graph or table that maps CPU temperature thresholds to corresponding fan speed percentages or RPMs. Typically, it defines several points: for example, 30% fan speed at 40°C, 50% at 60°C, and 100% at 80°C. Modern motherboards and control software allow users to customize these points, creating a tailored response to thermal changes. The goal is to find a balance between effective cooling and acoustic comfort.
Default Settings vs. Custom Optimization
Most motherboards come with a default fan curve setting. While these defaults are generally safe, they are often conservative. Some might keep fan speeds unnecessarily high, leading to constant noise, while others might react too slowly to sudden temperature spikes, causing temporary overheating. Customizing your fan curve allows you to fine-tune this behavior to your specific CPU, cooler, case airflow, and noise tolerance. This is especially beneficial for high-performance CPUs, overclocked systems, or compact builds where heat management is critical.
![CPU Fan RPM Guide [Control Heat & Maximize Performance 2024]](/images/aHR0cHM6Ly90czQubW0uYmluZy5uZXQvdGg/aWQ9T0lQLjJ3Smp4czZ6ZllmM3pKalZqV3EtU0FIYUVLJnBpZD0xNS4x.webp)
How to Access and Adjust Your Fan Curve
There are primarily two ways to adjust your CPU fan curve:
- BIOS/UEFI Settings: This is the most common and recommended method as these settings are applied at the hardware level before the operating system loads. To access, restart your PC and repeatedly press the designated key (usually Del, F2, F10, or F12) to enter the BIOS/UEFI. Navigate to the “Monitor,” “Fan Control,” or “Q-Fan Control” section. Here, you’ll typically find a graphical interface or a table to set temperature points and corresponding fan speeds.
- Software Utilities: Many motherboard manufacturers (e.g., ASUS AI Suite, Gigabyte SIV, MSI Dragon Center) provide Windows-based utilities that allow for on-the-fly fan curve adjustments. Third-party tools like Argus Monitor or FanControl also offer advanced customization options. While convenient, BIOS settings are generally preferred for stability.
Principles of an Optimal Fan Curve
Crafting the perfect fan curve involves a delicate balance:
- Idle Temperatures (e.g., 30-50°C): Fans should be quiet, perhaps running at 20-30% speed.
- Medium Load Temperatures (e.g., 50-70°C): Fan speed should increase steadily to maintain temperatures without excessive noise (e.g., 40-70% speed).
- High Load/Gaming Temperatures (e.g., 70-85°C): Fans should ramp up aggressively to prevent thermal throttling, potentially reaching 80-100% speed. Your maximum comfortable operating temperature should be below 90°C, ideally closer to 80-85°C under sustained load.
- Ramp-up/Ramp-down Speed: Avoid sudden, drastic changes in fan speed, as this creates an annoying “whooshing” sound. Introduce gradual increases and decreases.
Step-by-Step Guide to Setting Your Optimal Curve
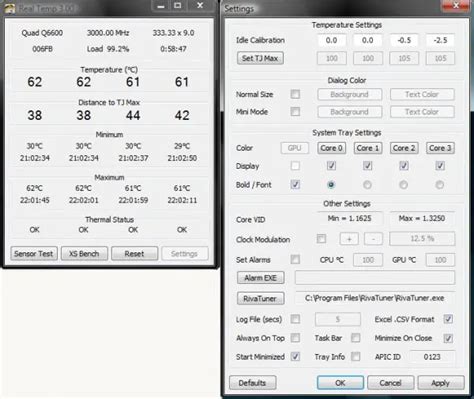
- Monitor Your Temperatures: Use monitoring software like HWMonitor, Core Temp, or HWiNFO to observe your CPU temperatures at idle, during light tasks (browsing, office work), and under heavy load (gaming, video rendering, benchmarks like Cinebench).
- Start with a Baseline: Begin with a gentle curve, keeping fans relatively quiet at low temperatures.
- Increase Steadily: As temperatures rise, increase the fan speed incrementally. For example, you might set points at 40°C (30%), 55°C (50%), 70°C (75%), and 85°C (100%).
- Test and Refine: Apply the new curve and repeat your temperature monitoring under various loads. If temperatures get too high, adjust the fan speeds upwards at those temperature points. If noise is excessive at certain temperatures, try to reduce fan speed slightly, ensuring temperatures remain safe.
- Observe Noise Levels: Pay attention to the acoustic profile. The goal is to have the fan noise be acceptable, or at least less noticeable than the benefits it provides.

Beyond Fan Curves: Other Cooling Considerations
While an optimal fan curve is crucial, it’s part of a larger thermal management strategy. Ensure your PC case has good airflow with intake and exhaust fans, keep your system dust-free, and ensure your thermal paste is fresh and properly applied. A high-quality CPU cooler also makes a significant difference. Combining these elements with a well-tuned fan curve will provide the best cooling performance and a quieter PC experience.
Conclusion
Tuning your CPU fan curve is an essential step in preventing PC overheating, extending hardware lifespan, and enhancing your computing experience. By understanding the relationship between temperature and fan speed, and taking the time to customize these settings, you can achieve a harmonious balance between efficient cooling and acoustic comfort. Don’t let default settings dictate your PC’s thermal fate; take control and optimize for performance and longevity.