


How to set up G-Sync/FreeSync for smooth, tear-free gaming on my monitor?

Eliminate Screen Tearing: A Guide to G-Sync and FreeSync Setup
Screen tearing is a common and frustrating visual artifact for gamers, where multiple frames are displayed simultaneously, resulting in a horizontally split image. This disruption occurs when your graphics card’s frame rate is out of sync with your monitor’s refresh rate. Fortunately, NVIDIA’s G-Sync and AMD’s FreeSync technologies offer a revolutionary solution: Variable Refresh Rate (VRR). These technologies synchronize your monitor’s refresh rate with your GPU’s output, delivering incredibly smooth, tear-free, and stutter-free gameplay.
Setting up G-Sync or FreeSync is a straightforward process, but it requires specific hardware and correct configuration. This guide will walk you through everything you need to know to get these technologies running on your system.

Prerequisites for Variable Refresh Rate (VRR)
Before you dive into the setup, ensure your system meets the following requirements:
- Compatible Monitor: You need a monitor that specifically supports either G-Sync (NVIDIA’s proprietary module) or FreeSync (AMD’s open standard). Many monitors are also ‘G-Sync Compatible,’ meaning they support FreeSync over DisplayPort and have been validated by NVIDIA.
- Compatible Graphics Card:
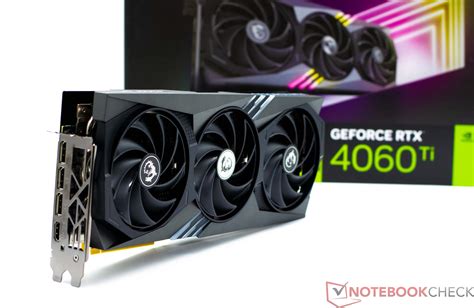
- For G-Sync/G-Sync Compatible: You need an NVIDIA GeForce GTX 10-series or newer GPU.
- For FreeSync: You need an AMD Radeon RX 200 series or newer GPU, or an NVIDIA GeForce GTX 10-series or newer GPU (for G-Sync Compatible monitors using FreeSync technology).
- Correct Cable:
- For G-Sync (native module): You MUST use a DisplayPort cable.
- For FreeSync (and G-Sync Compatible): DisplayPort is generally preferred and offers the widest range of VRR. Some FreeSync monitors also support VRR over HDMI (usually HDMI 2.0 or newer). Check your monitor’s specifications.
- Latest Drivers: Ensure your graphics card drivers are updated to the latest version.
Setting up NVIDIA G-Sync / G-Sync Compatible
If you have an NVIDIA graphics card and a G-Sync or G-Sync Compatible monitor, follow these steps:
- Connect Your Monitor: Use a DisplayPort cable to connect your monitor to your NVIDIA graphics card. If your monitor is G-Sync Compatible and supports FreeSync over HDMI, you can use an HDMI 2.0+ cable, but DisplayPort is recommended for best results.
- Enable G-Sync/FreeSync on Your Monitor: Access your monitor’s On-Screen Display (OSD) menu. Navigate to the ‘Gaming,’ ‘Display,’ or ‘Picture’ settings and look for options like ‘G-Sync,’ ‘FreeSync,’ ‘Adaptive Sync,’ or ‘VRR.’ Enable this feature.
-
Enable G-Sync in NVIDIA Control Panel:
- Right-click on your desktop and select ‘NVIDIA Control Panel.’
- In the left pane, expand ‘Display’ and select ‘Set up G-SYNC.’
- Check the box next to ‘Enable G-SYNC, G-SYNC Compatible.’
- Select your G-Sync/G-Sync Compatible monitor from the list.
- Choose ‘Enable for full screen mode’ or ‘Enable for windowed and full screen mode’ (full screen is generally recommended for optimal performance).
- Click ‘Apply.’
- Set Your Monitor’s Refresh Rate: Still in the NVIDIA Control Panel, go to ‘Change resolution’ under ‘Display.’ Ensure your monitor’s highest refresh rate is selected for your native resolution.
Setting up AMD FreeSync
If you have an AMD graphics card and a FreeSync monitor, follow these steps:
- Connect Your Monitor: Use either a DisplayPort or HDMI 2.0+ cable (depending on monitor support) to connect your monitor to your AMD graphics card.
- Enable FreeSync on Your Monitor: Access your monitor’s On-Screen Display (OSD) menu. Navigate to the ‘Gaming,’ ‘Display,’ or ‘Picture’ settings and look for ‘FreeSync’ or ‘Adaptive Sync’ and enable it.
-
Enable FreeSync in AMD Radeon Software:
- Right-click on your desktop and select ‘AMD Radeon Software.’
- Click on the ‘Gear’ icon in the top right to open settings.
- Go to the ‘Display’ tab.
- Look for the ‘Radeon FreeSync’ option and toggle it to ‘Enabled.’
- Set Your Monitor’s Refresh Rate: Right-click on your desktop, go to ‘Display settings,’ then ‘Advanced display settings,’ and ensure your monitor’s highest refresh rate is selected for your native resolution.

Troubleshooting Common Issues
- Ensure Monitor is Set to Max Refresh Rate: Sometimes Windows or display drivers default to a lower refresh rate. Double-check this in your display settings.
- Update Drivers: Outdated graphics drivers are a frequent cause of issues. Always ensure you have the latest drivers from NVIDIA or AMD.
- Check Cables: A faulty or incorrect cable can prevent VRR from working. Try a different DisplayPort or HDMI cable if you encounter problems.
- Disable In-Game V-Sync: For the best experience with G-Sync/FreeSync, disable V-Sync within your game settings. G-Sync/FreeSync handles synchronization more effectively. However, you might want to enable NVIDIA’s G-Sync + V-Sync setting in the NVIDIA Control Panel (if frames exceed the refresh rate) to prevent tearing above your monitor’s max refresh rate while maintaining low input lag.
- Verify Monitor OSD Settings: Some monitors have multiple ‘Adaptive Sync’ modes or require specific settings to be enabled. Consult your monitor’s manual.
Conclusion
With G-Sync or FreeSync properly configured, you’ll experience a dramatic improvement in gaming fluidity and visual clarity. The days of distracting screen tearing and stuttering will be behind you, allowing you to fully immerse yourself in your favorite games. By following these steps and ensuring your hardware meets the necessary requirements, you can unlock the full potential of your high-refresh-rate gaming monitor and enjoy truly smooth, tear-free gaming.


