


How do I properly set up my high refresh rate gaming monitor for G-Sync or FreeSync?
High refresh rate gaming monitors paired with adaptive sync technologies like G-Sync and FreeSync offer an unparalleled gaming experience, eliminating screen tearing and reducing stutter. However, simply plugging in your monitor isn’t enough; proper setup is crucial to unlock the full potential of these features. This guide will walk you through the necessary steps to configure your display for a butter-smooth, tear-free gaming session, whether you’re rocking an NVIDIA or AMD graphics card.
Understanding Adaptive Sync: G-Sync vs. FreeSync
Before diving into the setup, it’s essential to grasp what G-Sync and FreeSync do. Both technologies synchronize your monitor’s refresh rate with your GPU’s frame rate. This dynamic adjustment prevents screen tearing (when the monitor displays parts of multiple frames simultaneously) and reduces stuttering, leading to a much smoother and more immersive visual experience, especially when your frame rate fluctuates.
Prerequisites for Setup
Ensure you have the following before proceeding:
- Compatible Monitor: A high refresh rate monitor that explicitly supports G-Sync, G-Sync Compatible, or FreeSync.
- Compatible GPU: An NVIDIA GPU for G-Sync/G-Sync Compatible or an AMD GPU for FreeSync.
- Display Cable: A DisplayPort (DP) cable is highly recommended for optimal performance and is often required for G-Sync. For FreeSync, HDMI can also work, but DP is generally preferred.
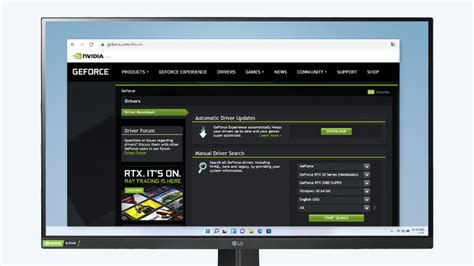
- Latest Drivers: Update your graphics card drivers to the latest version.

Step 1: Enable Adaptive Sync on Your Monitor
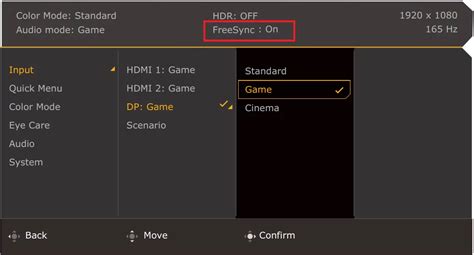
The first crucial step is to enable G-Sync or FreeSync directly on your monitor’s On-Screen Display (OSD) menu. The exact terminology may vary by manufacturer, but you’ll usually find it under a “Gaming,” “Display,” or “Setup” section. Look for options like “Adaptive Sync,” “FreeSync,” “G-Sync,” or “VRR (Variable Refresh Rate)” and ensure it’s turned “On.”
- Access your monitor’s OSD using the physical buttons on the monitor.
- Navigate to the relevant section (e.g., “Gaming” or “Display”).
- Find the “FreeSync,” “Adaptive Sync,” or “G-Sync” option and set it to “On.”
Step 2: Configure G-Sync (NVIDIA Users)
If you have an NVIDIA graphics card and a G-Sync or G-Sync Compatible monitor, follow these steps:
- Open NVIDIA Control Panel: Right-click on your desktop and select “NVIDIA Control Panel.”
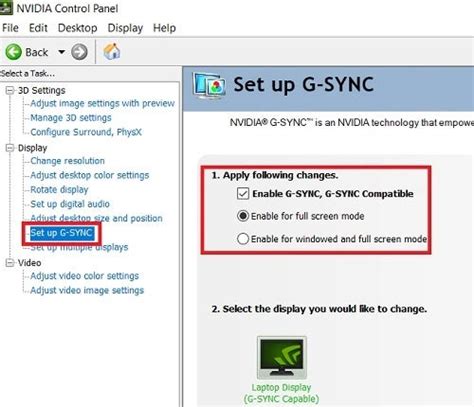
- Navigate to G-Sync Settings: In the left-hand menu, under “Display,” click on “Set up G-SYNC.”
- Enable G-Sync:
- Check the box for “Enable G-SYNC, G-SYNC Compatible.”
- Select your desired monitor(s).
- Choose whether to enable G-Sync for “Windowed and full screen mode” (recommended) or “Enable for full screen mode only.”
- Apply Settings: Click “Apply” at the bottom right.
- Verify: Some G-Sync monitors have an indicator in their OSD to confirm G-Sync is active. You can also enable a “G-SYNC Indicator” through the NVIDIA Control Panel’s “Display” menu (top bar) to see an overlay in games.
Recommended NVIDIA Settings for G-Sync
- V-Sync: Within the NVIDIA Control Panel, go to “Manage 3D settings,” then “Program Settings” (for specific games) or “Global Settings.” Set “Vertical sync” to “On.” While this might seem counter-intuitive with G-Sync, enabling V-Sync after G-Sync is active acts as a frame rate limiter above your monitor’s maximum refresh rate, preventing tearing when you exceed the G-Sync range.
- Frame Rate Cap: Set an in-game frame rate limiter or use NVIDIA’s “Max Frame Rate” setting in the Control Panel (under “Manage 3D settings”). Cap your frames 2-3 FPS below your monitor’s maximum refresh rate (e.g., for a 144Hz monitor, cap at 141-142 FPS). This keeps your GPU within the G-Sync range and prevents V-Sync from engaging unless absolutely necessary.
Step 3: Configure FreeSync (AMD Users)
If you have an AMD graphics card and a FreeSync monitor, follow these steps:
- Open AMD Radeon Software: Right-click on your desktop and select “AMD Radeon Software.”
- Navigate to Display Settings: Click on the “Gear” icon (Settings) in the top right, then go to the “Display” tab.
- Enable FreeSync:
- Find “Radeon FreeSync” (or “AMD FreeSync”) and ensure the toggle is set to “Enabled.”
- Confirm your monitor is listed with its FreeSync range.
- Apply Settings: The settings usually apply automatically.
- Verify: Some FreeSync monitors have an OSD indicator. You can also observe the visual smoothness in games.
Recommended AMD Settings for FreeSync
- Radeon Enhanced Sync: While FreeSync is active, you might consider enabling “Enhanced Sync” in the Radeon Software. This feature works similarly to NVIDIA’s V-Sync approach, helping to prevent tearing when frame rates exceed the monitor’s refresh rate, but with lower input lag than traditional V-Sync.
- Frame Rate Cap: Similar to NVIDIA, set an in-game frame rate limiter or use AMD’s “Radeon Chill” (with max FPS set 2-3 frames below your refresh rate) or a global frame rate cap utility. This ensures your framerates stay within the FreeSync operating range.

Step 4: Testing and Optimization
Once you’ve configured everything, it’s time to test it out:
- Run a Game: Launch a graphically demanding game.
- Monitor Performance: Observe the visual fluidity. You should notice a significant reduction or complete elimination of screen tearing and stutter.
- Use Test Demos: Websites like TestUFO’s FreeSync demo can help confirm if adaptive sync is active and working correctly (though it’s not always definitive).
- Adjust In-Game Settings: Experiment with in-game graphics settings to maintain frame rates within your monitor’s adaptive sync range as much as possible for the best experience.
Troubleshooting Common Issues
- No Adaptive Sync Option: Double-check your monitor’s manual or online specifications to ensure it truly supports G-Sync/FreeSync. Also, verify you’re using DisplayPort for G-Sync.
- Flickering/Stuttering: Ensure your frame rates stay within your monitor’s adaptive sync range. Sometimes, older cables or driver issues can cause this. Try updating drivers or replacing the cable.
- G-Sync Not Appearing (NVIDIA): Make sure you have the latest drivers, your DisplayPort cable is correctly seated, and your monitor’s adaptive sync option is enabled in its OSD.
- Frame Rate Issues: If your frames are consistently below the adaptive sync range, consider lowering in-game settings.
Conclusion
Properly setting up your high refresh rate monitor for G-Sync or FreeSync is a straightforward process that dramatically enhances your gaming experience. By following these steps, you’ll unlock tear-free, smooth visuals, allowing you to fully immerse yourself in your favorite games. Enjoy the silky-smooth performance!


