


How to optimize Windows 11 settings for max gaming FPS?
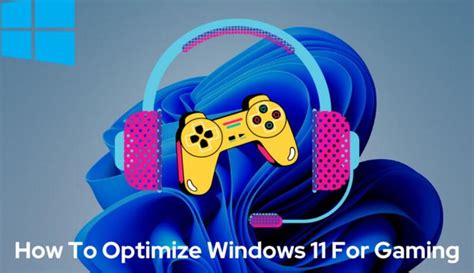
Boost Your Gaming Performance: A Windows 11 Guide
Windows 11 introduces a sleek new interface and various under-the-hood improvements. While it generally performs well out of the box, dedicated gamers can squeeze out significant extra frames per second (FPS) by optimizing specific system settings. A few tweaks can transform a good gaming experience into a great one, reducing lag and increasing responsiveness. This guide will walk you through the essential adjustments to maximize your gaming FPS on Windows 11.
Enable Game Mode
Game Mode is a core Windows feature designed to prioritize your gaming experience. When active, it tells Windows to allocate system resources (CPU and GPU) to your game, minimizing background processes and interruptions. It’s usually enabled by default, but it’s always worth double-checking.
How to Enable Game Mode:
- Go to Settings (Windows Key + I).
- Navigate to Gaming > Game Mode.
- Ensure the toggle is set to On.
Adjust Graphics Settings for Performance
Windows 11 offers advanced graphics options that can significantly impact your FPS, especially Hardware-accelerated GPU scheduling and per-app graphics preferences.
Hardware-accelerated GPU scheduling (HAGS):
This feature allows your graphics card to manage its own video memory, potentially reducing latency and improving performance in some scenarios. Its effectiveness can vary depending on your hardware and games, so test it out.
- Go to Settings (Windows Key + I).
- Navigate to System > Display > Graphics.
- Click on Change default graphics settings.
- Toggle Hardware-accelerated GPU scheduling to On.
- You will need to restart your PC for changes to take effect.
Per-App Graphics Performance Preference:
You can tell Windows to use your high-performance GPU for specific games or applications, especially if you have an integrated GPU alongside a dedicated one.
- From Settings > System > Display > Graphics.
- Under “Add an app”, select Desktop app (most common) or Microsoft Store app.
- Click Browse and locate your game’s executable file (e.g.,
game.exe). - Once added, click on the game, then select Options.
- Choose High performance and click Save.

Optimize Power Plan
A balanced or power-saving plan can limit your CPU’s performance. For gaming, you want your CPU running at full tilt.
Set Power Plan to High Performance:
- Search for Edit power plan in the Windows search bar and open it.
- Click on Power Options in the address bar at the top.
- Select High performance or Ultimate Performance (if available). If not, click “Show additional plans”.
- If “High performance” isn’t visible, click Create a power plan, choose High performance, name it, and proceed.
Disable Background Apps and Notifications
Apps running in the background consume valuable CPU and RAM, which could otherwise be used by your game. Similarly, notifications can cause micro-stutters and distractions.
Turn off Background Apps:
- Go to Settings > Apps > Installed apps.
- For apps you don’t need running, click the three dots next to their name, select Advanced options.
- Under “Background apps permissions”, select Never from the drop-down.
Disable Notifications:
- Go to Settings > System > Notifications.
- Toggle Notifications to Off. You can also customize which apps can send notifications.
Manage Startup Programs
Many applications automatically launch when Windows starts, slowing down your boot time and consuming resources. Disable unnecessary startup programs.
- Right-click on the Taskbar and select Task Manager.
- Go to the Startup apps tab.
- Right-click on any non-essential program and select Disable.
Reduce Visual Effects
Windows 11’s fancy visual effects, while aesthetically pleasing, consume GPU and CPU resources. Disabling some of them can free up power for your games.
- Search for Adjust the appearance and performance of Windows in the Windows search bar and open it.
- In the Performance Options window, select Adjust for best performance.
- Alternatively, you can choose Custom and selectively uncheck animations and shadows you deem unnecessary while keeping those that enhance usability.
Update Drivers (Especially GPU)
Outdated drivers are a common cause of poor gaming performance. Always ensure your graphics card, chipset, and other essential drivers are up to date.
- For NVIDIA GPUs: Download GeForce Experience or visit the official NVIDIA website.
- For AMD GPUs: Download AMD Radeon Software or visit the official AMD website.
- For Intel integrated graphics: Use the Intel Driver & Support Assistant or visit the official Intel website.
- Check your motherboard manufacturer’s website for the latest chipset drivers.
Optimize Display Refresh Rate
Ensure your display’s refresh rate is set to its maximum for the smoothest experience, especially if you have a high refresh rate monitor (120Hz, 144Hz, 240Hz, etc.).
- Go to Settings > System > Display.
- Scroll down and click on Advanced display.
- Under “Choose a refresh rate”, select the highest available option for your monitor.

Additional Tips for Max FPS
- Keep Windows Updated: Microsoft often releases performance improvements and bug fixes through Windows Updates.
- Disable Mouse Acceleration: In “Mouse settings” > “Additional mouse options” > “Pointer Options”, uncheck “Enhance pointer precision” for more consistent aiming.
- Clean Your Drives: Use Disk Cleanup to remove temporary files. Consider defragmenting HDDs (not SSDs).
- Overclocking (Advanced): If comfortable, safely overclocking your CPU, GPU, or RAM can yield significant FPS gains, but proceed with caution and research.
- Monitor Temperatures: Ensure your CPU and GPU aren’t overheating, as this can lead to throttling and reduced performance.
Conclusion
By systematically applying these Windows 11 optimization tips, you can significantly enhance your gaming performance, achieving higher FPS and a more responsive, enjoyable experience. Remember that the impact of each setting can vary based on your specific hardware and the games you play, so experiment and find the perfect balance for your setup. Happy gaming!


