


Gaming PC overheating? Quick tips for better airflow & lower CPU/GPU temps.
There’s nothing quite like the thrill of high-performance gaming, but that excitement can quickly turn to frustration when your PC starts to lag, stutter, or even shut down unexpectedly. More often than not, the culprit is overheating. High CPU and GPU temperatures not only degrade performance but can also lead to long-term damage to your expensive components. Fortunately, with a few strategic adjustments, you can significantly improve your system’s thermal management. This guide will walk you through essential tips to optimize airflow and keep your gaming rig running cool and efficiently.
Understanding the Heat Threat
Modern gaming components, especially powerful CPUs and GPUs, generate a substantial amount of heat during operation. When this heat isn’t effectively dissipated, temperatures rise, triggering thermal throttling (where components automatically reduce performance to prevent damage) or even system crashes. Poor airflow is often the primary reason for these elevated temperatures.
1. The Dust Buster: Regular Cleaning is Key
The most common enemy of PC cooling is dust. Over time, dust accumulates on fans, heatsinks, and internal components, forming a thick insulating layer that traps heat and impedes airflow. Regularly cleaning your PC is the first and most crucial step in maintaining optimal temperatures.
How to Clean:
- Power Down: Always unplug your PC before cleaning.
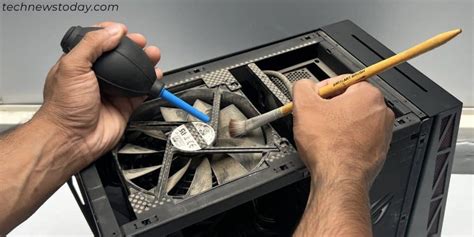
- Compressed Air: Use short bursts to dislodge dust from fan blades, heatsink fins, and vents. Hold fans stationary while cleaning to prevent overspinning.
- Microfiber Cloth: Gently wipe down interior surfaces and larger components.
- Frequency: Aim for a thorough cleaning every 3-6 months, or more often if you live in a dusty environment or have pets.
2. Tame the Tangled Web: Optimize Cable Management
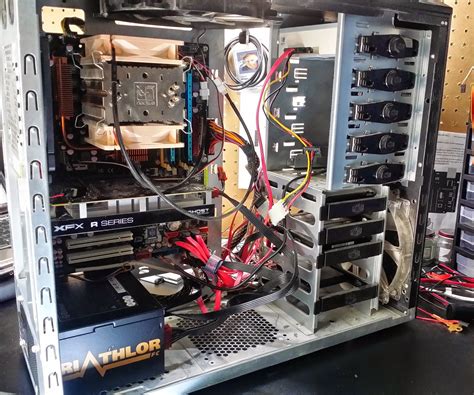
While often overlooked, messy internal cables can severely disrupt airflow. A chaotic bundle of wires acts as a physical barrier, blocking the path of cool air entering your case and warm air exiting it. Proper cable management can make a significant difference.
Cable Management Tips:
- Route Behind Motherboard Tray: Most modern cases have space behind the motherboard tray to route cables, keeping them out of the main airflow path.
- Use Zip Ties or Velcro Straps: Bundle cables neatly together.
- Only Use Necessary Cables: Disconnect any power supply cables you’re not using.
- Modular Power Supplies: These are excellent for cable management as you only plug in the cables you need.
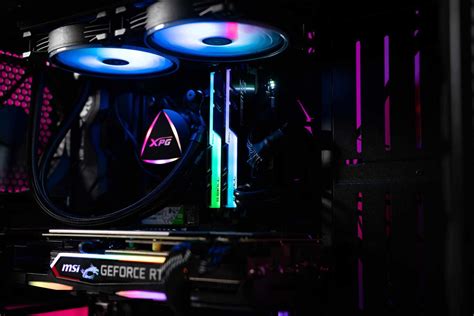
3. Master the Breeze: Enhance Case Airflow and Fan Setup
Your PC case is designed to move air in a specific direction, creating a pressure system that expels hot air. Understanding and optimizing this airflow is vital.
Airflow Principles:
- Positive vs. Negative Pressure:
- Positive Pressure: More intake fans than exhaust fans. Pushes air out through any gaps, minimizing dust entry.
- Negative Pressure: More exhaust fans than intake fans. Pulls air in through any gaps, potentially increasing dust entry.
Generally, a slightly positive pressure setup is preferred for dust control.
- Intake Fans: Positioned at the front and bottom of the case to draw cool air in.
- Exhaust Fans: Located at the rear and top of the case to push hot air out.
- Fan Direction: Ensure fans are oriented correctly (usually an arrow on the side indicates airflow direction).
- Fan Speed: Adjust fan curves in your motherboard’s BIOS/UEFI or using software like FanControl to balance cooling and noise.
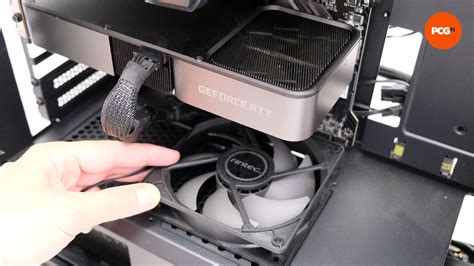
4. Serious Cooling: Consider Upgrading Your Cooling Solutions
If cleaning and airflow optimization aren’t enough, it might be time for hardware upgrades.
- CPU Coolers: Stock CPU coolers are often adequate for non-overclocked CPUs but can struggle under heavy gaming loads. Aftermarket air coolers (larger heatsinks, more efficient fans) or All-in-One (AIO) liquid coolers offer significantly better performance.
- Thermal Paste: Over time, thermal paste between your CPU/GPU and their respective coolers can dry out and lose effectiveness. Reapplying fresh, high-quality thermal paste can drastically improve heat transfer.
- Additional Case Fans: If your case has empty fan mounts, adding more fans can boost overall airflow.
- GPU Cooling: For highly demanding GPUs, some users opt for aftermarket GPU coolers, but this is a more advanced modification.
5. Keep an Eye on Temps: Monitoring Software
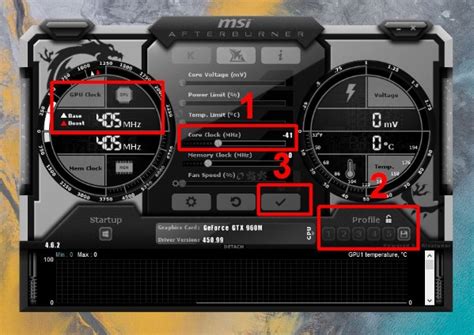
Knowledge is power. Regularly monitoring your CPU and GPU temperatures allows you to identify issues early and confirm the effectiveness of your cooling solutions. Tools like HWMonitor, MSI Afterburner, or NZXT CAM provide real-time temperature readings and allow you to log performance over time.
Conclusion
A well-cooled gaming PC is a happy and high-performing gaming PC. By regularly cleaning dust, managing your cables, optimizing fan placement, and considering hardware upgrades, you can ensure your CPU and GPU stay within safe operating temperatures. This not only prevents frustrating performance drops and crashes but also extends the lifespan of your valuable components, allowing you to enjoy countless hours of uninterrupted gaming bliss.


