


Optimal Windows 11 settings for max gaming FPS & low latency?
Unleashing Peak Gaming Performance in Windows 11
Windows 11, while visually appealing, can sometimes hold back your gaming rig’s true potential. To achieve maximum Frames Per Second (FPS) and reduce frustrating input latency, a few strategic tweaks are necessary. This guide will walk you through essential settings to optimize your Windows 11 system for an unparalleled gaming experience.
Activate Game Mode and Graphics Settings
One of the most straightforward optimizations is ensuring Windows 11’s built-in Game Mode is active. This feature prioritizes your game’s processes and resources, reducing background activity that might hog CPU or GPU cycles.
- Game Mode: Navigate to
Settings > Gaming > Game Modeand ensure it’s toggled On. - Graphics Settings: Go to
Settings > System > Display > Graphics. Here, you can add specific games to provide them with high-performance GPU priority. Also, consider enabling Hardware-accelerated GPU scheduling if your GPU supports it, as this can reduce input lag and improve performance in some titles. - Variable Refresh Rate: For monitors supporting VRR (like G-Sync or FreeSync), ensure it’s enabled under your monitor’s display settings and in your GPU control panel (NVIDIA Control Panel or AMD Adrenalin Software).
Optimize Power Plan and Notifications
Your power settings can significantly impact CPU and GPU performance. The default ‘Balanced’ plan might throttle components to save power, which is counterproductive for gaming.
- Power Plan: Search for ‘Edit power plan’ in the Windows search bar, then click ‘Power Options’ in the address bar. Choose ‘High performance’ or, if available, ‘Ultimate Performance’. If ‘Ultimate Performance’ isn’t visible, you can enable it via Command Prompt (Admin) using the command:
powercfg -duplicatescheme e9a42b02-d5df-448d-aa00-03f147496700and then select it. - Notifications & Focus Assist: Go to
Settings > System > Notificationsand turn off unnecessary notifications. For deeper control, navigate toSettings > System > Focus assistand set it to ‘On when I’m playing a game’ or configure specific rules to minimize distractions and background processes.
Manage Background Processes and Startup Apps
Many applications launch with Windows or run in the background, consuming valuable system resources. Minimizing these can free up RAM and CPU cycles for your games.
- Startup Apps: Open
Task Manager(Ctrl+Shift+Esc), go to the ‘Startup’ tab, and disable any non-essential applications from launching with Windows. - Background Apps: Navigate to
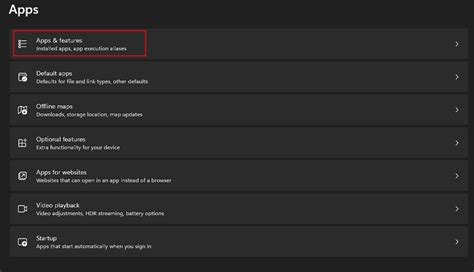
Settings > Apps > Apps & features. For each app, click the three dots, select ‘Advanced options’, and for ‘Background app permissions’, choose ‘Never’ for apps you don’t need running in the background. - Disable Unnecessary Services: Search for ‘Services’ in Windows, open it, and set non-critical services (like print spooler if you don’t print, or fax) to ‘Manual’ or ‘Disabled’. Exercise caution here; research before disabling.
Network Optimization for Low Latency
High latency can ruin an online gaming experience. While your internet connection plays a huge role, some Windows settings can help minimize internal network lag.
- Update Network Drivers: Ensure your Ethernet or Wi-Fi adapter drivers are up to date. Visit your motherboard manufacturer’s website or the adapter manufacturer’s site.
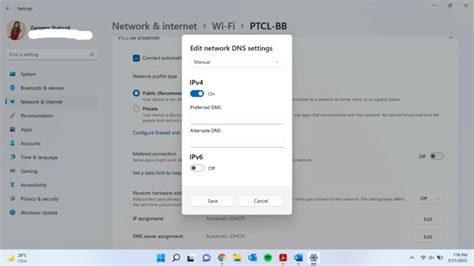
- Disable Nagle’s Algorithm: This is a more advanced tweak involving the Registry Editor. While it can reduce latency for some games, it might cause issues for others. It requires editing the Registry key
HKEY_LOCAL_MACHINESYSTEMCurrentControlSetServicesTcpipParametersInterfaces{Your Adapter GUID}and creating a DWORD (32-bit) value calledTcpAckFrequencyand setting it to1. Create another DWORD (32-bit) value calledTCPNoDelayand set it to1. (Warning: Backup your registry before making changes.) - QoS Packet Scheduler: While designed to prioritize network traffic, it can sometimes introduce latency. You can try disabling it from your network adapter properties (
Network Connections > Right-click adapter > Properties).
Visual Effects, Updates, and Drivers
Some visual flair comes at a performance cost. Additionally, keeping drivers updated is crucial, while managing Windows Updates prevents interruptions.
- Adjust Visual Effects: Search for ‘Adjust the appearance and performance of Windows’. In the ‘Performance Options’ window, select ‘Adjust for best performance’ or customize by unchecking effects like ‘Animate windows when minimizing and maximizing’ and ‘Fade or slide menus into view’.
- Pause Windows Updates: To prevent unexpected reboots or slowdowns during gaming, temporarily pause Windows Updates via
Settings > Windows Update. Remember to update regularly during off-peak hours. - Keep Drivers Updated: This is paramount. Regularly update your GPU drivers directly from NVIDIA, AMD, or Intel. Also, check for chipset drivers from your motherboard manufacturer.
Storage Optimization and Disk Cleanup
A cluttered or fragmented drive can impact load times and in-game performance.
- Disk Cleanup: Search for ‘Disk Cleanup’, select your C: drive, and tick boxes for temporary files, delivery optimization files, and other non-essential data.
- Defragment and Optimize Drives: Search for ‘Defragment and Optimize Drives’. For SSDs, Windows performs TRIM, which is beneficial. For HDDs, regular defragmentation is crucial.
Conclusion
By systematically applying these Windows 11 optimizations, you’ll create a leaner, faster, and more responsive gaming environment. Remember to test your settings in-game and fine-tune them to find the perfect balance for your specific hardware and preferred titles. Enjoy the smoother frame rates and reduced latency!


