


How to optimize Windows 11 for max gaming FPS & reduce input lag?
Windows 11, while visually appealing, can sometimes hold back your gaming performance if not properly configured. Achieving maximum Frames Per Second (FPS) and minimizing input lag is crucial for a competitive and enjoyable gaming experience. This guide will walk you through a series of system tweaks and settings adjustments designed to give you the edge in your favorite games.
Laying the Foundation: Essential Pre-Optimizations
Before diving into specific settings, ensure your system is ready for peak performance.
Update Your Drivers
Always start by ensuring all your drivers are up to date, especially your graphics card driver (NVIDIA, AMD, Intel). These updates often include performance enhancements and bug fixes specifically for games. Visit your GPU manufacturer’s website or use their dedicated software to check for the latest versions. Don’t forget chipset and network drivers from your motherboard manufacturer as well.
Enable Game Mode
Windows 11 has a built-in Game Mode designed to prioritize your gaming experience. When enabled, it helps reduce background processes and allocate more CPU and GPU resources to your game.
- Go to Settings > Gaming > Game Mode.
- Ensure the toggle is set to On.
Adjust Power Options
By default, Windows might use a balanced power plan. For gaming, you want maximum performance.
- Search for ‘Edit power plan’ in the Windows search bar and open it.
- Click on ‘Power Options’ in the address bar at the top.
- Select High Performance or Ultimate Performance (if available). If not, you might be able to create one or enable it via command prompt (search online for how to enable Ultimate Performance if not visible).
![Windows 7 with Windows 11 logo [1920x1080] : r/wallpaper](/images/aHR0cHM6Ly90czEubW0uYmluZy5uZXQvdGg/aWQ9T0lQLm14cVppVEJUeDlHRzE2ZlBEZGoyTmdIYUVLJnBpZD0xNS4x.webp)
Fine-Tuning Graphics & Visuals
These settings directly impact how your GPU renders games and the overall visual experience.
Hardware-accelerated GPU Scheduling
This feature allows your GPU to manage its own video memory, which can reduce latency and improve performance in some systems, especially those with newer GPUs.
- Go to Settings > System > Display > Graphics > Change default graphics settings.
- Toggle Hardware-accelerated GPU scheduling to On. You’ll need to restart your PC for this change to take effect.
Optimize Graphics Performance for Specific Apps
You can tell Windows to prioritize specific games for better performance.
- Go to Settings > System > Display > Graphics.
- Under ‘Add an app’, choose ‘Desktop app’ or ‘Microsoft Store app’, then browse for your game’s executable file or select it from the list.
- Once added, click on ‘Options’ for that game and select High performance.
Disable Visual Effects
Windows 11 has many animations and visual effects that consume system resources. Disabling some can free up resources for gaming.
- Search for ‘Adjust the appearance and performance of Windows’ and open it.
- Under the ‘Visual Effects’ tab, select Adjust for best performance or choose ‘Custom’ and uncheck unnecessary options like ‘Animate windows when minimizing and maximizing’, ‘Fade or slide menus into view’, ‘Show shadows under windows’, etc.
Minimizing Background Interference
Unnecessary applications and processes running in the background can steal precious CPU cycles and RAM from your game.
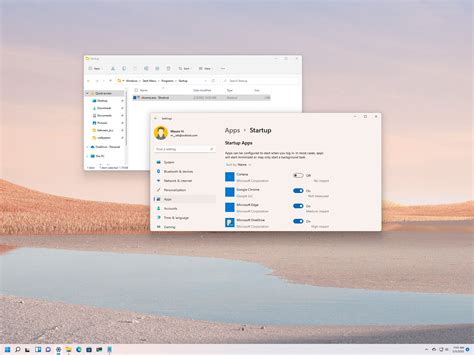
Manage Startup Apps
Many applications launch automatically with Windows, consuming resources from the get-go.
- Go to Settings > Apps > Startup.
- Toggle off any applications you don’t need running immediately upon startup. Common culprits include messaging apps, cloud services, and update utilities.
Disable Background Apps
Some apps continue to run in the background even after you’ve closed them, periodically refreshing content or sending notifications.
- Go to Settings > Apps > Installed apps.
- For apps you don’t want running in the background, click the three dots next to them, select ‘Advanced options’, and change ‘Let this app run in background’ to Never. Focus on apps that aren’t critical for system function.
Turn Off Notifications and Focus Assist
Notifications can be disruptive and cause micro-stutters. Focus Assist (formerly Quiet Hours) helps manage this.
- Go to Settings > System > Notifications and toggle off notifications for apps during gaming.
- Go to Settings > System > Focus assist and set it to ‘On’ when you’re playing games, or set up automatic rules.
Network and Storage Optimizations
A stable network connection and fast storage are vital for online gaming and quick load times.
Optimize Network Settings
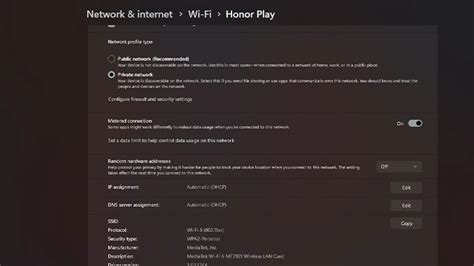
For online gaming, a wired (Ethernet) connection is always superior to Wi-Fi for stability and lower latency.
- Disable Network Throttling (for some users): In some cases, Windows can throttle network bandwidth. Search for ‘gpedit.msc’ (Group Policy Editor) and navigate to Computer Configuration > Administrative Templates > Network > QoS Packet Scheduler. Double-click ‘Limit reservable bandwidth’, set it to ‘Enabled’, and change ‘Bandwidth limit (%)’ to 0. (Note: Group Policy Editor is not available in Windows 11 Home edition).
- Consider DNS Servers: Switching to a faster DNS server (like Google DNS or Cloudflare DNS) can sometimes reduce lookup times, slightly improving initial connection speed to game servers.
Clean Up Your Disk
A cluttered hard drive can slow down your system. For SSDs, ensure TRIM is enabled (it usually is by default). For HDDs, regular defragmentation is beneficial.
- Search for ‘Disk Cleanup’ and run it, selecting your main drive (usually C:). Check boxes for temporary files, recycling bin, etc., and click OK.
- For HDDs: Search for ‘Defragment and Optimize Drives’ and run it. Select your HDD and click ‘Optimize’.
Advanced Tweaks for Serious Gamers
These are more specific tweaks that might offer marginal gains but are worth exploring for dedicated gamers.
Disable Nagle’s Algorithm
Nagle’s Algorithm bundles small packets of data before sending them over the network. While good for bandwidth, it can add a tiny bit of latency for real-time applications like games. This requires a registry edit:
- Search for ‘regedit’ and open the Registry Editor.
- Navigate to
HKEY_LOCAL_MACHINESYSTEMCurrentControlSetServicesTcpipParametersInterfaces. - Find the subkey that corresponds to your network adapter (look for your IP address).
- Right-click in the right pane, select New > DWORD (32-bit) Value.
- Create two new values: TcpAckFrequency and TCPNoDelay. Set both their ‘Value data’ to 1.
- Restart your PC. (Be cautious when editing the registry; create a backup first.)
Adjust Mouse Polling Rate (for compatible mice)
A higher polling rate (e.g., 1000Hz) means your mouse reports its position to your PC more frequently, which can reduce input lag. Check your mouse software for this option.
Consider a Fresh Windows Installation
For the absolute best performance, especially on an older system that has accumulated a lot of software and files, a clean installation of Windows 11 can work wonders. This removes all bloatware and ensures a pristine operating environment.
By systematically applying these optimizations, you can significantly improve your Windows 11 gaming experience, enjoying higher FPS, reduced input lag, and a more responsive system overall. Remember to test changes one by one to identify which tweaks provide the most benefit for your specific hardware and games.


