


Gaming monitor: How to enable 144Hz/240Hz for max FPS?
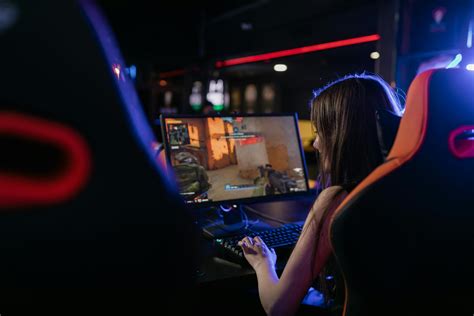
Gaming monitors with high refresh rates like 144Hz or 240Hz are essential for competitive and immersive gaming, offering significantly smoother visuals and reduced input lag compared to standard 60Hz displays. However, simply plugging in your new monitor might not automatically activate its full refresh rate potential. This guide will walk you through the necessary steps to ensure your monitor is running at its maximum refresh rate, allowing you to experience games with the highest possible Frames Per Second (FPS).
Understanding High Refresh Rates and Their Benefits
A monitor’s refresh rate, measured in Hertz (Hz), indicates how many times per second the display updates its image. A higher refresh rate means more frames are displayed per second, resulting in smoother motion, clearer visuals, and a more responsive feel. For gamers, this translates to better target tracking, reduced motion blur, and an overall competitive edge. To fully benefit, your graphics card (GPU) must also be capable of rendering frames at a rate equal to or higher than your monitor’s refresh rate.

Prerequisites: Ensuring Your Hardware is Ready
Before diving into software settings, it’s crucial to confirm your hardware setup supports high refresh rates.
- Compatible Graphics Card (GPU): Most modern gaming GPUs from NVIDIA (GTX 900 series and newer, RTX series) and AMD (RX 400 series and newer) support high refresh rates. Ensure your GPU drivers are up to date.
- Correct Display Cable: This is often the most overlooked component. Not all cables are created equal when it comes to bandwidth.
- DisplayPort (DP) 1.2 or higher: Recommended for 144Hz/240Hz and higher resolutions.
- HDMI 2.0 or higher: Can support 144Hz at 1080p and sometimes 1440p, but HDMI 2.1 is needed for 4K 144Hz. Older HDMI 1.4 is usually limited to 60Hz or 120Hz at lower resolutions.
Always use the cable that came with your high refresh rate monitor, or a high-quality certified cable.
- Monitor On-Screen Display (OSD) Settings: Some monitors require you to enable a specific “overclock” or “high refresh rate” mode within their OSD menu. Consult your monitor’s manual if you can’t find this option.
Step 1: Enabling High Refresh Rate in Windows Settings
Once your hardware is correctly set up, the next step is to configure Windows to use the higher refresh rate.
For Windows 10:
- Right-click on your desktop and select “Display settings.”
- Scroll down and click on “Advanced display settings.”
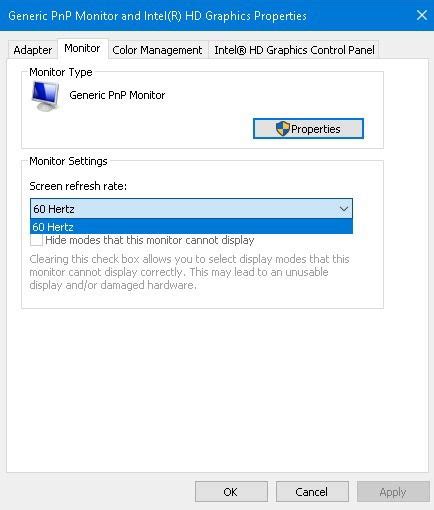
- Under “Refresh rate,” select the highest available option (e.g., 144Hz, 240Hz). If you don’t see options above 60Hz, check your cable and GPU drivers.
For Windows 11:
- Right-click on your desktop and select “Display settings.”
- Click on “Advanced display.”
- Next to “Choose a refresh rate,” select the desired refresh rate from the dropdown menu.
Step 2: Configuring Your GPU Control Panel
Sometimes, setting the refresh rate in Windows isn’t enough, or you might need to make fine-tuned adjustments through your graphics card’s control panel. This also ensures the GPU is fully optimized for the higher refresh rate.
NVIDIA Control Panel:
- Right-click on your desktop and select “NVIDIA Control Panel.”
- Under “Display,” click on “Change resolution.”
- In the resolution pane, select your display. Under “Resolution,” ensure “PC” resolutions are selected (e.g., 1920×1080) rather than “HD, SD.”
- Under “Refresh rate,” select the highest available refresh rate for your chosen resolution.
- Click “Apply.”
AMD Radeon Software:
- Right-click on your desktop and select “AMD Radeon Software.”
- Click on the “Display” tab.
- Select your monitor.
- Click on “Custom Resolutions” or “Advanced Display Settings” (the exact naming can vary slightly between driver versions).
- Ensure the desired resolution and refresh rate are selected or create a custom one if necessary.
- Click “Apply.”

Step 3: Verifying and Troubleshooting
After making these changes, it’s a good idea to verify that your monitor is indeed running at the desired refresh rate.
- Monitor OSD: Many monitors display the current refresh rate in their on-screen display menu.
- Online Test: Websites like testufo.com can visually confirm your refresh rate.
- In-Game Settings: Some games have their own refresh rate settings within their graphics options. Make sure these are also set to match your monitor’s maximum.
Common Troubleshooting Tips:
- Update GPU Drivers: Always keep your graphics drivers updated to the latest version.
- Check Cables Again: A faulty or incompatible cable is the most common culprit. Try a different DisplayPort or HDMI 2.0+ cable.
- Try a Different Port: Test different DisplayPort or HDMI ports on both your GPU and monitor.
- Factory Reset Monitor: Sometimes, resetting your monitor’s OSD settings to default can resolve issues.
- Custom Resolution Utility (CRU): For advanced users, CRU can force specific resolutions and refresh rates, but use with caution.
Conclusion
Enabling the full refresh rate of your 144Hz or 240Hz gaming monitor is a straightforward process that significantly enhances your gaming experience. By ensuring your hardware is compatible, correctly configuring your Windows display settings and GPU control panel, and verifying the changes, you’ll unlock smoother visuals and a more responsive feel, giving you the maximum FPS and a competitive edge in your favorite games. Enjoy the silky-smooth action!


