


My gaming PC runs hot. What’s the best airflow setup for optimal cooling?
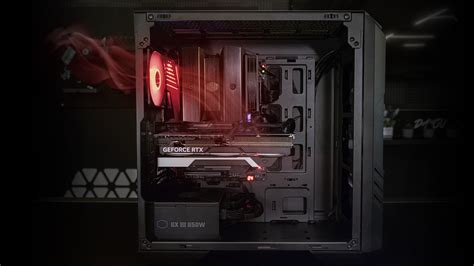
A gaming PC running hot isn’t just a minor inconvenience; it can lead to performance throttling, reduced component lifespan, and even system instability. Optimal cooling is paramount for keeping your powerful hardware running at its peak, and the cornerstone of good cooling is an effective airflow setup. Understanding how air moves through your case is the first step toward a cooler, more efficient machine.
The Fundamentals of PC Airflow
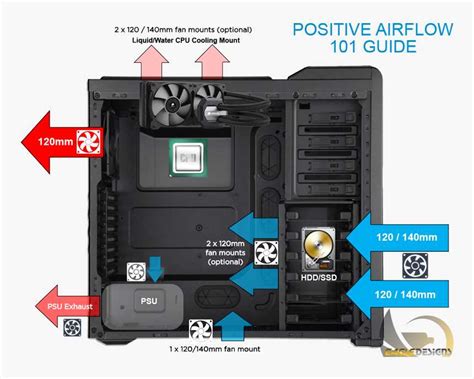
Before diving into specific fan configurations, it’s essential to grasp the basic principles of PC airflow. Air needs to be drawn into the case (intake) and expelled from it (exhaust) in a controlled manner. Generally, cool air should enter from the front and bottom, and hot air should exit from the rear and top, as heat naturally rises.
There are two main approaches to internal case pressure:
- Positive Pressure: More air is pushed into the case than is pulled out. This slightly pressurizes the interior, helping to keep dust out through tiny gaps and ensuring a consistent flow of cool air over components.
- Negative Pressure: More air is pulled out of the case than is pushed in. This creates a vacuum effect, drawing air in from every available opening, which can unfortunately also include dust. While it can be effective for exhausting hot air, it generally leads to more dust buildup.
For most gaming setups, a slightly positive pressure setup is recommended, as it effectively cools while minimizing dust intrusion.
Strategic Fan Placement
The placement and orientation of your case fans are critical. Here’s a general guideline for optimal airflow:
Front Fans: Intake
The front of your PC case is typically where cool, ambient air should be drawn in. Most cases have mounts for 2-3 fans here. Ensure these fans are set to pull air into the case, directing it over your hard drives and into the main component area.
Rear Fan: Exhaust
A single rear exhaust fan is almost universally recommended. Positioned directly behind your CPU cooler, it helps to quickly expel the hot air generated by the CPU and other components, preventing it from recirculating.
Top Fans: Exhaust (or Intake with Liquid Cooling)
Heat rises, making the top of your case an ideal location for exhaust fans. Two or three top exhaust fans work in conjunction with the rear fan to create an upward flow of hot air out of the case. If you’re using an AIO (All-In-One) liquid cooler, its radiator is often mounted here, and the fans typically push air through the radiator and out of the case.
Bottom Fans: Intake (if available)
Some larger cases offer bottom fan mounts. These are excellent for providing additional cool air directly to your GPU, which can be a significant heat generator.
The Importance of Fan Types and Speeds
Not all fans are created equal. Different fans are designed for specific purposes:
- Airflow Fans: These have more blades and are designed to move a large volume of air with minimal resistance. They are best used as unrestricted intake or exhaust fans (e.g., front, top, rear).
- Static Pressure Fans: These have fewer, wider, more steeply angled blades and are designed to push air through restrictive obstacles like radiators, heatsinks, or tight mesh filters. Use these if you’re mounting fans directly to a CPU air cooler or a liquid cooling radiator.
Adjusting fan speeds (via BIOS or software) is also crucial. Aim for a balance between effective cooling and acceptable noise levels. Often, setting intake fans to run slightly faster than exhaust fans helps maintain positive pressure.

Beyond Fans: Other Airflow Enhancers
While fan placement is primary, several other factors significantly impact your PC’s thermal performance:
Cable Management
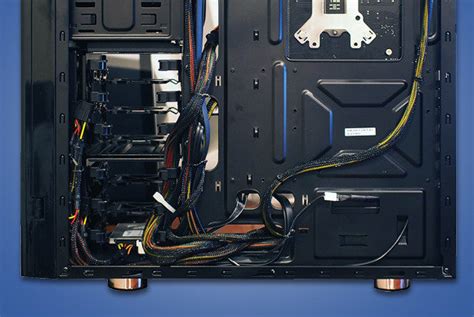
Tidy cables aren’t just for aesthetics. Messy, tangled cables can obstruct airflow pathways, creating dead zones and preventing cool air from reaching components. Route cables behind the motherboard tray and use zip ties or Velcro straps to keep them organized and out of the main airflow path.
Dust Filters and Regular Cleaning
Dust is the enemy of cooling. It accumulates on heatsinks, fans, and filters, acting as an insulating layer and impeding airflow. Ensure your intake fans have dust filters and clean them regularly (every 1-3 months, depending on your environment). A can of compressed air is your best friend for blowing dust out of heatsinks and fan blades.
Component Spacing
If possible, ensure there’s adequate space around components like your GPU. Avoid placing your PC in a cramped cabinet or against a wall, as this restricts the flow of ambient air to the intake fans and prevents hot air from dissipating effectively from the exhaust.
Monitoring and Testing
After optimizing your airflow, it’s vital to monitor your temperatures to confirm the improvements. Software like HWMonitor, Core Temp, or MSI Afterburner can display real-time CPU and GPU temperatures. Run demanding games or stress tests (e.g., Prime95 for CPU, FurMark for GPU) to see how your system performs under load.
Aim for CPU temperatures typically below 75-80°C under full load and GPU temperatures below 80-85°C. These are general guidelines, and acceptable temperatures can vary slightly by component and manufacturer.
Conclusion
A hot gaming PC doesn’t have to be a permanent problem. By strategically setting up your case fans for optimal intake and exhaust, understanding positive pressure, managing your cables, and keeping dust at bay, you can significantly improve your system’s thermal performance. Invest a little time in optimizing your airflow, and your PC will reward you with lower temperatures, higher performance, and a longer lifespan for its components.


