


Guide: Setting up your new gaming monitor for optimal refresh rates & G-Sync?
Unboxing and Physical Setup
Congratulations on your new gaming monitor! The first step to unlocking its full potential is a proper physical setup. Carefully unbox your monitor and assemble its stand, ensuring it’s stable. Connect the necessary cables: the power cable and, crucially, the display cable. For optimal refresh rates and G-Sync compatibility, a DisplayPort cable is almost always required and recommended over HDMI, especially for resolutions above 1080p and refresh rates over 60Hz. Ensure it’s securely plugged into both your graphics card and the monitor.
Once connected, position your monitor ergonomically. Power it on and navigate its On-Screen Display (OSD) menu to check for any initial settings. Some monitors require you to manually enable high refresh rates or G-Sync compatibility in their OSD before Windows or NVIDIA can recognize them.
Windows Display Settings Configuration
With your monitor physically set up, it’s time to configure Windows to recognize its capabilities. Right-click on your desktop and select ‘Display settings’.
- Resolution: Ensure your monitor’s native resolution is selected. Running at a non-native resolution can result in a blurry image.
- Refresh Rate: Scroll down and click ‘Advanced display settings’, then ‘Display adapter properties for Display 1’ (or whichever number corresponds to your gaming monitor). In the new window, go to the ‘Monitor’ tab. From the ‘Screen refresh rate’ dropdown, select the highest available refresh rate your monitor supports (e.g., 144Hz, 165Hz, 240Hz). Click ‘Apply’ and ‘OK’. If your screen goes black, wait 15 seconds; it should revert. If the higher refresh rate works, confirm the change.
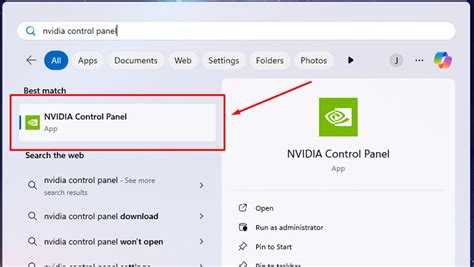
NVIDIA Control Panel: G-Sync Activation & Optimization
This is the most critical step for G-Sync users. Right-click on your desktop and open the ‘NVIDIA Control Panel’.
1. Enable G-Sync
In the left-hand pane, navigate to ‘Display’ > ‘Set up G-SYNC’.
- Check the box for ‘Enable G-SYNC, G-SYNC Compatible’.
- Select your gaming monitor from the list.
- Choose ‘Enable for full screen mode’ (or ‘Enable for windowed and full screen mode’ if you play windowed games).
- Click ‘Apply’. Your screen might flicker briefly.
2. Verify Refresh Rate in NCP
Go to ‘Display’ > ‘Change resolution’. Double-check that your monitor’s highest refresh rate is selected here under the resolution you’re using. Sometimes, Windows settings don’t fully propagate to the NVIDIA Control Panel.
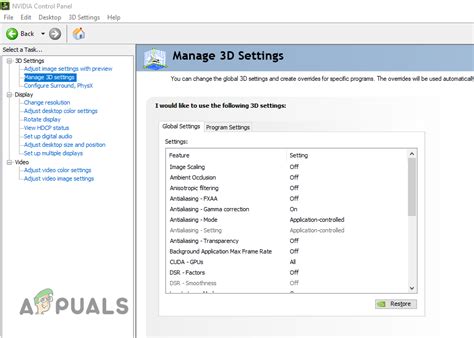
3. Manage 3D Settings for Optimal G-Sync Performance
Navigate to ‘3D Settings’ > ‘Manage 3D settings’. These are global settings that can be overridden by game-specific profiles.
- Vertical sync: Set to ‘On’. While this sounds counter-intuitive for G-Sync, enabling V-Sync in the NVIDIA Control Panel (but not in-game) prevents screen tearing when your frame rate exceeds your monitor’s refresh rate, while G-Sync handles tearing below it.
- Max Frame Rate: Set this to a value 3 frames below your monitor’s maximum refresh rate (e.g., 141 FPS for a 144Hz monitor, 162 FPS for a 165Hz monitor). This ensures G-Sync remains active and prevents V-Sync from engaging unnecessarily, minimizing input lag.
- Low Latency Mode: Set to ‘Ultra’. This can reduce input lag in some scenarios by submitting frames just-in-time for the GPU.
In-Game Settings Adjustments
The final layer of optimization comes within your games.
- Refresh Rate: In the game’s display or graphics settings, make sure the refresh rate matches your monitor’s highest setting (e.g., 144Hz).
- V-Sync: Crucially, disable V-Sync within the game itself. Since you’ve set ‘Vertical sync’ to ‘On’ in the NVIDIA Control Panel and capped your frame rate, G-Sync will handle tearing without the added input lag of in-game V-Sync.
- Frame Rate Cap: If a game has an in-game frame rate limiter, set it to the same value you used in the NVIDIA Control Panel (e.g., 141 FPS). This provides an additional layer of protection to keep G-Sync engaged.

Testing and Verification
To ensure everything is working as intended:
- Refresh Rate Test: Visit testufo.com. This site will display your monitor’s current refresh rate and show smooth motion if correctly configured.
- G-Sync Indicator: In the NVIDIA Control Panel, go to ‘Display’ > ‘Set up G-SYNC’ and enable ‘Display G-SYNC Indicator’. When you launch a full-screen game, a ‘G-SYNC’ overlay should appear in the top right corner, confirming it’s active.
Troubleshooting Tips
- Update Drivers: Ensure your NVIDIA graphics drivers are up to date.
- Check Cables: A faulty or non-DisplayPort cable can prevent high refresh rates and G-Sync.
- Monitor OSD: Revisit your monitor’s OSD to ensure high refresh rate or G-Sync options aren’t disabled there.
- Game Compatibility: Some older games might not fully support G-Sync or high refresh rates.
Conclusion
By following these steps, you’ve now meticulously set up your new gaming monitor to deliver an uncompromised experience. Optimal refresh rates provide buttery-smooth visuals, while G-Sync eliminates screen tearing and minimizes stutter, resulting in a more immersive and competitive gaming session. Enjoy your perfectly tuned setup!


