Actionable tips for resolving mod conflicts post-game update?
Game updates are exciting, bringing new features and bug fixes, but for many modded players, they often usher in a wave of frustration: mod conflicts. Suddenly, your perfectly customized game either refuses to launch, crashes repeatedly, or exhibits strange behavior. Don’t despair! Resolving these conflicts is a common rite of passage in the modding world, and with a systematic approach, you can get your game back on track.
Understanding Why Conflicts Happen
When a game updates, its internal files, scripts, and asset structures can change significantly. Mods, which are built to interact with specific versions of the game, can become incompatible if those underlying structures are altered. This can lead to anything from minor visual glitches to critical game crashes. The key to resolution is patience and methodical troubleshooting.
Step 1: Preparation and Initial Checks
Backup Your Saves and Mod Profiles
Before you do anything else, make sure your game saves and your current mod setup (if using a mod manager) are backed up. This provides a safety net in case something goes wrong during troubleshooting. Many mod managers allow for profile backups, and manually copying your save game folder is always a good idea.
Check for Official Mod Updates
The very first thing you should do is visit the mod pages for all your installed mods. Many mod authors are quick to update their creations after a major game patch. Look for notices, changelogs, or new file versions specifically mentioning compatibility with the latest game version. Updating an out-of-date mod can often resolve conflicts instantly.
Step 2: Isolating the Culprit with the 50/50 Method
If updating mods doesn’t fix the issue, you’ll need to find out which mod (or mods) is causing the problem. The “50/50 method” is a highly effective way to do this:
- Disable half of your installed mods.
- Launch the game.
- If the problem persists, the conflicting mod is in the enabled half.
- If the problem is gone, the conflicting mod is in the disabled half.
- Repeat the process, halving the problematic group each time, until you narrow it down to a single mod or a small group of highly suspected mods.
This method can be time-consuming with a large mod list but is incredibly reliable for pinpointing the source of the conflict.
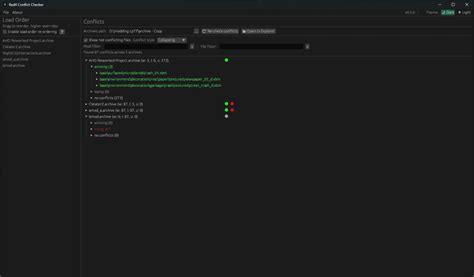
Step 3: Leveraging Mod Managers for Conflict Detection
Modern mod managers like Vortex, Mod Organizer 2 (MO2), and BG3MM (for Baldur’s Gate 3) offer powerful features to help you manage and detect conflicts. They can often:
- Identify Overwrites: Show which mod files are being overwritten by others.
- Suggest Load Order: Help optimize the order in which mods load, which is crucial for compatibility.
- Profile Management: Allow you to create separate mod setups for different playthroughs or for testing purposes.
Consult your mod manager’s documentation or community guides for specific instructions on using its conflict resolution tools. Sometimes, simply adjusting the load order based on the manager’s suggestions can solve the issue.
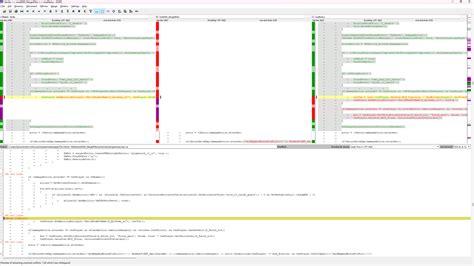
Step 4: Deep Dive: Reading Crash Logs and Community Support
For more stubborn conflicts, you might need to dig deeper:
- Crash Logs: If your game is crashing, check for crash log files (often found in your game’s installation directory or user data folders). These logs can sometimes point directly to the problematic file or mod.
- Game Forums & Modding Communities: Websites like Nexus Mods, Reddit’s modding subreddits, and official game forums are invaluable resources. Search for your specific game version, the conflicting mod’s name, or error messages you’re encountering. Chances are, someone else has faced the same issue and found a solution.
- Compatibility Patches: Some popular mods require specific compatibility patches to work together. Check if such a patch exists for your problematic mods.

Step 5: Prevention and Best Practices
While conflicts are inevitable, you can minimize their frequency and impact:
- Don’t Update Immediately: If you rely heavily on mods, consider waiting a few days or even a week after a major game update before updating your game. This gives mod authors time to release compatibility patches.
- Read Mod Descriptions Carefully: Always check a mod’s requirements, incompatibilities, and known issues before installing.
- Keep Your Mod List Lean: The fewer mods you have, the fewer potential points of conflict.
- Understand Load Orders: Learn the basics of how load orders work for your specific game, as this is often key to resolving conflicts.
Resolving mod conflicts after a game update can be a learning experience. With the right tools and a systematic approach, you’ll be back to enjoying your enhanced gameplay in no time. Remember to be patient, meticulous, and don’t hesitate to lean on the vast knowledge of the modding community.