


New gaming PC? What are the essential first setup steps for max FPS & low latency?

First Boot: Unboxing and Initial Hardware Checks
Congratulations on your new gaming rig! Before diving into games, a proper initial setup ensures maximum performance and stability. Start by carefully unboxing your PC and peripherals. Connect your monitor(s) using the correct ports on your graphics card (not the motherboard’s integrated graphics ports, unless you have an APU). Plug in your keyboard, mouse, and any other essential peripherals. Ensure all power cables are securely connected.
Take a moment for basic cable management, even if it’s just tidying the external cables for a cleaner look and better airflow. Power on your system for the first time, ensuring everything boots as expected and your monitor displays an image.

Operating System Installation & Crucial Updates
If your PC didn’t come with an operating system pre-installed, you’ll need to install Windows (typically Windows 10 or 11) from a USB drive. Once Windows is up and running, the absolute first step is to run Windows Update repeatedly until there are no more critical updates available. This ensures your OS is stable, secure, and has the latest patches.
After Windows is fully updated, visit your motherboard manufacturer’s website to download and install the latest chipset drivers for your specific model. These drivers are vital for communication between your CPU, RAM, and other components.
Graphics Card Driver Installation & Optimization
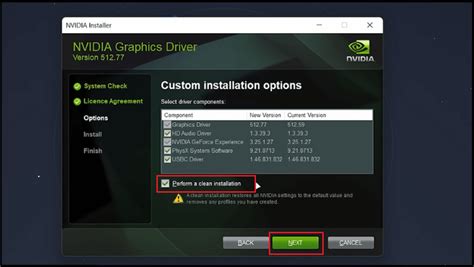
This is arguably the most critical step for gaming performance. Head directly to NVIDIA’s or AMD’s official website (depending on your GPU brand). Do NOT rely solely on Windows Update for graphics drivers; always get them directly from the source.
- NVIDIA: Download GeForce Experience for easy driver management and game optimization.
- AMD: Download AMD Adrenalin Software for similar functionality.
Perform a ‘clean installation’ if prompted, which removes any previous driver fragments, preventing potential conflicts. Regularly check for new GPU driver updates, as they often bring significant performance improvements and bug fixes for the latest games.
BIOS/UEFI Tweaks for Peak Performance
Restart your PC and enter the BIOS/UEFI settings (usually by pressing Del or F2 repeatedly during boot). These settings are fundamental for unlocking your hardware’s full potential:
- Enable XMP/DOCP: This is crucial for your RAM to run at its advertised speeds. Without it, your RAM will default to slower JEDEC speeds, significantly impacting CPU-intensive games.
- Enable Resizable BAR/Smart Access Memory (SAM): If your CPU, motherboard, and GPU support it, enable this feature for potential FPS gains in compatible games.
- Disable Unnecessary Peripherals/Features: If you’re not using onboard audio, Wi-Fi, or specific USB controllers, disabling them can slightly reduce system overhead.
- Check Boot Order: Ensure your primary drive is set as the first boot option.
Windows Settings for Gaming Dominance
Once back in Windows, fine-tune these settings:
- Power Plan: Go to ‘Power & sleep settings’ > ‘Additional power settings’ and select ‘High Performance’ or ‘Ultimate Performance’ (if available).
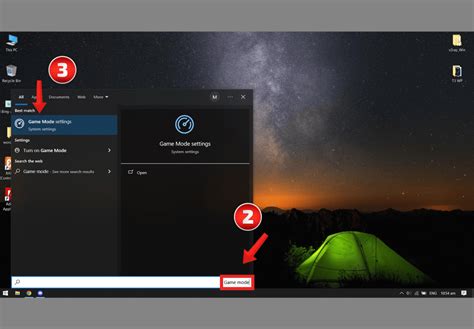
- Game Mode: Ensure ‘Game Mode’ is turned ON in Windows Settings > Gaming > Game Mode.
- Graphics Settings: In Windows Settings > System > Display > Graphics, add your game executables and set them to ‘High performance’.
- Disable Notifications: Turn off ‘Focus assist’ and unnecessary notifications.
- Startup Apps: Use Task Manager (Ctrl+Shift+Esc) to disable non-essential programs from launching at startup.
- Mouse Pointer Precision: In ‘Mouse settings’ > ‘Additional mouse options’ > ‘Pointer Options’, uncheck ‘Enhance pointer precision’ for more consistent aim.
Graphics Control Panel Deep Dive (NVIDIA/AMD)
Spend time in your GPU’s control panel:
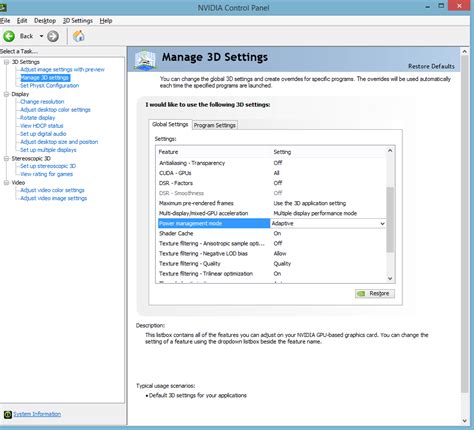
- NVIDIA Control Panel: Under ‘Manage 3D settings’, set ‘Power management mode’ to ‘Prefer maximum performance’ and ‘Low Latency Mode’ to ‘Ultra’ or ‘On’. Set ‘Refresh Rate’ to ‘Highest available’.
- AMD Adrenalin Software: Similar options exist for ‘Radeon Anti-Lag’ and ‘Radeon Boost’ for latency reduction and performance.
- G-Sync/FreeSync: If you have a compatible monitor, ensure G-Sync (NVIDIA) or FreeSync (AMD) is enabled for tear-free gaming.
Network & Latency Reduction
For competitive gaming, network latency (ping) is crucial:
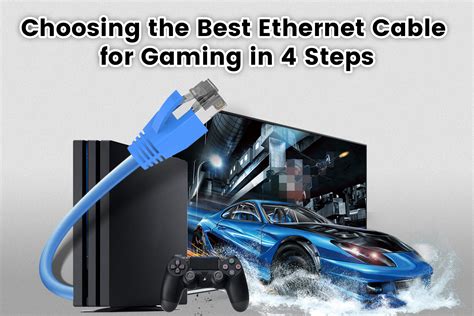
- Use Ethernet: Always prefer a wired Ethernet connection over Wi-Fi. It’s inherently more stable and faster.
- Router QoS: If your router supports Quality of Service (QoS), prioritize your gaming PC’s traffic.
- Update Network Drivers: Check your motherboard manufacturer’s website for the latest LAN drivers.
Game-Specific Optimizations & Monitoring
Finally, once in a game, adjust its individual graphics settings. Prioritize higher refresh rates and lower latency. Often, competitive players reduce graphical fidelity (shadows, anti-aliasing, post-processing) to achieve maximum FPS. Ensure your in-game refresh rate matches your monitor’s native refresh rate.
Utilize monitoring tools like MSI Afterburner (with RivaTuner Statistics Server) to keep an eye on your CPU/GPU temperatures, usage, and FPS while gaming. This helps identify bottlenecks and confirm your optimizations are working.
Conclusion
By diligently following these first setup steps, you’re not just getting your new gaming PC ready; you’re fine-tuning it to deliver the absolute best performance for high frame rates and ultra-low latency. Enjoy your optimized gaming experience!


