How to properly cable manage your gaming PC for better airflow & aesthetics?
Why Cable Manage Your Gaming PC?
Your gaming PC is a powerhouse of components, but often, it’s also a tangled mess of wires. Effective cable management goes far beyond just tidying up; it’s a critical step in optimizing your system’s performance and longevity. A well-managed PC interior not only looks professional but also significantly impacts its operational efficiency.

Benefits of Proper Cable Management
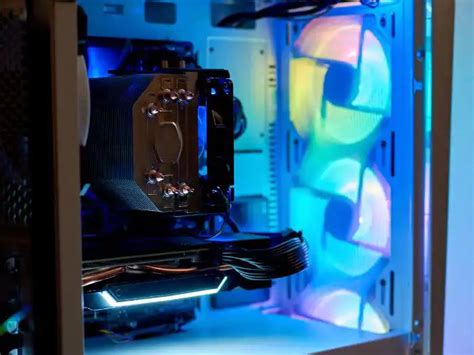
Improved Airflow: The primary performance benefit is enhanced airflow. Unrestricted cables create less turbulence and allow fans to move air more efficiently, leading to lower temperatures for your CPU, GPU, and other components. This can prevent thermal throttling and extend the lifespan of your hardware.
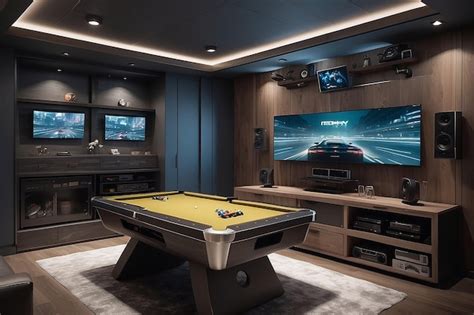
Enhanced Aesthetics: For many gamers, a clean build is a point of pride. With clear side panels becoming standard, a meticulously managed interior makes your high-end components truly shine. It transforms your PC from a functional machine into a display piece.
Easier Maintenance & Upgrades: When cables are neatly routed, upgrading components or troubleshooting issues becomes significantly simpler. You won’t have to untangle a spaghetti junction just to replace a drive or a fan.
Essential Tools and Materials
Before you dive in, gather the right arsenal of tools. Having these on hand will make the process much smoother and more effective.
- Zip Ties or Velcro Straps: Zip ties offer a more permanent hold, while Velcro straps are reusable and ideal for areas you might frequently access or change.
- Cable Combs: Perfect for keeping GPU and motherboard power cables neatly aligned and parallel, offering a premium look.
- Cable Sleeving/Wraps: For bundling multiple cables together into a single, cleaner conduit, especially for front panel I/O or fan cables.
- Cable Routing Clips/Adhesive Mounts: Useful for securing cables along hidden paths or areas without built-in tie-down points.
- Pliers/Nippers: For cleanly cutting zip ties.
- Screwdriver Set: To access your case and components.

The Cable Management Process: Step-by-Step
This is where the real work begins. Take your time and be systematic.
1. Disconnect and Plan
First, unplug everything. Remove any existing components that might hinder access to routing channels. Lay out all your cables (PSU, SATA, fan, front panel) to get a clear overview. Identify all the routing holes and tie-down points your PC case offers. Most modern cases have dedicated channels behind the motherboard tray.
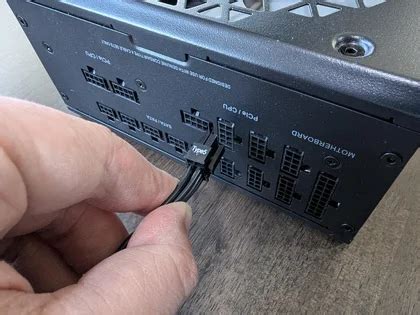
2. Start with the Power Supply Unit (PSU)
The PSU is the heart of your cable network. Connect only the necessary modular cables to your PSU. Plan their routes immediately. The main 24-pin ATX power cable, 8-pin EPS (CPU) cable, and PCIe power cables for your GPU are usually the thickest and most prominent. Route them directly behind the motherboard tray and bring them out through the nearest grommet to their respective ports.
3. Route CPU Power Cable
The EPS (CPU) power cable often runs along the top edge of the motherboard. Route it through the designated top-left cutout in your case, typically hidden above the motherboard tray. Ensure it has enough slack but isn’t excessively loose.
4. Manage GPU Power Cables
If your graphics card requires external power, route the PCIe cables from behind the motherboard tray, emerging from a grommet directly below or beside your GPU. Use cable combs here for a super clean look, making sure the cables run straight and parallel.
5. Connect SATA and Fan Cables
These thinner cables can be trickier. Route SATA data and power cables to your SSDs/HDDs, keeping them flat against the case or tucked away. For fan cables, try to run them along the edges of the case or behind component frames. If your case has a fan hub, utilize it to consolidate multiple fan cables into one.
6. Front Panel I/O Cables
These include USB, audio, power switch, and LED headers. Bundle them together where possible and route them along the case’s bottom or side edges, bringing them to their motherboard headers neatly. These are often the shortest and most fiddly cables, so patience is key.
7. Secure and Refine
Once all cables are connected and roughly routed, start securing them with zip ties or Velcro straps. Begin from the PSU side and work your way towards the components. Don’t overtighten zip ties, as this can damage cables. Bundle cables together into logical groups. Use the tie-down points on your motherboard tray to create neat runs.
Advanced Tips for a Pristine Build
To take your cable management to the next level, consider these finer points:
- Modular PSU is Your Best Friend: If you’re building a new PC or upgrading, invest in a fully modular power supply. This allows you to only use the cables you need, reducing clutter significantly.
- Cable Extensions/Custom Cables: For truly show-stopping builds, custom sleeved cable extensions can perfectly match your build’s aesthetic and provide ideal lengths. They fit over your existing PSU cables.
- Use the Back of the Case: The space behind the motherboard tray is your primary hiding spot. Utilize every inch of it.
- Don’t Rush: Good cable management takes time. Be patient, make adjustments, and don’t be afraid to redo a section if it doesn’t look right.
- Test as You Go: Before closing up your case, do a quick power-on test to ensure everything is connected correctly and functioning.
Conclusion
Proper cable management is more than just an aesthetic choice; it’s an investment in your gaming PC’s performance, longevity, and ease of maintenance. By following these steps and using the right tools, you can transform a chaotic tangle into a clean, efficient, and visually stunning machine. Enjoy the improved airflow, lower temperatures, and the satisfaction of a perfectly organized build!