


How do I optimize Windows 11 settings for maximum gaming performance and FPS?
Introduction to Windows 11 Gaming Optimization
Windows 11 brings a sleek interface and some under-the-hood enhancements, but out of the box, it’s not always configured for peak gaming performance. To squeeze every last frame per second (FPS) out of your system and ensure a smooth gaming experience, you’ll need to dive into some specific settings. This guide will walk you through the essential tweaks to optimize Windows 11 for maximum gaming performance.
Update Drivers and Windows
Before making any system tweaks, ensure all your drivers and Windows itself are up to date. Outdated drivers, especially for your graphics card, can significantly hinder performance. Windows updates often include performance improvements and bug fixes.
- Graphics Card Drivers: Download the latest drivers directly from NVIDIA, AMD, or Intel’s website. Perform a clean installation if possible.
- Chipset Drivers: Update your motherboard’s chipset drivers from the manufacturer’s website.
- Windows Updates: Go to Settings > Windows Update and check for any pending updates.
Enable Game Mode
Game Mode in Windows 11 is designed to prioritize your gaming experience by limiting background processes and allocating system resources more effectively to your game.
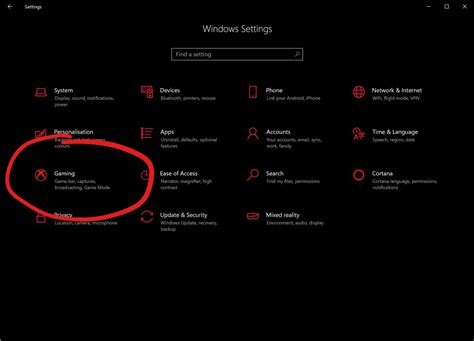
- Open Settings (Windows Key + I).
- Navigate to Gaming > Game Mode.
- Toggle Game Mode to On.
Adjust Graphics Settings for Performance
Dedicated GPU Scheduling
Hardware-accelerated GPU scheduling can reduce latency and improve performance on supported hardware.
- Go to Settings > System > Display > Graphics.
- Click Change default graphics settings.
- Toggle Hardware-accelerated GPU scheduling to On.
Per-App Graphics Performance Preference
For specific games, you can instruct Windows to use your high-performance GPU or set a performance preference.
- In Settings > System > Display > Graphics, under “Add an app”, select “Desktop app” and click Browse to add your game’s executable.
- Once added, click Options for that game.
- Select High performance and click Save.
Manage Power Options
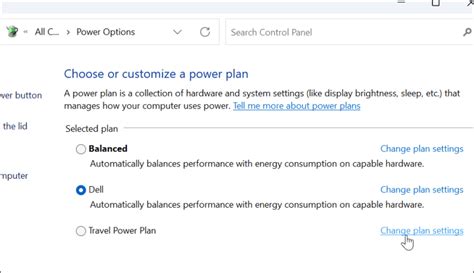
Ensure your PC is using a high-performance power plan to prevent CPU throttling.
- Search for “Edit power plan” in the Windows search bar and open it.
- Click Power Options in the address bar.
- Select High performance or Ultimate Performance (if available). If not, you might need to create a custom plan or enable it via command prompt.
Disable Unnecessary Background Apps
Many apps run in the background, consuming CPU, RAM, and network resources. Disable those you don’t need while gaming.
- Go to Settings > Apps > Apps & features.
- Review the list and uninstall or restrict background activity for non-essential apps.
- For apps that support it, click the three dots next to the app, select Advanced options, and set “Let this app run in background” to Never.
Optimize Storage and Drives
Disk Cleanup and Defragmentation
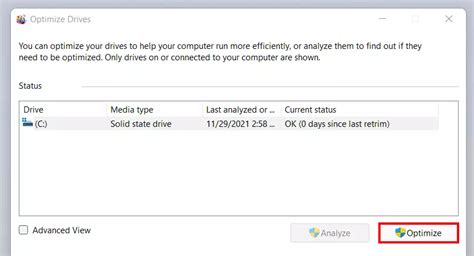
Regularly clean your drives and ensure SSDs are not excessively fragmented (though defragmentation is less critical for SSDs).
- Search for “Disk Cleanup” to remove temporary files.
- For HDDs, search for “Defragment and Optimize Drives” to optimize them. (SSDs are optimized differently by TRIM, which Windows handles automatically).
Disable Storage Sense (if causing issues)
While useful for managing space, if Storage Sense is frequently active during gaming, it might cause minor stutters.
- Go to Settings > System > Storage.
- Toggle Storage Sense to Off temporarily if you suspect it’s impacting performance.
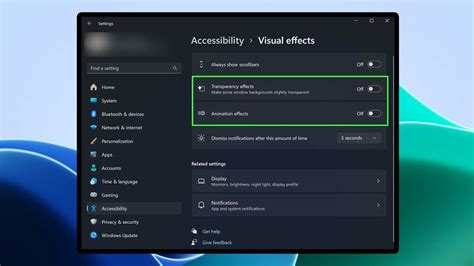
Adjust Visual Effects
Windows 11’s visual flair comes at a slight performance cost. Reducing some visual effects can free up resources.
- Search for “Adjust the appearance and performance of Windows” and open it.
- In the Visual Effects tab, select Adjust for best performance or choose custom options like disabling “Animate windows when minimizing and maximizing”, “Fade or slide menus into view”, etc.
- Click Apply and then OK.
Network Optimization
Disable Nagle’s Algorithm (Advanced)
Nagle’s Algorithm can sometimes introduce latency for online games. Disabling it can reduce ping for some users.
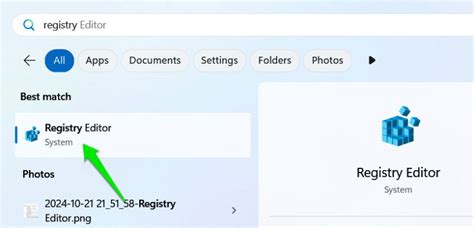
- Press Windows Key + R, type
regedit, and press Enter. - Navigate to
HKEY_LOCAL_MACHINESYSTEMCurrentControlSetServicesTcpipParametersInterfaces. - Find your active network interface (look for the one with your IP address).
- Right-click in the right pane, select New > DWORD (32-bit) Value.
- Create two new DWORDs:
TcpNoDelayandTcpAckFrequency. Set both their values to1. - Restart your PC.
Disable Xbox Game Bar and Game DVR
While useful for some, the Xbox Game Bar and its recording features (Game DVR) can consume resources. If you don’t use them, turn them off.
- Go to Settings > Gaming > Xbox Game Bar. Toggle it Off.
- Go to Settings > Gaming > Captures. Toggle Record what happened to Off.
Conclusion
By systematically applying these optimizations, you can significantly enhance your Windows 11 gaming experience, achieving higher FPS and a smoother, more responsive gameplay. Remember that the impact of each tweak can vary based on your system hardware and the games you play. Experiment with these settings to find the sweet spot for your setup, and always keep your drivers updated for the best results.


