How to troubleshoot common mod conflicts & ensure game stability?
The Thrill and Challenge of Modding
Modifying your favorite games can unlock incredible new experiences, from enhanced graphics and quality-of-life improvements to entirely new quests and gameplay mechanics. However, the more mods you install, the higher the chance of encountering conflicts that can lead to crashes, freezes, or unexpected in-game behavior. Ensuring game stability amidst a heavily modded setup requires a systematic approach to troubleshooting. This guide will walk you through common issues and effective strategies to keep your game running smoothly.

Understanding Mod Conflicts
Before you can fix a problem, you need to understand its nature. Mod conflicts arise when two or more modifications attempt to alter the same game asset, script, or record in incompatible ways. These can manifest in several forms:
- Overwrite Conflicts: One mod replaces files that another mod relies on or provides its own version of. This is common with textures, meshes, and sound files.
- Script Conflicts: Mods that add or modify game scripts can clash, leading to unexpected behavior, quest breakage, or immediate crashes.
- Load Order Conflicts: Even if mods don’t directly overwrite files, their order in the load list can determine which mod’s changes take precedence, potentially breaking dependencies.
- Resource Conflicts: Problems can occur when mods try to use the same internal identifiers or global variables.
Essential Tools for Modding
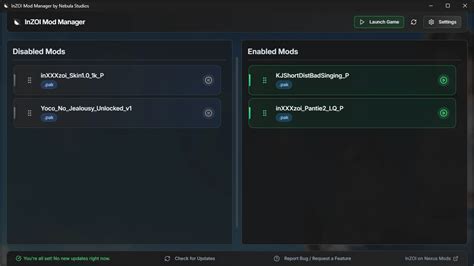
A stable modding experience begins with the right tools. A robust mod manager is non-negotiable for large mod lists.
- Mod Organizer 2 (MO2): Offers a virtual file system, meaning mods are installed into separate folders and merged virtually at runtime. This prevents actual file overwrites in your game directory, making it incredibly easy to enable, disable, and rearrange mods without affecting your base game. Its conflict resolution tools are powerful.
- Vortex: Nexus Mods’ official manager, Vortex is generally more beginner-friendly, providing clear guidance on conflicts and suggesting solutions. It uses a linking system to manage mod files.
Beyond mod managers, understanding your game’s directory structure and using tools like Wrye Bash (for Bethesda games) or specific game utility tools for patching can be invaluable.
The Troubleshooting Process: A Step-by-Step Guide
1. Isolate the Problem
The golden rule of troubleshooting is to isolate the problematic mod(s). If your game suddenly crashes after installing new mods, chances are one of them is the culprit. Disable your most recently installed mods one by one until the issue disappears. If the problem persists, begin disabling groups of mods (e.g., all texture mods, all quest mods) to narrow down the category.
2. Optimize Your Load Order
Your load order dictates which mod’s changes are applied last, and thus take precedence. Incorrect load order is a leading cause of conflicts. Most mod managers have built-in sorting tools (like LOOT for Bethesda games) that analyze your mod list and suggest an optimized load order based on community rules. Always run these sorters after adding or removing mods.
3. Resolve Conflicts Manually
Even with an optimized load order, some conflicts may remain. Your mod manager will highlight these. For texture and mesh conflicts, you often just need to decide which mod’s assets you prefer by ensuring it loads later. For more complex conflicts involving game records (especially with MO2), you might need to use a conflict resolution tool (like xEdit for Bethesda games) to manually merge conflicting entries, creating a ‘patch’ that combines the desired changes from multiple mods.
4. Check for Patches and Compatibility Guides
Many popular mods have official or community-made compatibility patches designed to make them work together. Always check the mod pages, forums, and community wikis for recommended patches or specific load order instructions. Major modding communities often have extensive guides on resolving conflicts between common mod combinations.
Advanced Tips and Community Resources
- Read Crash Logs: Many games (or their modding frameworks) generate crash logs that can pinpoint the exact file or script causing a crash. Learning to interpret these logs is a powerful skill.
- Clean Saves: Sometimes, removing a mod or changing your load order requires starting a new game or reverting to a ‘clean save’ from before the problematic changes were introduced. Mod changes can get baked into save files.
- Community Forums: Don’t hesitate to reach out! Modding communities on Nexus Mods, Reddit (e.g., r/skyrimmods, r/falloutmods), and Discord servers are vibrant and often willing to help troubleshoot specific issues. When asking for help, provide as much detail as possible: your mod list, load order, crash logs, and a clear description of the problem.

Conclusion
Troubleshooting mod conflicts is an inherent part of the modding experience. While it can be frustrating at times, approaching it systematically with the right tools and a bit of patience will ensure your modded games run beautifully. Embrace the learning process, leverage the incredible resources of the modding community, and enjoy the rich, customized gaming adventures that await!