


How to fix CTD due to mod load order conflicts?

Crashing to Desktop (CTD) is a frustrating reality for many mod enthusiasts, especially when dealing with complex game setups. While numerous factors can contribute to a CTD, one of the most common and often overlooked culprits is mod load order conflicts. A disorganized load order can lead to unexpected behavior, missing assets, and ultimately, an unstable game that crashes frequently. This guide will walk you through the essential steps and tools needed to diagnose and resolve these conflicts, ensuring a smoother, more enjoyable modding experience.
Understanding Mod Load Order and Conflicts
At its core, a game’s load order dictates the sequence in which your installed mods are loaded by the game engine. When two or more mods modify the same game record (e.g., an item’s stats, a character’s appearance, or a world space cell), the mod loaded later in the sequence “wins” and its changes override those of earlier mods. This is how many mods are designed to work harmoniously. However, when these overrides are unintentional or create logical inconsistencies, a conflict arises, often leading to a CTD.
For example, if Mod A changes a tree’s texture and Mod B changes the same tree’s mesh, and they are not designed to be compatible, the conflicting asset definitions can confuse the game engine, causing it to fail.
Essential Tools for Conflict Resolution
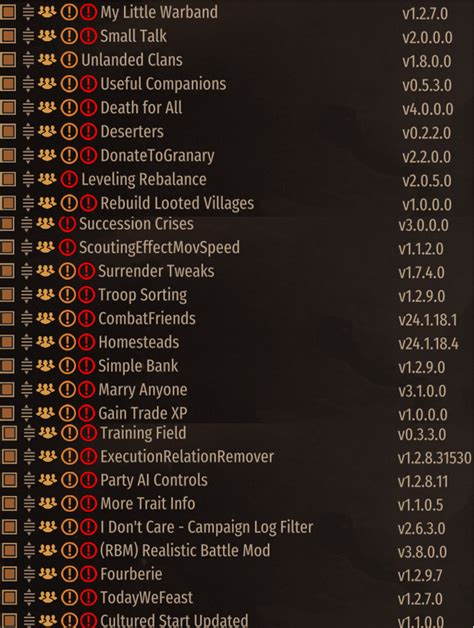
Before diving into resolution, it’s crucial to have the right tools at your disposal. A robust mod manager is non-negotiable, as it handles installation, uninstallation, and crucially, the sequencing of your mods. Popular choices include:
- Mod Organizer 2 (MO2): Offers a virtual file system, keeping your game’s data folder clean and allowing for easy mod isolation and profiling. Highly recommended for advanced users.
- Vortex: Nexus Mods’ official manager, designed for ease of use and integrates well with their website. Suitable for beginners and intermediate users.
Beyond a mod manager, the absolute MVP for load order management is LOOT (Load Order Optimisation Tool). LOOT reads your entire mod list and intelligently sorts it based on a vast, community-maintained database of rules, applying recommended overrides and flagging potential issues.
The LOOT Advantage: Your First Line of Defense
Using LOOT is typically the first and most critical step in addressing load order issues. Here’s how to use it effectively:
- Download and Install LOOT: Ensure it’s integrated with your chosen mod manager or run it as a standalone application.
- Run LOOT: Launch LOOT. It will scan your installed plugins and sort them automatically.
- Apply Sort Order: Click the “Apply” button to save the new load order.
- Review Warnings and Errors: LOOT will display messages indicating dirty edits, missing masters, or other potential problems. Pay close attention to these warnings; they often point directly to stability issues.
While LOOT is powerful, it’s not a magic bullet. It provides an excellent baseline, but some conflicts require manual intervention, especially with unique or custom mod combinations.

Manual Conflict Resolution and Patching
When LOOT’s automatic sorting isn’t enough, or if it flags specific warnings, you’ll need to delve deeper. This often involves using a tool like SSEEdit (for Skyrim Special Edition) or FO4Edit (for Fallout 4) to visually inspect conflicts.
Using xEdit (SSEEdit/FO4Edit):
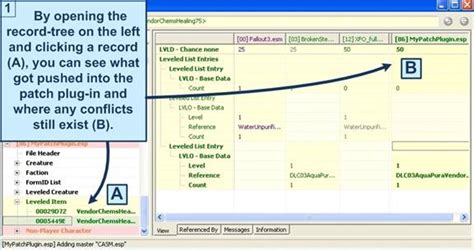
- Launch xEdit through your mod manager. Load all your plugins.
- Identify Conflicts: xEdit will highlight conflicting records in different colors. Right-click on a mod in the left pane and select “Filter for conflicts (recursive)” to see all conflicts.
- Analyze and Resolve: For each conflict, you’ll see which mods are trying to modify the same record. You can then:
- Reorder: If one mod’s change is simply meant to override another, ensure it’s loaded later.
- Create a Patch: For complex conflicts where you want specific changes from multiple mods, you can create a “merge patch” or “bashed patch” (often using Wrye Bash or Mator Smash, which are more advanced tools) that combines the desired changes.
- Disable the Conflicting Mod: If a mod is causing irreparable issues and isn’t essential, consider disabling it.
Creating patches often involves copying desired records into a new .esp file, effectively telling the game exactly how to resolve the conflict. This is an advanced technique but incredibly powerful for stabilizing large mod setups.
Testing, Iteration, and Advanced Cleaning
After making changes to your load order or creating patches, rigorous testing is paramount. Launch your game and play through areas that previously caused CTDs. If stability improves, you’re on the right track. If not, revisit your changes, check LOOT warnings again, and continue to debug.
For more advanced users, “cleaning” dirty edits from official master files (like Skyrim.esm or Fallout4.esm) and even some mod files using xEdit can resolve subtle CTDs and improve overall stability. However, always exercise caution and follow reputable guides when cleaning files, as improper cleaning can cause more harm than good.

Conclusion
Fixing CTDs due to mod load order conflicts can seem daunting, but with the right tools and a systematic approach, it’s a solvable problem. Start with a reliable mod manager, leverage LOOT for initial sorting, and don’t shy away from using xEdit for deeper conflict resolution. Patience and persistent testing are key to achieving a stable, modded game that delivers countless hours of enjoyment rather than frustrating crashes.


