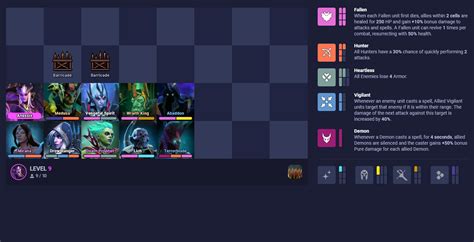
Current meta: Which support builds offer best synergy for raid progression?

The Cornerstone of Raid Success: Synergistic Support Builds
In the challenging world of raid progression, a strong damage per second (DPS) output is undeniably important, but it’s often the unsung heroes of the support roles that dictate a team’s ultimate success or failure. The current meta for many massively multiplayer online (MMO) games emphasizes not just individual support build efficacy, but the intricate synergy between them. Understanding which support builds complement each other best can transform a struggling raid group into a finely tuned progression machine.
Understanding the Demands of the Current Raid Meta
Modern raids are complex encounters, demanding a blend of sustain, burst healing, damage amplification, crowd control (CC), and defensive utility. No single support build can provide everything, which is why thoughtful composition is paramount. The meta often shifts based on new content, balance patches, and community discoveries, but core principles remain: a balanced approach to healing, offensive buffs, and defensive mitigation is key.
Currently, many games favor compositions that can provide sustained boons (like Quickness, Alacrity, Might, Haste, etc.), significant damage reduction or healing throughput, and crucial cleanse or CC capabilities for specific encounter mechanics.
Top Support Archetypes and Their Synergies
1. The Pure Healer & Offensive Buffer Duo
One of the most common and effective pairings involves a dedicated pure healer (often providing some defensive buffs) alongside an offensive buffer (focusing on damage-enhancing boons). For example:
- Healer Archetype: Builds focused solely on high healing output, defensive boons (Protection, Barrier), and condition cleansing. Often brings strong group sustain.
- Offensive Buffer Archetype: Builds designed to maximize uptime on crucial offensive boons (e.g., Quickness/Alacrity, Might, Fury) and amplify ally damage through unique debuffs on enemies.
The synergy here is straightforward: the healer keeps everyone alive and removes threats, allowing the offensive buffer to push group damage without concern for survivability, leading to faster boss kills and fewer mechanic overlaps.

2. Utility-Heavy Supports and Defensive Enablers
Beyond pure healing and offensive boons, utility supports often fill crucial gaps and provide unique advantages:
- Crowd Control (CC) Specialists: Essential for breaking boss defiance bars or interrupting dangerous abilities. Pairing a strong CC support with another that can apply vulnerability or condition pressure can make these phases trivial.
- Barrier/Shield Providers: Some supports excel at mitigating incoming damage proactively rather than reactively healing. Synergizing these with reactive healers ensures that both burst damage and sustained pressure are effectively managed.
- Boon Strippers/Cleanse Bots: Certain encounters require rapid removal of enemy boons or ally conditions. A support dedicated to this role, paired with one that can protect them or enhance their own boon duration, can be invaluable.
Exemplary Synergistic Compositions for Progression
While specific build names vary greatly by game, the principles of synergy remain. Consider these hypothetical, yet common, powerful combinations:
- The “Speed Clear” Combo: A high-Alacrity/Quickness support (e.g., Chronomancer/Scrapper in GW2, Astrologian/Sage in FFXIV) paired with a high-Might/Haste buffer (e.g., Warrior/Revenant in GW2, Scholar/White Mage in FFXIV). This duo maximizes DPS uptime and ability usage across the group.
- The “Unkillable Wall” Setup: A robust Protection/Barrier healer (e.g., Guardian/Renegade in GW2, Paladin/Warrior in FFXIV) alongside a utility support offering significant damage reduction or invulnerability phases (e.g., Druid/Specter in GW2, Gunbreaker/Dark Knight in FFXIV). This ensures survival through the most devastating mechanics.
- The “Mechanic Breaker” Trio: A Quickness support, a pure healer, and a dedicated CC/Boon Strip utility. This team can quickly dispatch defiance bars, remove critical enemy buffs, and maintain group health, offering maximum flexibility.

Optimizing Your Support Team for Success
Achieving optimal synergy goes beyond just selecting the right builds. It also involves:
- Communication: Clear call-outs for cooldowns, boon applications, and CC trains are vital.
- Practice: Understanding each other’s rotation and when to overlap or stagger abilities comes with experience.
- Adaptation: Be willing to swap traits, gear, or even entire builds between encounters based on specific boss mechanics.
- Build Diversification: Encourage support players to master a few different builds to offer flexibility to the raid leader.
Conclusion: The Art of Support Synergy
Raid progression is a marathon, not a sprint, and the thoughtful composition of your support team is arguably the most critical factor in achieving consistent success. By understanding the current meta’s demands, recognizing the strengths of different support archetypes, and fostering strong communication, raid groups can unlock powerful synergies that not only ensure survival but also maximize efficiency, paving the way for smooth and satisfying progression through even the toughest encounters.

