


High CPU temps gaming? Best PC case airflow configuration tips?

Why Optimal PC Airflow is Crucial for Gamers
Experiencing high CPU temperatures while gaming can be a frustrating and potentially damaging issue. Elevated temps not only lead to thermal throttling, reducing your system’s performance, but can also shorten the lifespan of your valuable components. The good news is that often, the solution lies not in expensive upgrades, but in optimizing your PC case airflow. A well-configured cooling setup ensures a consistent flow of cool air to your components and efficient expulsion of hot air, maintaining optimal operating temperatures even under heavy gaming loads.
Understanding the Basics of PC Airflow
At its core, PC airflow is about creating a path for cool air to enter your case and hot air to exit. This is typically achieved using intake and exhaust fans. Intake fans draw cooler ambient air into the case, while exhaust fans push heated air out. The goal is to create a constant, unidirectional flow that sweeps across heat-generating components like your CPU and GPU.
Most modern PC cases come with fan mounting points at the front, top, rear, and sometimes bottom. The front and bottom are generally best for intake, as they draw in cooler air from outside the case. The rear and top are ideal for exhaust, as hot air naturally rises.

Positive vs. Negative Air Pressure
Understanding air pressure within your case is key to effective cooling and dust management:
- Positive Air Pressure: More air is being pushed into the case (intake) than pulled out (exhaust). This creates a slightly higher internal pressure, forcing air out through all available gaps and crevices. The main benefit is that dust can only enter through filtered intake points, significantly reducing dust buildup inside your system.
- Negative Air Pressure: More air is being pulled out of the case (exhaust) than pushed in (intake). This creates lower internal pressure, drawing air in through any unfiltered opening, which can lead to rapid dust accumulation. While it might feel like it’s extracting heat more aggressively, the dust issue often outweighs this benefit.
For most users, especially those concerned with dust, a slightly positive air pressure setup is recommended.
Strategic Fan Placement Configurations
The number and placement of your fans will significantly impact your cooling performance. Here are some common and effective configurations:
1. The Classic Front-to-Back Flow (Balanced)
- Intake: 2-3 fans at the front.
- Exhaust: 1 fan at the rear.
This is a solid baseline for many systems, creating a direct path for air over the CPU and GPU. Adding an extra exhaust fan at the top can further improve heat dissipation.
2. Optimizing for Positive Pressure
- Intake: 2-3 fans at the front, 1-2 fans at the bottom (if available).
- Exhaust: 1 fan at the rear, 1-2 fans at the top.
Prioritize more intake than exhaust to maintain positive pressure, ensuring all intake fans are filtered.

3. GPU-Focused Cooling
If your GPU temps are more concerning, consider:
- Intake: Front fans, and potentially bottom intake fans blowing directly onto the GPU.
- Exhaust: Rear and top exhaust fans to quickly remove heat generated by the GPU.
The Role of Cable Management and Dust Filters
Good airflow isn’t just about fans; it’s also about clear pathways:
- Cable Management: Messy cables obstruct airflow, creating pockets of stagnant hot air. Route cables behind the motherboard tray and use zip ties or Velcro straps to keep them tidy.
- Dust Filters: Essential for preventing dust buildup, especially on intake fans. Regularly clean these filters (every 1-3 months, depending on your environment) to ensure unrestricted airflow.

Additional Cooling Considerations
- CPU Cooler Orientation: Ensure your CPU cooler’s fan(s) are oriented to push air towards your rear exhaust fan, aligning with the overall airflow path.
- Thermal Paste: A fresh application of high-quality thermal paste on your CPU can significantly improve heat transfer to your CPU cooler.
- Fan Speed Control: Utilize your motherboard’s fan headers and BIOS/software controls (e.g., PWM) to adjust fan speeds based on temperature. This balances cooling performance with noise levels.

Testing and Monitoring Your Airflow
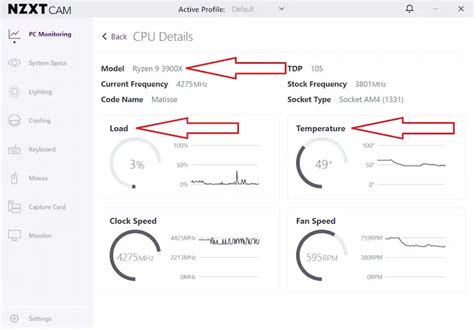
After making changes, it’s crucial to test your setup. Use monitoring software (like HWMonitor, MSI Afterburner, or NZXT CAM) to track your CPU and GPU temperatures during gaming. Pay attention to idle temperatures and temperatures under load. Experiment with different fan speeds and configurations to find the optimal balance for your specific system and environment.
Conclusion
Optimizing your PC case airflow is one of the most cost-effective ways to combat high CPU temperatures during gaming and prolong the life of your components. By understanding the principles of positive and negative pressure, strategically placing your fans, maintaining good cable management, and regularly cleaning dust filters, you can ensure your gaming rig stays cool and performs at its best, even during the most demanding sessions. A little effort in airflow configuration goes a long way in achieving a stable, high-performance gaming experience.


