How to effectively troubleshoot common mod installation errors?
Introduction to Mod Troubleshooting
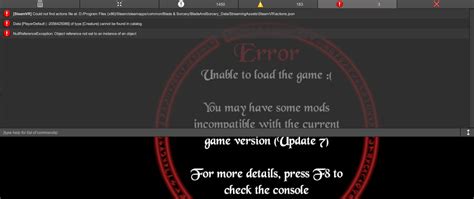
Modding your favorite games can dramatically enhance gameplay, introduce new features, or simply refresh an old classic. However, the path to a perfectly modded game is often fraught with installation errors. From game crashes to missing textures, these issues can be frustrating. Understanding how to effectively troubleshoot common mod installation errors is a crucial skill for any avid modder. This article will equip you with a systematic approach to diagnose and fix these problems, getting you back to gaming faster.
Understanding the Root Causes of Mod Errors
Before diving into solutions, it’s essential to understand why mod installations fail. Most errors stem from a few core issues: file conflicts, incorrect installation paths, missing dependencies, or an improper load order. Game engines are often not designed with extensive modding in mind, leading to fragility when multiple modifications try to alter the same game assets or scripts.
Common culprits include incompatible mod versions, corrupt downloads, or user error during manual installation. Identifying the exact nature of the problem is the first and most critical step in effective troubleshooting.

Essential First Steps for Diagnosis
When an error occurs, don’t panic. Start with these foundational steps:
- Read the Mod Description Carefully: Many issues are preventable if you thoroughly read the mod’s description, requirements, and installation instructions on its download page. Developers often list known incompatibilities or specific installation quirks.
- Verify Game File Integrity: Use your game client (Steam, GOG, Epic Games Launcher) to verify the integrity of your game files. This ensures your base game installation isn’t corrupted and all vanilla files are present.
- Use a Mod Manager: For games with extensive modding scenes (e.g., Skyrim, Fallout, Stardew Valley), a dedicated mod manager (like Vortex, Mod Organizer 2, or Nexus Mod Manager) is indispensable. These tools automate many aspects of installation, dependency checking, and load order management, drastically reducing human error.
- Install One Mod at a Time: When installing multiple mods, add them one by one and test the game after each installation. This makes it easy to pinpoint which specific mod is causing a problem.

Diagnosing Specific Issues and Solutions
Load Order Conflicts
Many games process mods in a specific sequence, known as the ‘load order’. If two mods modify the same game element, the one loaded later will usually overwrite the earlier one. Conflicts arise when mods overwrite each other in a way that breaks functionality. Mod managers are crucial here, as they often have built-in load order optimizers (like LOOT for Bethesda games) that can automatically sort mods for maximum compatibility.
Missing Dependencies
Some mods rely on other ‘parent’ mods or framework tools (e.g., SKSE for Skyrim, Script Extender for Fallout 4) to function. If these dependencies aren’t installed or are an incorrect version, the child mod will fail. Always check the ‘requirements’ section of a mod’s page.
Corrupt Files or Incomplete Downloads
A partial or corrupt download can lead to strange errors. Redownload the mod, preferably from a different mirror or at a later time, and ensure your internet connection is stable. Also, check if your antivirus software is quarantining mod files, as some can be flagged incorrectly.
Permission Issues
If your game is installed in a protected directory (like Program Files on Windows), Windows’ User Account Control (UAC) might prevent mods from writing or modifying necessary files. Try installing the game outside of ‘Program Files’ or running your mod manager and game as an administrator.
Advanced Troubleshooting Techniques
- Clean Installation: If all else fails, a complete clean installation of both the game and all mods can sometimes resolve stubborn issues. Back up your save files, uninstall the game, manually delete any remaining game folders, reinstall the game, and then carefully reinstall your mods.
- Binary Search Method: For large mod lists, if you can’t identify the problematic mod, disable half of your mods and test. If the problem persists, the issue is in the active half; if it disappears, it’s in the disabled half. Repeat this process until you isolate the culprit.
- Reading Log Files: Many games and mod managers generate log files that contain valuable information about errors. Learn where these logs are stored (often in the game’s main directory or a ‘Logs’ subfolder) and how to interpret them. Error codes or specific file paths mentioned can lead you directly to the problem.
- Community Support: The modding community is a vast resource. Forums, Discord servers, and wikis dedicated to specific games and modding tools are excellent places to ask for help. When posting for support, provide as much detail as possible: your mod list, load order, error messages, and what steps you’ve already taken.

Preventing Future Errors
Proactive measures can save you a lot of headache:
- Regular Backups: Before making significant changes to your mod list or game files, back up your game installation and save files.
- Stay Updated (Carefully): Keep your game and mod manager updated. However, be cautious with game updates, as they can sometimes break existing mods. Check mod compatibility after a game patch.
- Test Frequently: Don’t install dozens of mods at once. Test your game frequently during the modding process to catch issues early.

Conclusion
While mod installation errors can be daunting, a systematic and patient approach can resolve most issues. By understanding common error types, utilizing mod managers, meticulously checking dependencies, and leveraging community resources, you can transform a frustrating experience into a rewarding one. Happy modding!