


How to optimize Windows 11 for max gaming FPS & reduce input lag?
Windows 11 offers a sleeker interface and several under-the-hood improvements, but out-of-the-box, it’s not always tuned for the absolute best gaming performance. To squeeze every last frame per second (FPS) and ensure your inputs are registered with lightning speed, you need to make some specific adjustments. This guide will walk you through the essential steps to transform your Windows 11 machine into a gaming powerhouse.
Essential Driver Updates
The foundation of any good gaming setup is up-to-date drivers. Your graphics card drivers are paramount, but don’t overlook chipset and audio drivers.
- Graphics Card Drivers: Always download the latest drivers directly from NVIDIA (GeForce Experience), AMD (Radeon Software), or Intel’s official websites. These updates often include game-specific optimizations and bug fixes that significantly impact performance.
- Chipset Drivers: Update your motherboard’s chipset drivers from your motherboard manufacturer’s website or directly from Intel/AMD. These ensure proper communication between your CPU, GPU, and other components.
- Audio Drivers: While less impactful on FPS, up-to-date audio drivers can prevent sound-related glitches and ensure smooth gameplay.

Windows 11 Game Mode & Graphics Settings
Windows 11 has dedicated features designed to prioritize gaming performance.
Enable Game Mode
Game Mode is designed to optimize your system for gaming by prioritizing game processes and suspending background activities. To enable it:
- Go to
Settings > Gaming > Game Mode. - Ensure the ‘Game Mode’ toggle is set to
On.
Graphics Performance Preference
For demanding games, you can manually assign them to use your dedicated graphics card and set a performance preference.
- Go to
Settings > System > Display > Graphics. - Click ‘Add an app’ to browse for your game’s executable file if it’s not listed.
- Select the game, click ‘Options’, and choose ‘High performance’.
- Click ‘Save’.

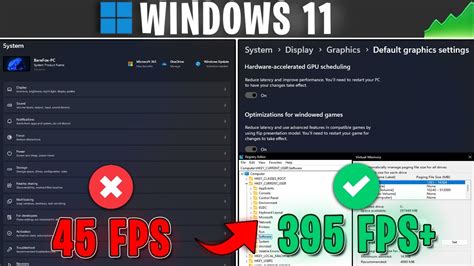
Hardware-accelerated GPU scheduling
This feature can reduce latency and improve performance by allowing the graphics card to manage its own VRAM more efficiently. Your GPU and drivers must support it.
- Go to
Settings > System > Display > Graphics > Change default graphics settings. - Toggle ‘Hardware-accelerated GPU scheduling’ to
On. - Restart your PC for changes to take effect.
Variable Refresh Rate (VRR)
If you have a compatible monitor and GPU (G-Sync or FreeSync), enable VRR for smoother gameplay without screen tearing.
- Go to
Settings > System > Display > Graphics > Change default graphics settings. - Toggle ‘Variable Refresh Rate’ to
On.
Power & Performance Settings
Ensuring your system is receiving adequate power and minimizing background resource usage is crucial.
Ultimate Performance Power Plan
This power plan is designed to deliver maximum performance at the expense of power efficiency, ideal for gaming desktops.
- Open ‘Command Prompt’ as an administrator.
- Type
powercfg -duplicatescheme e9a42b02-d5df-448d-aa00-03f147496726and press Enter. - Go to
Control Panel > Hardware and Sound > Power Options. - Select ‘Ultimate Performance’ from the list. If it doesn’t appear, click ‘Show additional plans’.

Disable Background Apps and Notifications
Background apps consume CPU, RAM, and network bandwidth, which can impact gaming performance. Notifications can also cause momentary stutters.
- Background Apps: Go to
Settings > Apps > Installed apps. Click the three dots next to apps you don’t need running in the background, select ‘Advanced options’, and set ‘Let this app run in background’ to ‘Never’. - Notifications: Go to
Settings > System > Notificationsand turn off notifications for apps you don’t need alerts from, or toggle off ‘Notifications’ entirely while gaming.
Startup Apps Cleanup
Many applications are configured to launch automatically when Windows starts, hogging resources. Disable unnecessary startup items:
- Open Task Manager (Ctrl+Shift+Esc).
- Go to the ‘Startup apps’ tab.
- Right-click on any non-essential apps and select ‘Disable’.
System Optimization & Tweaks
Beyond core gaming settings, general system tweaks can further enhance responsiveness and FPS.
Visual Effects
Windows 11’s fancy visual effects can consume resources. For max performance, prioritize function over aesthetics.
- Search for ‘Adjust the appearance and performance of Windows’ in the Start Menu and open it.
- In the ‘Visual Effects’ tab, select ‘Adjust for best performance’ or customize by unchecking effects like ‘Animate windows when minimizing and maximizing’ and ‘Fade or slide menus into view’.

Storage Management
A cluttered or fragmented drive can slow down load times and overall system responsiveness.
- Disk Cleanup: Search for ‘Disk Cleanup’ in the Start Menu. Select your drive and let it analyze, then check temporary files, Recycle Bin, and other non-essential items to remove.
- Defragment and Optimize Drives: For HDDs, fragmentation can reduce performance. Search for ‘Defragment and Optimize Drives’ and run it. SSDs don’t need defragmentation; Windows 11 will automatically TRIM them.
- Install Games on SSD: If possible, always install your games on an SSD (Solid State Drive) for faster load times and smoother gameplay.
Mouse & Keyboard Settings
Input lag can be a deal-breaker in competitive gaming.
- Disable Mouse Acceleration (Enhance pointer precision): This feature makes your cursor move faster the quicker you move your mouse, which can be inconsistent for gaming. Go to
Settings > Bluetooth & devices > Mouse > Additional mouse settings > Pointer Optionsand uncheck ‘Enhance pointer precision’. - High Polling Rate: Use a gaming mouse with a high polling rate (1000Hz is common) to ensure rapid input reporting to your PC.

Network Optimizations
For online gaming, a stable and fast connection is key.
- Use an Ethernet Cable: A wired connection is almost always more stable and faster than Wi-Fi, reducing ping and packet loss.
- Disable Nagle’s Algorithm: This algorithm can cause small delays in network communication. Search for guides on how to disable it via Registry Editor for specific games, but proceed with caution as incorrect changes can cause system instability.
Disable Unnecessary Services
Some Windows services run in the background and consume resources without providing much benefit for gamers.
- Search for ‘Services’ in the Start Menu and open it.
- Carefully review the list. Services like ‘Print Spooler’ (if you don’t have a printer) or ‘Fax’ can often be set to ‘Disabled’ or ‘Manual’ startup type. Always research a service before disabling it to avoid system issues.
Conclusion
Optimizing Windows 11 for gaming is a multi-step process that involves tweaking various system, graphics, and power settings. By diligently following these recommendations, you can significantly boost your FPS, reduce input lag, and enjoy a much smoother, more responsive gaming experience. Remember to restart your PC after making significant changes and test your performance in your favorite games to feel the difference.


