


How to optimize Windows 11 for peak gaming performance and minimal input lag?

Unlocking Peak Gaming Performance in Windows 11
Windows 11, with its modern interface and under-the-hood improvements, offers a solid foundation for gaming. However, out-of-the-box settings aren’t always tailored for maximum performance and responsiveness. By fine-tuning various aspects of your operating system, you can significantly boost frame rates, smooth out gameplay, and minimize input lag, giving you a competitive edge.
This guide will walk you through essential optimizations, from simple toggles to more advanced system adjustments, ensuring your Windows 11 machine is a gaming powerhouse.
Core Windows Settings for Gamers
Activate Game Mode
Windows 11 includes a built-in Game Mode designed to prioritize your gaming experience. When active, it tells Windows to optimize your PC for gaming by suspending background tasks and allocating more CPU and GPU resources to your game.
- Go to
Settings > Gaming > Game Mode. - Ensure the toggle for “Game Mode” is set to On.
Enable Hardware-accelerated GPU Scheduling
This feature allows your GPU to manage its own video memory more efficiently, potentially reducing latency and improving performance. While not every system or game will see a dramatic difference, it’s generally beneficial for modern hardware.
- Navigate to
Settings > System > Display > Graphics > Change default graphics settings. - Turn On “Hardware-accelerated GPU scheduling.”
- Restart your PC for changes to take effect.

Optimize Graphics Performance for Specific Games
You can tell Windows 11 to use a specific GPU or prioritize certain performance settings for individual games.
- Go to
Settings > System > Display > Graphics. - Click “Add an app” or choose an app from the list.
- Select your game, click “Options,” and choose “High performance” to ensure it uses your dedicated GPU (if applicable).
Set Your Power Plan to High Performance or Ultimate Performance
By default, Windows might use a balanced power plan, which can limit CPU and GPU clocks to save energy. For gaming, you want maximum power.
- Search for “Edit power plan” in the Windows search bar and open it.
- Click “Power Options” in the address bar.
- Select “High performance.” If you don’t see it, click “Show additional plans.”
- For even more aggressive performance (often hidden), you might need to activate the “Ultimate Performance” plan via Command Prompt: Type
powercfg -duplicatescheme e9a42b02-d5df-448d-aa00-03f5064f6974and press Enter. Then, select it from the Power Options.
Minimizing Background Interference
Disable Unnecessary Background Apps
Many apps run in the background, consuming CPU, RAM, and network resources. Shutting them down frees up resources for your game.
- Go to
Settings > Apps > Apps & features. - Find apps you don’t need running constantly, click the three dots, select “Advanced options,” and set “Let this app run in background” to Never.
Manage Startup Apps
Programs that launch automatically with Windows can slow down boot times and hog resources.
- Press
Ctrl + Shift + Escto open Task Manager. - Go to the “Startup apps” tab.
- Disable any non-essential apps by right-clicking them and selecting “Disable.”

Turn Off Notifications and Focus Assist
Notifications can be distracting and cause micro-stutters. Focus Assist (now renamed to Focus in Windows 11 22H2+) helps silence them.
- For Notifications: Go to
Settings > System > Notificationsand turn off notifications for apps you don’t want interrupting your game. - For Focus: Go to
Settings > System > Focus. You can set it to turn on automatically when you’re playing a game or manually activate it.
Driver and System Maintenance
Update Graphics Drivers Regularly
This is arguably the most critical step for gaming performance. NVIDIA, AMD, and Intel frequently release new drivers that offer performance improvements and bug fixes for the latest games.
- Visit your GPU manufacturer’s website (NVIDIA GeForce Experience, AMD Radeon Software, or Intel Driver & Support Assistant) to download and install the latest drivers.

Update Chipset Drivers
While less frequent, updated chipset drivers can improve system stability and overall performance, especially for new CPU generations.
- Visit your motherboard manufacturer’s website or the website of your CPU manufacturer (Intel or AMD) to download the latest chipset drivers.
Optimize Storage Drives
For SSDs, ensure TRIM is enabled (it usually is by default). For HDDs, regular defragmentation can improve load times, though SSDs do not need defragmentation.
- Search for “Defragment and Optimize Drives” in Windows search.
- Select your drives and click “Optimize.” Windows will handle SSDs with TRIM and HDDs with defragmentation appropriately.
Advanced Tweaks for Minimal Input Lag
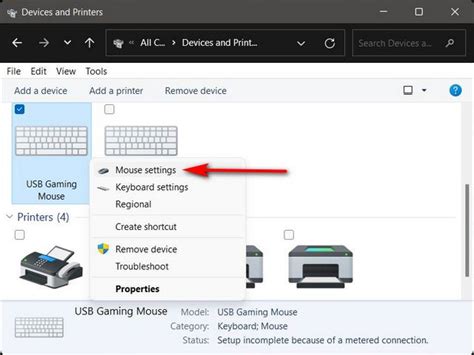
Disable Mouse Pointer Precision
While it sounds helpful, “Enhance pointer precision” actually adds acceleration to your mouse movements, making precise aiming difficult and introducing inconsistent input. For gaming, you want a 1:1 raw input.
- Search for “Mouse settings” and open it.
- Click “Additional mouse settings.”
- Go to the “Pointer Options” tab.
- Uncheck “Enhance pointer precision.”
Disable Fullscreen Optimizations (Game-Specific)
Windows 10/11 introduced fullscreen optimizations that can sometimes add a layer of processing that introduces minor input lag or compatibility issues for older games. For some games, disabling this can help.
- Locate the game’s executable file (usually in its installation folder).
- Right-click the executable, select “Properties.”
- Go to the “Compatibility” tab.
- Check the box for “Disable fullscreen optimizations.”
- Click “Apply” and “OK.”
Consider Disabling Nagle’s Algorithm (Advanced)
Nagle’s algorithm bundles small packets of data before sending them, which can reduce network overhead but potentially increase latency for real-time applications like online gaming. Disabling it requires a registry edit, proceed with caution.
- Open Registry Editor (
regeditfrom Run dialog). - Navigate to
HKEY_LOCAL_MACHINESYSTEMCurrentControlSetServicesTcpipParametersInterfaces. - Find the subfolder that matches your network adapter’s IP address.
- Create two new DWORD (32-bit) Values:
TcpAckFrequencyandTCPNoDelay. Set both their values to 1. - Restart your PC.
Conclusion
By systematically applying these optimizations, you can transform your Windows 11 machine into a finely tuned gaming rig. Remember that not every tweak will yield massive improvements on every system or for every game, so it’s best to apply changes gradually and test their impact. Regular driver updates and occasional system clean-ups will help maintain your peak gaming performance over time, ensuring a smooth and responsive experience in all your favorite titles.


