How to troubleshoot mod conflicts for stable, crash-free gaming?
The Unseen Enemy: Understanding Mod Conflicts
Modding can transform your favorite games, offering new content, enhanced graphics, and fresh gameplay mechanics. However, with great power comes great potential for chaos. As you add more modifications, the likelihood of them clashing – or “conflicting” – increases significantly. These conflicts are the primary culprits behind crashes, freezes, glitches, and corrupted save files, turning an exciting modded playthrough into a frustrating debugging session. Understanding why conflicts occur is the first step to resolving them.
Typically, conflicts arise when two or more mods attempt to modify the same game asset, script, or record in incompatible ways. This could be anything from changing the same texture file to altering a core game mechanic or adding conflicting entries to a character’s inventory. The game’s engine often struggles to decide which change to prioritize, leading to unpredictable behavior or outright failure.
Symptoms and Preparation: What to Look For
Identifying a mod conflict often starts with recognizing its symptoms. Common indicators include:
- Frequent Crashes to Desktop (CTD): Especially upon loading a save, entering a new area, or performing a specific action.
- Unexplained Freezes or Stuttering: The game locks up intermittently or completely.
- Graphical Glitches: Missing textures, flickering objects, odd visual artifacts.
- Broken Quests or Mechanics: Non-player characters (NPCs) not behaving correctly, quest objectives not updating, or game features failing.
- Corrupted Save Files: Saves failing to load or exhibiting severe issues when loaded.
Before diving into troubleshooting, preparation is key:
- Backup Your Saves: Always make copies of your save files. Modding is inherently risky, and a good backup can save hours of progress.
- Understand Your Mod Manager: Whether you use Vortex, Mod Organizer 2, Nexus Mod Manager, or a game-specific tool, know how to enable, disable, install, and uninstall mods cleanly.
- Isolate the Problem: If the issue started after installing new mods, those are your prime suspects.
Common Troubleshooting Techniques
1. The Golden Rule: One-By-One Testing (or Binary Search)
This is arguably the most effective, albeit time-consuming, method. If you have a large mod list, a binary search approach can speed things up:
- Disable half of your mods.
- Test the game. If the problem persists, the conflict is in the enabled half. If it’s gone, the conflict is in the disabled half.
- Repeat the process, halving the problematic group each time until you pinpoint the conflicting mod(s).
- Once you find a problematic mod, try to enable other mods with it to identify the specific conflict.
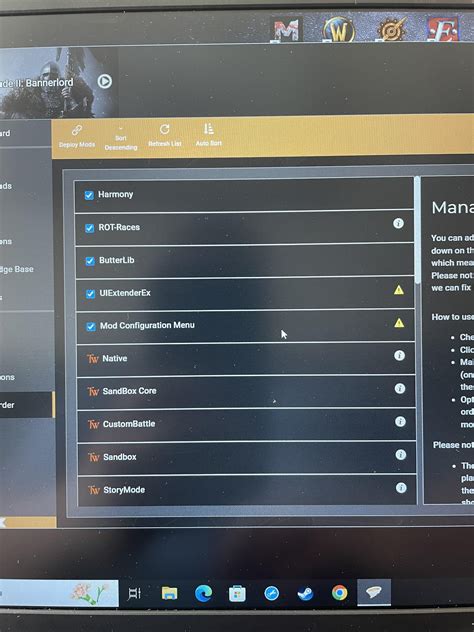
2. Check Load Order and Priority
Many games, especially RPGs like Skyrim or Fallout, rely heavily on a proper “load order.” This dictates which mod’s changes take precedence when multiple mods alter the same thing. Mod managers often have built-in sorting tools (like LOOT for Bethesda games) that can automatically optimize your load order. Always run these tools after installing new mods.
3. Read Mod Descriptions and Requirements
Mod authors often explicitly state known conflicts, required patches, or specific installation instructions. Ignoring these can lead directly to problems. Look for: “Requires X mod,” “Incompatible with Y mod,” or “Install patch Z if using together.”
4. Install Compatibility Patches
For popular mods that affect similar aspects of a game, dedicated compatibility patches are often created by mod authors or the community. These patches act as bridges, allowing two otherwise conflicting mods to work together harmoniously. Check the files section of a mod’s page for such patches.
5. Consult Error Logs (If Available)
Some games or modding frameworks generate error logs. These text files often contain crucial information about what went wrong, including the specific file or mod that caused a crash. Learning to interpret these logs can be invaluable. For example, a log might point to a missing master file for a mod or a script error in a particular plugin.
Advanced Troubleshooting and Prevention
1. Clean Your Save Files
Sometimes, mod conflicts can “bake” into your save files, meaning even after disabling the problematic mod, the issue persists. Tools like FallrimTools for Bethesda games can clean orphaned scripts and entries from your saves, potentially resolving lingering issues.
2. Reinstall Mods or Even the Game
If you’re truly stuck, a complete reinstallation of problematic mods (or even the entire game and all mods) can be a drastic but effective last resort. Ensure you’re performing a “clean” reinstall, meaning all associated files and folders are deleted before reinstallation.

3. Engage with the Community
Modding communities on Nexus Mods, Reddit, or game-specific forums are invaluable resources. Describe your problem clearly, list your mod setup, and mention troubleshooting steps you’ve already taken. Chances are, someone else has faced a similar issue and can offer advice.
Preventing Future Conflicts
- Install Mods Gradually: Don’t install dozens of mods at once. Add a few, test them, and then add more.
- Read Everything: Pay close attention to mod descriptions, requirements, and comments sections.
- Keep Mods Updated: Outdated mods can lead to conflicts, especially after game patches.
- Be Mindful of Overlaps: If two mods do very similar things, they are highly likely to conflict. Choose one or find a patch.

Conclusion
Troubleshooting mod conflicts requires patience, methodical testing, and a willingness to learn. While it can be daunting at first, mastering these techniques will empower you to create truly stable and enjoyable modded game experiences. Remember to always back up your work, consult your resources, and approach each conflict as a puzzle to be solved. Happy modding, and may your games run crash-free!