


Optimize Docker image build size for faster deployments?

Why Docker Image Size Matters for Faster Deployments
In the world of containerization, Docker images are the fundamental building blocks of your applications. While Docker offers immense benefits in portability and consistency, neglecting image size can significantly hamper your deployment speed, increase storage costs, and even introduce security vulnerabilities. Large images take longer to build, push, pull, and ultimately deploy, creating bottlenecks in your CI/CD pipelines and consuming more bandwidth and disk space.
Optimizing Docker image size isn’t just about saving a few megabytes; it’s about streamlining your entire development and operations workflow. Smaller images lead to faster iteration cycles, more efficient resource utilization, and a more robust deployment strategy.
Foundational Principles for Slimming Down Docker Images
Achieving smaller Docker images relies on several core principles that guide your Dockerfile construction and overall approach to containerization:
- Choose a Minimal Base Image: Starting with a lightweight base image is arguably the most impactful step. Instead of general-purpose distributions, opt for specialized, minimal images.
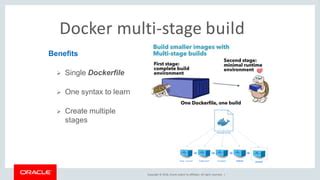
- Leverage Multi-stage Builds: This powerful Docker feature allows you to separate the build environment (compilers, build tools, development dependencies) from the runtime environment, ensuring only essential artifacts are included in the final image.
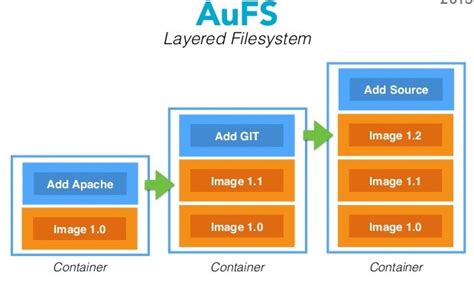
- Minimize Layers: Each command in a Dockerfile (
RUN,COPY,ADD) creates a new layer. While layers are essential for caching, too many unnecessary layers can add bloat. Combine related commands where possible. - Use
.dockerignoreEffectively: Just like.gitignore,.dockerignoreprevents irrelevant files and directories (like.git,node_modulesin development, build caches) from being added to the build context, reducing transfer time and final image size.
Practical Techniques for Size Reduction
Multi-stage Builds in Action
Multi-stage builds are a game-changer. Here’s a conceptual example for a Go application:
# Stage 1: Build the application
FROM golang:1.18-alpine AS builder
WORKDIR /app
COPY go.mod go.sum ./
RUN go mod download
COPY . .
RUN CGO_ENABLED=0 GOOS=linux go build -a -o /app/my-app

# Stage 2: Create the final, minimal image
FROM alpine:latest
WORKDIR /app
COPY --from=builder /app/my-app .
EXPOSE 8080
CMD ["/app/my-app"]
In this example, the golang:1.18-alpine image, compilers, and source code are only present during the build stage. The final image starts from a fresh alpine:latest and only copies the compiled binary, resulting in a significantly smaller runtime image.
Selecting the Right Base Image
- Alpine: Known for its tiny footprint (around 5-7MB), Alpine Linux is an excellent choice for applications that don’t require glibc or extensive system tools. It uses musl libc.
- Distroless: Offered by Google, distroless images contain only your application and its runtime dependencies. They are even smaller than Alpine and provide enhanced security by minimizing the attack surface (no shell, no package manager). Ideal for compiled languages like Go, Java, or Node.js.
- Slim Variants: Many official images (e.g.,
node:16-slim,python:3.9-slim-buster) offer stripped-down versions of larger distributions, providing a balance between size and functionality.
Consolidating RUN Commands and Cleaning Up
Avoid a new RUN command for every step. Combine them using && and ensure you clean up temporary files in the same layer. For instance, when installing packages with apt-get:
# Bad example: creates multiple layers and leaves cache
RUN apt-get update
RUN apt-get install -y --no-install-recommends some-package
RUN rm -rf /var/lib/apt/lists/*

# Good example: one layer, cleaned up
RUN apt-get update &&
    apt-get install -y --no-install-recommends some-package &&
    rm -rf /var/lib/apt/lists/*
For Node.js projects, ensure you remove build dependencies (like devDependencies) and clear npm/yarn caches if they’re not needed in the final image.
Advanced Optimizations and Considerations
Build Caching Strategies
Docker caches layers. To maximize cache hits, place commands that change frequently (like COPY . .) later in your Dockerfile. Commands that change infrequently (like installing base dependencies) should be placed earlier. This ensures that Docker can reuse as many cached layers as possible, speeding up subsequent builds.
Squashing Layers (Use with Caution)
While multi-stage builds are generally preferred, you can technically squash multiple layers into one using docker build --squash (an experimental feature) or external tools like docker-squash. However, this often comes at the cost of losing build cache benefits for intermediate layers and can make debugging harder. It’s usually a last resort for specific scenarios.
Conclusion
Optimizing Docker image size is a crucial practice for any modern development workflow. By adopting strategies like multi-stage builds, selecting minimal base images, meticulously cleaning up dependencies, and intelligently structuring your Dockerfiles, you can significantly reduce image bloat. The payoff is substantial: faster deployments, lower resource consumption, reduced bandwidth usage, and improved security. Integrating these best practices into your CI/CD pipeline will lead to more efficient, cost-effective, and robust containerized applications.


