


Optimize Windows 11 for gaming: Key settings for max FPS & low latency?
Windows 11, with its sleek interface and modern architecture, offers a robust platform for gaming. However, out-of-the-box settings aren’t always optimized for competitive play or achieving the highest possible frame rates. By fine-tuning a few key system configurations, you can significantly boost your gaming performance, reduce input latency, and unlock the full potential of your hardware.
The Foundation: Drivers & Updates
Before diving into specific Windows 11 settings, ensure your system’s drivers are up-to-date, especially your graphics card drivers. NVIDIA, AMD, and Intel frequently release game-ready drivers that offer performance improvements and bug fixes for the latest titles. Regularly check their official websites or use their respective software (GeForce Experience, AMD Adrenalin) to keep drivers current.
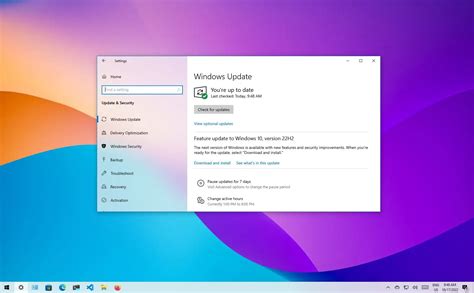
While Windows Updates are crucial for security and stability, they can sometimes run in the background and consume resources. Consider pausing updates during your gaming sessions or scheduling them for off-peak hours.
Core Windows 11 Gaming Features
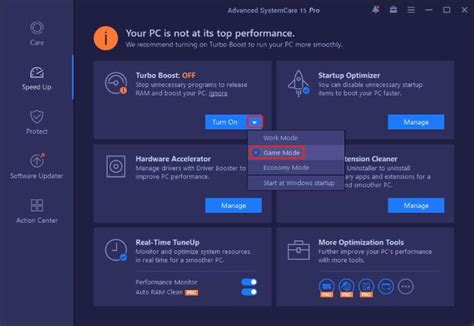
Game Mode Activation
Windows 11’s Game Mode is designed to optimize your PC for gaming by prioritizing game processes and suspending background tasks. To enable it:
- Go to Settings > Gaming > Game Mode.
- Toggle the Game Mode switch to On.
This simple setting can make a noticeable difference in consistent frame rates and overall system responsiveness during gameplay.
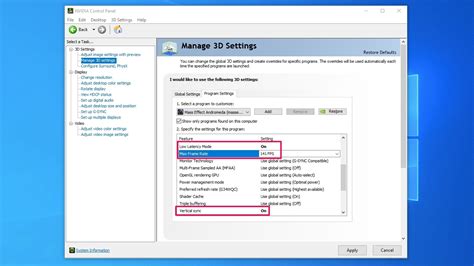
Graphics Settings & Hardware-accelerated GPU Scheduling
This feature can significantly reduce input latency and improve performance by allowing your GPU to manage its VRAM more efficiently. While not beneficial for all systems, many modern GPUs see a boost.
- Go to Settings > System > Display > Graphics.
- Under “Default graphics settings”, click on Change default graphics settings.
- Toggle Hardware-accelerated GPU scheduling to On. Restart your PC for changes to take effect.
- Back on the main Graphics page, you can also add specific games (or browse for their .exe files) and set their graphics preference to “High performance” for dedicated GPU usage.
Power & Performance Tweaks
Adjust Power Plan for Maximum Performance
By default, Windows might be set to a balanced power plan, which can limit your CPU’s performance. For gaming, you want every ounce of power.
- Search for “Choose a power plan” in the Windows search bar and open it.
- Select High Performance. If you have it, an Ultimate Performance plan might be available (often hidden, sometimes available in advanced settings or via a specific command prompt command –
powercfg -duplicatescheme e9a42b02-d5df-448d-aa00-03f147496701).
Disable Background Apps and Notifications
Apps running in the background and constant notifications consume precious CPU cycles and RAM. Minimize these distractions and resource hogs:
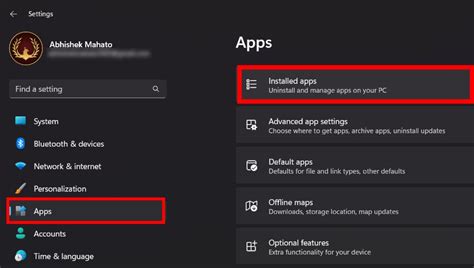
- Background apps: Go to Settings > Apps > Installed apps. For apps you don’t need running constantly, click the three dots, select “Advanced options,” and set “Let this app run in background” to “Never.”
- Notifications: Go to Settings > System > Notifications. Turn off “Notifications” entirely or disable specific app notifications that bother you.
- Startup Apps: Check Task Manager > Startup apps and disable unnecessary programs from launching with Windows.
Network & Storage Optimization
Optimize Network Settings
For online gaming, a stable, low-latency connection is paramount. Ensure you’re using an Ethernet cable instead of Wi-Fi for critical gaming. You can also disable unnecessary network services or prioritize your gaming traffic through QoS (Quality of Service) settings on your router, if available.
- Ethernet over Wi-Fi: Always prefer a wired connection for consistent ping.
- Router QoS: If your router supports it, prioritize your gaming PC’s traffic.
Storage Health and Speed
Modern games often have large file sizes and benefit greatly from fast storage. An SSD (Solid State Drive) is virtually essential for quick load times. If you’re still using an HDD for games, regularly defragment it (though not for SSDs!). Run Disk Cleanup to remove temporary files that can slow down your system.
- SSDs: Ensure your games are installed on an SSD for optimal load times.
- Disk Cleanup: Search for “Disk Cleanup” and run it to remove temporary files.
Visual Effects & UI Adjustments
Adjust Visual Effects for Performance
Windows 11’s eye candy can consume resources that could be better spent on your game.
- Search for “Adjust the appearance and performance of Windows” and open it.
- Under the “Visual Effects” tab, select Adjust for best performance. This will turn off most animations and visual enhancements.
- Alternatively, you can select “Custom” and manually uncheck specific effects like “Animate controls and elements inside windows,” “Fade or slide menus into view,” or “Show shadows under windows.”
Disable Transparency Effects
The transparent elements in the Windows 11 UI, like the Start Menu and Taskbar, also require a small amount of GPU processing. Disabling them can free up a tiny bit of overhead.
- Go to Settings > Personalization > Colors.
- Toggle Transparency effects to Off.
Conclusion
Optimizing Windows 11 for gaming is an ongoing process, not a one-time setup. By implementing these key settings – from enabling Game Mode and hardware-accelerated GPU scheduling to adjusting power plans and disabling unnecessary background processes – you can significantly enhance your gaming experience with higher FPS and lower latency. Remember to regularly update your drivers and periodically review these settings to ensure your PC remains a finely tuned gaming machine.