


Optimizing Windows for maximum gaming FPS: what settings to tweak?
Unleashing Your PC’s Gaming Potential
Windows is a versatile operating system, but its default settings aren’t always geared for peak gaming performance. By tweaking a few key configurations, you can significantly reduce input lag, prevent stuttering, and ultimately boost your Frames Per Second (FPS) for a smoother, more immersive gaming experience. This guide will walk you through the essential adjustments to transform your PC into a gaming powerhouse.
Power Plan Optimization: The Foundation of Performance
One of the most critical adjustments is ensuring your system is set to a performance-oriented power plan. Windows often defaults to ‘Balanced’ to conserve energy, which can throttle your CPU and GPU during intense gaming sessions.
How to Tweak Your Power Plan:
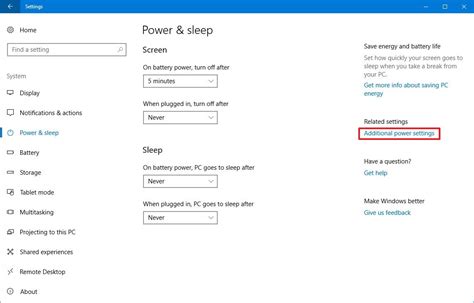
- Go to Control Panel > Hardware and Sound > Power Options.
- Select High Performance. If you have it, choose Ultimate Performance (this plan is often hidden and can be enabled via a specific command in PowerShell for Windows 10/11 Pro users, though ‘High Performance’ is usually sufficient).
- Click Change plan settings next to your chosen plan, then Change advanced power settings.
- Ensure ‘Processor power management’ is set to 100% for both minimum and maximum processor state.
Game Mode and Graphics Settings: A Direct Boost
Windows 10 and 11 offer a ‘Game Mode’ designed to prioritize gaming processes. Additionally, you can specify high-performance graphics settings for individual games.
Enable Game Mode:
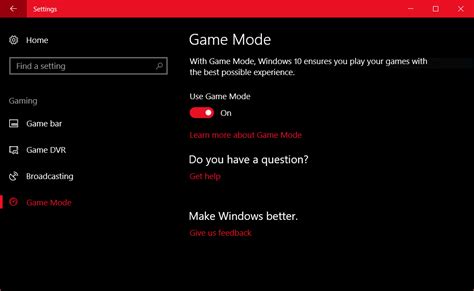
- Go to Settings > Gaming > Game Mode.
- Ensure Game Mode is toggled On.
Customize Graphics Performance:
- Go to Settings > System > Display > Graphics (or search for “Graphics settings”).
- Click Browse and add your game’s executable file (e.g., from its installation directory).
- Select the added game, click Options, and choose High performance.
While you’re at it, disable any unnecessary background applications that might consume resources. Go to Settings > Apps > Apps & features and manage background app permissions, or check Task Manager’s ‘Startup’ tab.
Visual Effects and Notifications: Decluttering for Speed
Fancy visual effects and constant notifications can silently eat into your system resources. Turning them down or off can free up valuable CPU and GPU cycles.
Adjust Visual Effects:
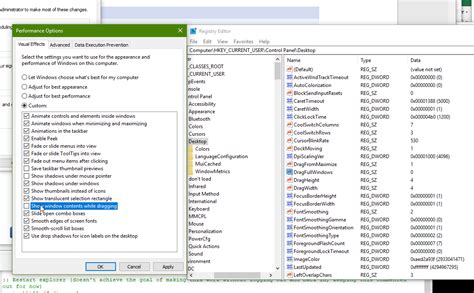
- Search for “Adjust the appearance and performance of Windows” and open it.
- Under the Visual Effects tab, select Adjust for best performance. This will disable most animations and shadows. You can also custom-select which ones you want to keep.
Silence Notifications:
- Go to Settings > System > Notifications and toggle off ‘Get notifications from apps and other senders’ if you want a complete silence.
- Consider enabling Focus Assist (found in the same Notifications section or via the Action Center) to suppress notifications automatically when gaming.
Driver Updates and Startup Programs: Essential Maintenance
Outdated graphics drivers are a common culprit for poor gaming performance. Similarly, too many programs launching with Windows can bog down your system from the start.
Update Graphics Drivers:
- Visit the official website for your GPU manufacturer (NVIDIA, AMD, or Intel) and download the latest drivers for your specific card. Perform a clean installation if possible.
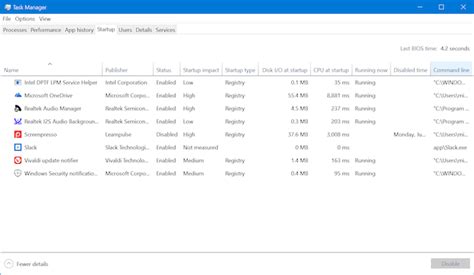
Manage Startup Programs:
- Open Task Manager (Ctrl + Shift + Esc).
- Go to the Startup tab.
- Disable any non-essential programs that launch with Windows by right-clicking them and selecting Disable. Keep essential drivers or security software enabled.
Disk Maintenance: Keeping Storage Optimized
While less critical for SSDs, optimizing your storage drive can still offer minor benefits, especially for traditional Hard Disk Drives (HDDs).
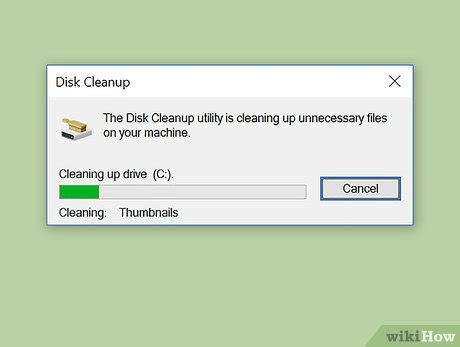
Disk Cleanup:
- Search for “Disk Cleanup” and run it.
- Select your primary drive (usually C:), then check categories like ‘Temporary files’, ‘Recycle Bin’, and ‘Delivery Optimization Files’ to free up space.
Defragment and Optimize Drives:
- Search for “Defragment and Optimize Drives” and open it.
- For HDDs, select the drive and click Optimize. This reorganizes fragmented data for faster access.
- Important: Do NOT defragment SSDs. SSDs handle data differently, and defragmentation can reduce their lifespan without performance benefits. Windows usually detects SSDs and performs ‘TRIM’ operations instead, which is beneficial.
Conclusion: Sustaining Peak Performance
Optimizing Windows for gaming is an ongoing process, not a one-time fix. Regularly updating drivers, managing background processes, and performing occasional system cleanups will help maintain your desired FPS and ensure a consistently smooth gaming experience. Remember, while these tweaks can significantly help, they won’t magically turn a low-end PC into a high-end one. Always balance performance with your hardware’s capabilities and personal preferences for visual quality.


