What are the top troubleshooting steps for mod conflicts in heavily modded games?
Venturing into the world of heavily modded games offers unparalleled customization and replayability, but it inevitably introduces the challenge of mod conflicts. When dozens or even hundreds of mods interact, seemingly minor incompatibilities can lead to crashes, broken quests, or visual glitches. Navigating this can feel like a labyrinth, but with a structured approach, most conflicts can be identified and resolved.
Understand the Nature of Mod Conflicts
Before diving into solutions, it’s crucial to understand what a mod conflict is. Essentially, it occurs when two or more mods attempt to modify the same game asset, record, or script in incompatible ways. This could be anything from changing the same texture file to altering core game mechanics or world spaces. Your goal is to identify which mods are competing and how to make them coexist harmoniously.
Essential First Steps
1. Verify Game Files
Before blaming your mods, ensure your base game installation is pristine. Use your game launcher (e.g., Steam, GOG, Epic Games Store) to verify the integrity of game files. This can fix corrupted vanilla files that might be mistaken for mod issues.
2. Update Mods and Mod Managers
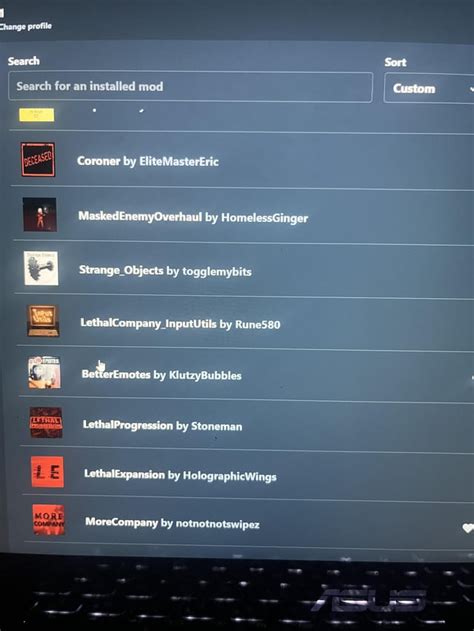
Outdated mods are a common source of conflicts. Always ensure your mods are up-to-date, especially after a game patch. Similarly, keep your mod manager (e.g., Mod Organizer 2, Vortex, NMM) updated, as newer versions often include better conflict detection and management features.
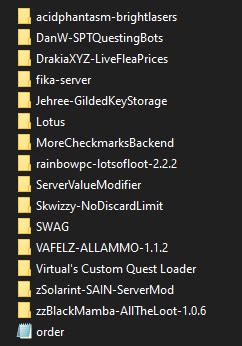
The Golden Rule: Load Order Management
The single most critical aspect of troubleshooting mod conflicts is your load order. This dictates the order in which your game loads mod files, with later-loaded files typically overwriting earlier ones. A well-organized load order ensures that intended overrides occur and unintended ones are minimized.
Tools for Load Order
- LOOT (Load Order Optimisation Tool): This indispensable tool automatically sorts your plugins (ESPs, ESMs, ESLs) based on predefined rules and user-submitted metadata. It also identifies dirty edits, missing masters, and general warnings. Always run LOOT as a first step when adjusting load order.
- Mod Managers: Modern mod managers like Mod Organizer 2 and Vortex offer excellent control over both install order (for loose files) and plugin load order. Utilize their built-in sorting and conflict highlighting features.
Logical Grouping
Beyond automated sorting, apply logical grouping. Generally, put foundational mods (e.g., script extenders, unofficial patches) first, followed by large overhauls, then smaller content additions, new items, textures, and finally patches. Graphics mods often load later, overwriting earlier textures as desired.
Isolate the Problem: The 50/50 Method
If your game is crashing or exhibiting strange behavior, and LOOT doesn’t flag obvious issues, you need to isolate the problematic mod(s). The 50/50 method is highly effective, especially with a large mod list:
- Disable half of your mods.
- Test the game.
- If the problem persists, the conflict is in the enabled half. Disable half of *those* mods and retest.
- If the problem disappears, the conflict is in the disabled half. Re-enable half of *those* and test again.
- Repeat this process, narrowing down the culprit until you identify the specific mod or pair of mods causing the issue.

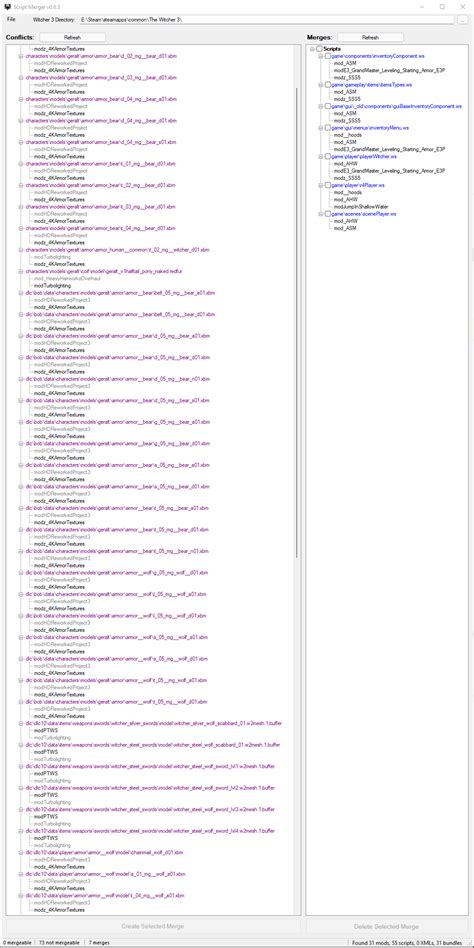
Delving Deeper: Conflict Resolution Tools
Once you’ve identified conflicting mods, you might need more advanced tools to resolve them.
Merge Patches
For games like Skyrim or Fallout, tools like xEdit (FO4Edit, SSEEdit) are invaluable. They allow you to view specific records that mods are altering. By creating a ‘merge patch’ (or ‘bashed patch’ with Wrye Bash), you can combine conflicting changes into a single plugin, ensuring that all desired modifications are present without one mod completely overwriting another.
Manual Patching
In some cases, especially with unique or niche mods, you might need to create a small patch yourself using xEdit. This involves creating a new plugin that specifically resolves conflicts by forwarding desired changes from multiple mods into a single record. This is an advanced technique but offers ultimate control.

Clean Slate: Reinstallation and Fresh Profiles
Sometimes, despite all efforts, a heavily modded game can become irrecoverably corrupted due to numerous experimental installations and removals. In such cases, a complete clean slate might be the only solution:
- Uninstall the game.
- Manually delete any leftover game folders (usually found in SteamApps and My Games documents).
- Reinstall the game.
- Start a fresh mod profile in your mod manager.
- Install mods incrementally, testing frequently, and addressing conflicts as they arise.
Conclusion
Troubleshooting mod conflicts requires patience and a systematic approach. By understanding the basics of conflicts, diligently managing your load order, using isolation techniques, and leveraging powerful conflict resolution tools, you can transform a chaotic mod list into a stable, customized gaming experience. Remember to always back up your save games and mod profiles before making significant changes.