


What’s the best MO2 load order to prevent Skyrim CTDs?

The Quest for Stability: Mastering Your MO2 Load Order
Skyrim’s enduring popularity is inextricably linked to its vibrant modding community, allowing players to transform the game in countless ways. However, with great power comes great responsibility—specifically, the responsibility of managing your mod load order to prevent the dreaded Crash to Desktop (CTD). A well-ordered Mod Organizer 2 (MO2) setup is the bedrock of a stable modded Skyrim experience, minimizing conflicts and maximizing playtime.
Understanding Skyrim CTDs and Load Order Fundamentals
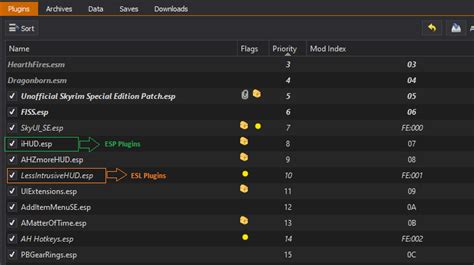
CTDs in modded Skyrim often stem from resource conflicts, missing masters, memory issues, or improperly ordered plugin files. When two mods try to modify the same game record (e.g., an item’s stats, a world space edit), the game needs to know which change to apply. This is where load order becomes critical: the plugin loaded “later” (lower down in the list) wins, overwriting changes from plugins loaded earlier. MO2 further complicates (and simplifies) this by managing both file priority (left pane) and plugin priority (right pane).
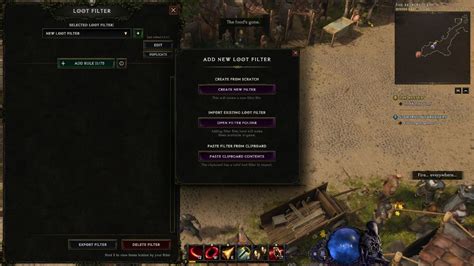
Automating Your Initial Sort with LOOT
Your journey to a stable load order begins with LOOT (Load Order Optimisation Tool). LOOT analyzes your installed plugins, identifies dependencies, and sorts them into a logical, community-maintained order. It’s an indispensable first step that resolves many common conflicts automatically. While powerful, LOOT isn’t a silver bullet; it provides a strong foundation but can’t account for every custom patch or unique mod interaction.
Manual Load Order Principles: Beyond LOOT
After LOOT has done its work, you’ll often need to make manual adjustments, particularly for specific patches or mods that explicitly state their required position. Here are some general principles:
- ESM/Masters: These foundational files (like Skyrim.esm, Update.esm, DLCs) should always load first. LOOT handles this automatically.
- Large Overhauls: Mods that change a lot of things (e.g., Requiem, SkyRe) often need to load early, after masters, or have very specific placement instructions.
- New Content (Worlds, Quests): Mods adding new areas or questlines often load early.
- Gameplay Mechanics: Mods altering combat, magic, perks, etc., typically come next.
- NPC/Follower Overhauls: Changes to character appearances or AI.
- Texture/Mesh Replacers: For the MO2 left pane, these often need higher priority to ensure desired textures overwrite others. In the right pane, texture/mesh replacer ESPs (if they exist) usually load later.
- Weapon/Armor Mods: New items or retextures.
- Environment & Weather: Mods like ELFX, Climates of Tamriel.
- Bashed/Smashed Patches: These merge various mod changes and should always load last.
Remember that MO2 has two panes: the left pane manages file priority (which mod’s assets get used), and the right pane manages plugin (ESP/ESM/ESL) load order. Both are crucial.

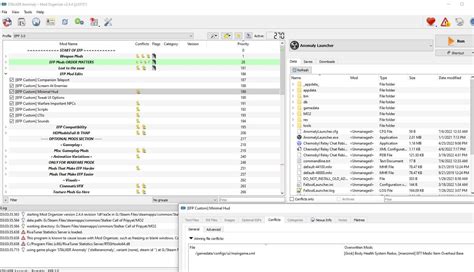
Conflict Resolution: The Heart of Stability
Even with LOOT and manual adjustments, conflicts will arise. Identifying and resolving these is paramount. MO2’s “Conflicts” column (in the right pane) highlights which plugins are being overwritten or are overwriting others. This is your first visual cue.
Merge Patches (Bashed/Smashed)
For minor record conflicts, especially leveled lists, Wrye Bash’s Bashed Patch (for older Skyrim versions) or Mator Smash’s Smashed Patch are invaluable. These tools combine various changes from multiple mods into a single plugin, reducing the overall plugin count and resolving common conflicts automatically. They should always be generated last and placed at the very end of your load order.
Advanced Conflict Resolution with SSEEdit (xEdit)
For deeper, more specific conflicts that merge patches can’t handle, SSEEdit (or xEdit for older versions) is your most powerful weapon. SSEEdit allows you to view exactly which records are being altered by each plugin and how they interact. By loading conflicting plugins, you can manually create a “patch” plugin that resolves these specific conflicts by choosing which mod’s changes to prioritize, or even blending elements from multiple mods.
- Cleaning Masters: Use SSEEdit to “clean” the official master files (Skyrim.esm, Update.esm, etc.) of unnecessary ITM (Identical To Master) and UDR (Undeleted References) records. This is a common stability fix.
- Identifying Load Order Issues: If a mod isn’t working as expected, open it and its dependencies in SSEEdit. You can often see immediately if another mod is overwriting crucial records.
Memory and Engine Fixes
Beyond load order, ensuring your game can handle the demands of heavy modding is crucial. For Skyrim Special Edition (SSE), SKSE64 (Skyrim Script Extender 64) is essential, and with it, SSE Engine Fixes (SKSE64 Plugin) is non-negotiable. This mod addresses numerous engine-level bugs and memory limitations, significantly reducing CTDs, especially in heavily modded setups.
The Iterative Process: Test and Refine
Modding is rarely a one-and-done process. Install mods in batches, test frequently, and pay attention to your game’s behavior. If you introduce a new mod and experience CTDs, it’s highly likely that mod, or its interaction with existing mods, is the culprit. Revert, re-evaluate its load order, check for patches, and consult its mod page for specific instructions or known incompatibilities. Tools like Crash Logger or Net Script Framework can provide invaluable logs to pinpoint the exact cause of a crash.

Conclusion: Patience is Key to a Stable Skyrim
Building a stable, heavily modded Skyrim is a rewarding but intricate process. By understanding the fundamentals of MO2, leveraging LOOT for initial sorting, delving into manual adjustments, mastering conflict resolution with merge patches and SSEEdit, and implementing crucial engine fixes, you can drastically reduce CTDs. Remember that patience, meticulous testing, and a willingness to learn are your greatest allies in transforming Skyrim into the personalized epic you envision.


