


Why is my gaming PC overheating? Tips to improve airflow & cooling.
The Heat is On: Understanding Gaming PC Overheating
There’s nothing more frustrating than your gaming PC sputtering, stuttering, or even crashing mid-game, especially when you suspect overheating is the culprit. High temperatures can severely impact your PC’s performance, leading to thermal throttling, reduced lifespan of components, and an overall poor gaming experience. Understanding why your system is running hot is the first step toward implementing effective solutions.
Modern gaming PCs pack powerful components like high-end CPUs and GPUs, which generate a significant amount of heat during intensive tasks. While these components are designed to operate within certain temperature ranges, a breakdown in the cooling system can quickly push them past safe limits. Let’s delve into the most common reasons your battle station might be feeling the burn.
Common Causes of Overheating
1. Dust Accumulation: The Silent Killer
Over time, dust, pet hair, and other debris can build up inside your PC case, coating fans, heatsinks, and components. This layer of grime acts as an insulator, trapping heat and preventing efficient heat dissipation. Dust-clogged fans also have to work harder, becoming less effective and noisier.

2. Inadequate Airflow and Fan Configuration
Your PC case needs a constant flow of fresh, cool air in and hot air out. If your case has too few fans, poorly placed fans, or an unbalanced intake/exhaust setup, hot air can become trapped inside. Cases with solid front panels or restrictive designs can also hinder proper airflow, regardless of fan count.
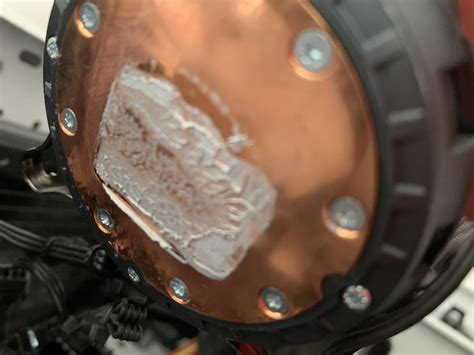
3. Dried or Poorly Applied Thermal Paste
Thermal paste is a crucial compound applied between your CPU (and sometimes GPU) and its cooler’s heatsink. It fills microscopic gaps, improving heat transfer. Over time, thermal paste can dry out, crack, and lose its effectiveness, leading to a poor thermal connection and higher component temperatures.
4. Stock CPU Cooler Limitations
The stock coolers that come with many CPUs are often adequate for general use but can struggle to keep temperatures in check during intense gaming sessions, especially with higher-end processors or if you plan to overclock.
5. Poor Cable Management
A tangle of cables inside your PC case can obstruct airflow, creating ‘dead zones’ where hot air accumulates and cool air cannot reach components effectively.
Tips to Improve Airflow & Cooling
Now that we understand the common culprits, let’s look at actionable steps you can take to cool down your gaming rig and ensure optimal performance.
1. Regular Cleaning is Key
- Dust It Out: Power down and unplug your PC. Use compressed air to blow dust out of your fans (hold the fan blades to prevent over-spinning), heatsinks (especially CPU and GPU), and the entire case interior. Do this outdoors or in a well-ventilated area.
- Filter Maintenance: If your case has dust filters, remove and clean them regularly (wash with water if possible, ensure they are completely dry before re-installing).

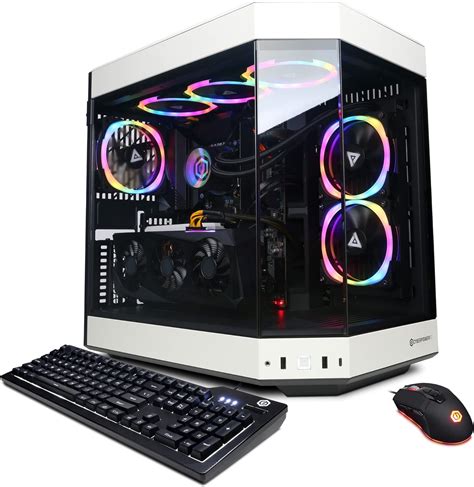
2. Optimize Case Fan Configuration
- Intake vs. Exhaust: Generally, you want positive air pressure inside your case (more intake than exhaust) to minimize dust entry. Common setups include front and bottom fans as intake, and rear and top fans as exhaust.
- Add More Fans: If your case has empty fan mounts, consider adding more fans, prioritizing locations that bring in cool air to your CPU and GPU.
- Fan Speed Control: Use your motherboard’s BIOS/UEFI settings or software like FanControl to create custom fan curves that ramp up fan speed when temperatures rise.
3. Reapply Thermal Paste
If your CPU or GPU temperatures are unusually high despite good airflow, consider reapplying thermal paste. This involves carefully removing the cooler, cleaning off the old paste with isopropyl alcohol, and applying a fresh, pea-sized dot of high-quality thermal paste before reattaching the cooler. This can significantly reduce core temperatures.
4. Upgrade Your CPU Cooler
If you’re still using a stock cooler, upgrading to an aftermarket air cooler or an All-in-One (AIO) liquid cooler can dramatically improve CPU temperatures, especially if you have a high-performance processor or are looking to overclock. Ensure compatibility with your CPU socket and case dimensions.
5. Improve Cable Management
Take the time to tidy up the cables inside your case. Use zip ties or Velcro straps to bundle cables and route them behind the motherboard tray or along the case edges. This clears pathways for airflow and makes your build look much cleaner.

6. Environmental Considerations
- PC Placement: Ensure your PC is not crammed into a tight space, like inside a desk cabinet, where airflow is restricted. Give it plenty of room to breathe.
- Room Temperature: A cooler room will naturally lead to cooler PC components. Consider air conditioning or better ventilation for your gaming space.
7. Monitor Temperatures
Regularly use monitoring software like HWMonitor, MSI Afterburner, or NZXT CAM to keep an eye on your CPU and GPU temperatures. This will help you identify if your cooling solutions are effective and if any component is running hotter than it should be. Ideal CPU temperatures during gaming are typically below 70-75°C, while GPUs can run a bit hotter, often up to 80-85°C, though lower is always better.
Conclusion
Overheating can be a serious issue for gaming PCs, but with a bit of proactive maintenance and strategic adjustments, you can keep your system running cool and performing at its best. By addressing dust, optimizing airflow, and ensuring efficient heat transfer, you’ll not only enjoy smoother gameplay but also extend the life of your valuable hardware. Don’t let your gaming experience suffer from the heat – take control of your PC’s cooling today!


