How to properly clean PC components to prevent overheating & boost performance?
Why PC Cleaning is Crucial for Performance and Longevity
Your personal computer is a complex machine, and like any machine, it requires regular maintenance to perform optimally. Over time, dust, pet hair, and other airborne particles accumulate inside your PC case, forming an insulating layer on crucial components like your CPU heatsink, GPU, and fans. This layer of dust acts as a blanket, trapping heat and preventing proper airflow.
When components run hotter than their optimal operating temperatures, they tend to throttle their performance to avoid damage. This ‘thermal throttling’ directly translates to slower gaming frame rates, longer rendering times, and general system sluggishness. Furthermore, sustained high temperatures can significantly shorten the lifespan of your hardware. A proper cleaning routine is not just about aesthetics; it’s a vital part of maintaining peak performance and ensuring the longevity of your investment.
Essential Tools for a Safe and Effective Clean
Before you begin, gather the necessary tools. Having everything at hand will make the process smoother and safer:
- Compressed Air Can: Essential for blowing dust out of tight spaces. Always use short bursts and hold the can upright.
- Microfiber Cloth: For wiping down surfaces without leaving lint or scratches.
- Small Paintbrush (soft bristles): Great for gently dislodging dust from heatsink fins and fan blades.
- Anti-static Wrist Strap: Highly recommended to prevent electrostatic discharge (ESD) which can damage sensitive components.
- Screwdriver Set: Particularly Phillips head, for opening your PC case and potentially removing components.
- Rubbing Alcohol (90%+ Isopropyl Alcohol): For cleaning thermal paste residue or stubborn grime (use sparingly with cotton swabs).
- Cotton Swabs: For precision cleaning with rubbing alcohol.
- Work Mat: A non-conductive, clean surface to work on.

Step-by-Step Guide to Cleaning Your PC
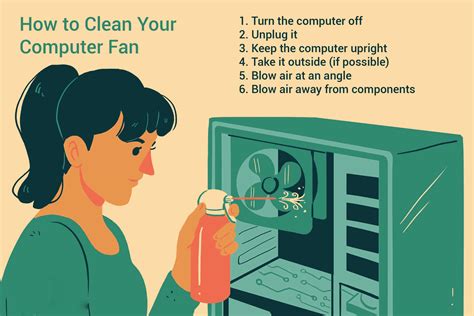
1. Preparation and Safety First
Safety is paramount. Start by completely shutting down your computer, not just putting it to sleep. Unplug all cables from the back: power, monitor, keyboard, mouse, and any other peripherals. Move your PC to a well-ventilated area, preferably outdoors or in a garage, as dust can get everywhere. Wear your anti-static wrist strap and attach it to an unpainted metal part of your PC case or another grounded object.
2. Opening the PC Case
Identify and remove the screws holding the side panel(s) of your PC case. Most modern cases have thumbscrews or a latch system for easy access. Carefully slide or lift off the side panel. Take note of how components are positioned to assist with reassembly.
3. General Dust Removal
Before touching any specific components, use compressed air in short bursts to clear out the bulk of the dust. Start from the top and work your way down, allowing gravity to assist. Pay special attention to fan grilles, vents, and any dust filters. If your case has removable dust filters, take them out and clean them separately with compressed air or by rinsing them gently with water (ensure they are completely dry before reinserting).
4. Cleaning CPU Heatsink and Fan
The CPU cooler is often the most significant dust magnet. Use compressed air to blow dust out of the heatsink fins. While doing this, gently hold the fan blades to prevent them from spinning rapidly, which can damage the fan motor or bearings. If the dust buildup is severe, you might need to carefully remove the CPU cooler (which may require reapplying thermal paste later) for a more thorough clean with a soft brush and compressed air. However, for most routine cleans, external compressed air should suffice.
5. GPU Cleaning
Your graphics card (GPU) also has its own fans and heatsink. Similar to the CPU cooler, use compressed air to clear dust from its heatsink fins and fan blades, again holding the fan blades still. You can use a soft paintbrush to dislodge stubborn dust between the fins. For extremely dusty GPUs, consider carefully removing the card from its PCIe slot for better access, but always handle it by the edges to avoid touching contacts.
![How to Clean your Graphics Card [Complete in 4 Easy Steps]](/images/aHR0cHM6Ly90czQubW0uYmluZy5uZXQvdGg/aWQ9T0lQLjJqbS1UN0pkSlZyY3M4ZU1jeFJPUHdIYUVPJnBpZD0xNS4x.webp)
6. RAM and Storage Devices
While RAM modules and storage drives (SSDs/HDDs) don’t have fans, dust can still settle on them. Gently wipe down RAM sticks and the surfaces of your drives with a clean microfiber cloth. Ensure all cables connected to these components are securely seated after cleaning.
7. Power Supply Unit (PSU)
The power supply unit (PSU) has its own fan and can accumulate a significant amount of dust. For safety reasons, it’s generally not recommended to open the PSU itself, as it contains large capacitors that can hold a charge even when unplugged. Instead, use compressed air to blow dust out through the fan grille and exhaust vents from the outside. If your PSU is bottom-mounted, check and clean its intake filter.

8. Reassembly and Cable Management
Once all components are clean, double-check that everything is properly seated and all cables are reconnected. If you removed any components, ensure they are securely reinstalled. Take this opportunity to improve your cable management. Tidy cables not only look better but also improve airflow, further aiding in temperature control. Replace the side panel(s) and secure them with their screws.
How Often Should You Clean Your PC?
The frequency of cleaning depends on several factors:
- Environment: If you live in a dusty area, have pets, or smoke indoors, you’ll need to clean more often.
- Usage: A PC used heavily for gaming or intensive tasks might accumulate dust faster due to increased airflow.
As a general guideline, a light dusting every 3-6 months is recommended, with a more thorough clean every 6-12 months. Pay attention to your PC’s temperatures and fan noise; if they start increasing, it’s a good indicator that a cleaning is due.
The Benefits: Boosted Performance and Extended Lifespan
After a thorough cleaning, you’ll likely notice several immediate benefits. Your PC’s fans will run quieter, temperatures will drop, and system performance will improve as components are no longer thermal throttling. This routine maintenance not only makes your computer more enjoyable to use but also extends the life of your expensive components, saving you money in the long run. A clean PC is a happy PC, ready to deliver optimal performance for all your computing needs.