


How do I correctly set up my 144Hz gaming monitor for optimal refresh rates in Windows?

Unlocking the Full Potential of Your 144Hz Gaming Monitor
Purchasing a 144Hz gaming monitor is an exciting upgrade, promising buttery-smooth visuals and a significant edge in fast-paced games. However, simply plugging it in isn’t always enough to experience the advertised refresh rate. By default, Windows often sets monitors to a standard 60Hz. To truly harness the power of your high-refresh-rate display, you need to manually configure it. This guide will walk you through the precise steps to ensure your 144Hz monitor is running at its optimal refresh rate in Windows.
Essential Prerequisites Before You Start
Before diving into software settings, ensure your hardware setup can support 144Hz. Overlooking these foundational steps can lead to frustration when your monitor doesn’t perform as expected.
- Compatible Graphics Card (GPU): Your graphics card must support the desired resolution at 144Hz. Most modern GPUs (NVIDIA GeForce GTX 900 series or newer, AMD Radeon R9 200 series or newer) will handle this, but older or entry-level cards might struggle.
- Correct Cable Type: This is critical. For 144Hz at 1080p or 1440p, you generally need either a DisplayPort (DP) cable (version 1.2 or higher) or an HDMI 2.0 (or higher) cable. DVI-D Dual Link can also support 144Hz, but it’s less common on newer monitors/GPUs. Standard HDMI 1.4 cables are usually limited to 60Hz or 120Hz at lower resolutions. Always use the cable that came with your monitor or a reputable brand.
- Monitor Connected to GPU: Ensure your monitor is plugged directly into your discrete graphics card’s output ports, not into your motherboard’s integrated graphics ports.

Step-by-Step Configuration in Windows Display Settings
Once your hardware is correctly connected, the next step is to configure Windows to recognize and utilize the higher refresh rate.
- Right-Click on Your Desktop: Anywhere on your desktop, right-click and select ‘Display settings’.
- Access Advanced Display Settings: Scroll down and click on ‘Advanced display settings’. If you have multiple monitors, ensure you select your 144Hz monitor from the dropdown menu at the top of this window.
- Open Display Adapter Properties: Click on ‘Display adapter properties for Display [X]’ (where X is the number corresponding to your 144Hz monitor). This will open a new window.
- Navigate to the Monitor Tab: In the new properties window, go to the ‘Monitor’ tab.
- Set Refresh Rate: Under ‘Screen refresh rate’, click the dropdown menu. You should see 144 Hertz (or 144Hz) as an option. Select it.
- Apply and Keep Changes: Click ‘Apply’ and then ‘OK’. Windows will prompt you to keep or revert the changes; click ‘Keep Changes’ within the countdown.
Configuring Refresh Rate Through Your GPU Control Panel
Many graphics card manufacturers provide their own control panels, which offer an alternative or complementary way to set your refresh rate. This method can sometimes be more reliable or offer additional settings.
For NVIDIA Users (NVIDIA Control Panel):
- Open NVIDIA Control Panel: Right-click on your desktop and select ‘NVIDIA Control Panel’.
- Navigate to Change Resolution: Under ‘Display’ on the left-hand pane, click on ‘Change resolution’.
- Select Your Monitor: Choose your 144Hz monitor from the display list.
- Choose PC Resolution & Refresh Rate: Scroll down to the ‘PC’ section (not ‘HD, SD’). Select your native resolution (e.g., 1920×1080 or 2560×1440). Then, from the ‘Refresh rate’ dropdown menu, select ‘144 Hz’.
- Apply Changes: Click ‘Apply’.
For AMD Users (AMD Radeon Software):
- Open AMD Radeon Software: Right-click on your desktop and select ‘AMD Radeon Software’.
- Go to Display Settings: Click on the ‘Settings’ icon (gear) in the top right, then select the ‘Display’ tab.
- Select Your Monitor: Locate your 144Hz monitor.
- Adjust Refresh Rate: Under the ‘Custom Resolutions’ or ‘Global Display’ section, you should find a ‘Refresh Rate’ dropdown. Select ‘144 Hz’.
- Apply Changes: Confirm any prompts to apply the changes.
In-Game Settings and Adaptive Sync (G-Sync/FreeSync)
Even after setting Windows to 144Hz, some games might default to a lower refresh rate. Always check the video or graphics settings within each game and ensure the refresh rate or display mode is set correctly. If your monitor supports G-Sync (NVIDIA) or FreeSync (AMD), ensure it’s enabled in your GPU control panel and your monitor’s OSD (On-Screen Display) for the best experience.

Troubleshooting Common Issues
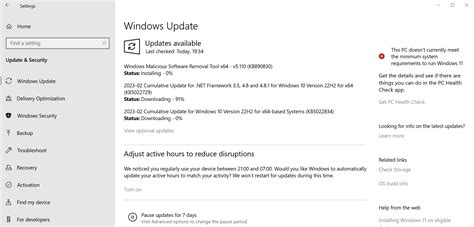
- No 144Hz Option: Double-check your cable type (DisplayPort or HDMI 2.0+ is essential). Ensure GPU drivers are up to date. Verify your monitor’s OSD settings; sometimes, a ‘gaming mode’ or specific input needs to be enabled.
- Screen Flickering/Artifacts: Try a different cable or port. Ensure your GPU drivers are stable and up to date. If overclocking is involved, revert to stock settings.
- Resolution Mismatch: Ensure your desktop resolution is set to your monitor’s native resolution for optimal clarity and performance.
Conclusion
Properly setting up your 144Hz gaming monitor is a straightforward process once you know where to look. By following these steps through Windows Display Settings and your GPU control panel, you’ll ensure your display is running at its optimal refresh rate, providing a significantly smoother, more responsive, and immersive gaming experience. Enjoy the fluidity!


