


How to enable G-Sync/FreeSync & optimize monitor refresh rate for smoother PC gaming?
Unlock the Ultimate Smoothness: G-Sync, FreeSync, and Refresh Rate Optimization
For PC gamers, a smooth and responsive visual experience is paramount. Screen tearing, stuttering, and input lag can severely detract from immersion and competitive performance. Fortunately, technologies like NVIDIA’s G-Sync and AMD’s FreeSync (collectively known as Adaptive Sync), combined with proper monitor refresh rate optimization, can virtually eliminate these issues, delivering a buttery-smooth gameplay experience. This guide will walk you through the steps to enable these features and fine-tune your display settings.
Understanding Adaptive Sync and Refresh Rate
Before diving into the setup, it’s crucial to understand what these technologies do. Refresh rate refers to how many times your monitor updates the image on the screen per second, measured in Hertz (Hz). A higher refresh rate (e.g., 144Hz, 240Hz) means more frames can be displayed, leading to smoother motion.
Adaptive Sync (G-Sync for NVIDIA GPUs, FreeSync for AMD GPUs) is a technology that synchronizes your monitor’s refresh rate directly with your graphics card’s frame rate. This eliminates screen tearing (where multiple frames are displayed simultaneously) and reduces stuttering by ensuring that a new frame is only displayed when the GPU is ready, not at fixed intervals. This dynamic synchronization results in a significantly smoother and more fluid visual experience.

Enabling NVIDIA G-Sync (or G-Sync Compatible)
NVIDIA offers two tiers of Adaptive Sync: dedicated G-Sync modules (premium) and G-Sync Compatible (monitors that support VESA Adaptive Sync over DisplayPort and have passed NVIDIA’s validation). The setup process is largely similar.
Prerequisites:
- NVIDIA GeForce GTX 10-series GPU or newer.
- G-Sync or G-Sync Compatible monitor.
- DisplayPort cable (recommended, HDMI 2.1 might work for some G-Sync Compatible displays).
- Latest NVIDIA graphics drivers.
Steps:
- Connect Your Monitor: Ensure your monitor is connected to your GPU using a DisplayPort cable. For G-Sync Compatible, some monitors may work with HDMI 2.1.
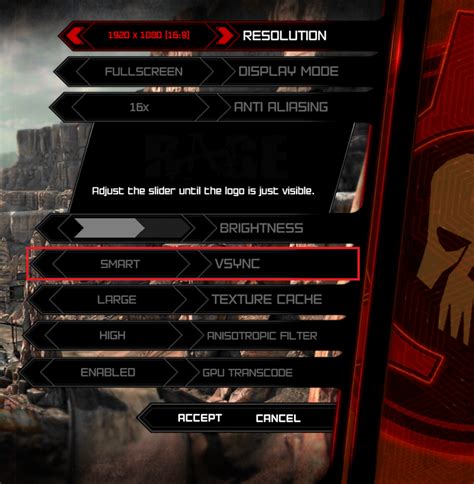
- Enable Adaptive Sync on Monitor: Access your monitor’s On-Screen Display (OSD) menu and enable ‘G-Sync’, ‘Adaptive Sync’, or ‘VRR’ (Variable Refresh Rate). This setting might be under ‘Gaming’, ‘Display’, or ‘Advanced’ sections.
- Open NVIDIA Control Panel: Right-click on your desktop and select ‘NVIDIA Control Panel’.
- Set Up G-Sync: In the NVIDIA Control Panel, navigate to ‘Display’ > ‘Set up G-SYNC’.
- Activate G-Sync: Check the box for ‘Enable G-SYNC, G-SYNC Compatible’.
- Select Display: Choose your G-Sync compatible monitor (if you have multiple displays).
- Apply Settings: Select whether to enable G-Sync for ‘Windowed and full screen mode’ or ‘Enable for full screen mode’ only. For the best experience, choose ‘Windowed and full screen mode’ if stable. Click ‘Apply’.
Enabling AMD FreeSync
AMD FreeSync works with a wider range of monitors and graphics cards, often at a lower price point.
Prerequisites:
- AMD Radeon GPU (RX 400 series or newer, or Ryzen APUs with integrated Vega graphics).
- FreeSync-enabled monitor.
- DisplayPort or HDMI cable.
- Latest AMD Radeon Software drivers.
Steps:
- Connect Your Monitor: Ensure your FreeSync monitor is connected to your GPU via DisplayPort or HDMI.
- Enable FreeSync on Monitor: Go into your monitor’s OSD menu and enable ‘FreeSync’, ‘Adaptive Sync’, or ‘VRR’. This setting is usually found in the ‘Gaming’ or ‘Display’ sections.
- Open AMD Radeon Software: Right-click on your desktop and select ‘AMD Radeon Software’.
- Navigate to Display Settings: Click on the ‘Settings’ cog icon in the top right, then go to the ‘Display’ tab.
- Activate FreeSync: Ensure ‘Radeon FreeSync’ is toggled to ‘Enabled’ for your connected display.
Optimizing Your Monitor’s Refresh Rate
Even with Adaptive Sync enabled, you need to ensure your monitor is running at its highest available refresh rate.
Steps:
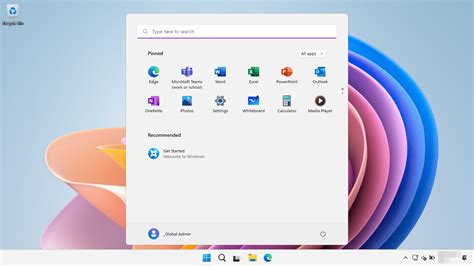
- Open Windows Display Settings: Right-click on your desktop and select ‘Display settings’.
- Access Advanced Display Settings: Scroll down and click on ‘Advanced display settings’.
- Choose Refresh Rate: Select your gaming monitor from the dropdown menu (if you have multiple).
- Set Highest Refresh Rate: Click on ‘Display adapter properties for Display [X]’ (where X is your monitor number). Go to the ‘Monitor’ tab. Under ‘Screen refresh rate’, select the highest available refresh rate (e.g., 144 Hz, 240 Hz). Click ‘Apply’ then ‘OK’.
- In-Game Settings: Always check your in-game graphics settings. Many games have a dedicated display section where you can manually select the refresh rate. Ensure it matches your desktop setting.
Note on Frame Rate Cap: For optimal Adaptive Sync performance, it’s often recommended to cap your in-game frame rate slightly below your monitor’s maximum refresh rate (e.g., 141 FPS for a 144Hz monitor). This prevents the GPU from exceeding the Adaptive Sync range, which can reintroduce tearing or stutter. Use your GPU’s control panel (NVIDIA Control Panel or AMD Radeon Software) or in-game settings to set a frame rate limit.
Troubleshooting Common Issues
- Screen Tearing Persists: Ensure Adaptive Sync is enabled on both your monitor’s OSD and your GPU control panel. Verify your DisplayPort/HDMI cable supports the required bandwidth. Consider capping your in-game FPS slightly below your monitor’s max refresh rate.
- G-Sync/FreeSync Option Missing: Update your graphics drivers. Check your monitor’s OSD to ensure Adaptive Sync is enabled. Confirm your hardware meets the minimum requirements.
- Black Screens/Flickering: This can sometimes occur with very high refresh rates or specific cable/monitor combinations. Try a different DisplayPort cable, update firmware for your monitor, or try lowering the refresh rate slightly as a temporary measure.
- Performance Issues: Ensure your display resolution and refresh rate aren’t exceeding your GPU’s capabilities, leading to constantly low frame rates.
Conclusion
Enabling G-Sync or FreeSync and optimizing your monitor’s refresh rate are crucial steps for any serious PC gamer. By synchronizing your GPU’s output with your display’s capabilities, you eliminate visual artifacts like tearing and stuttering, leading to a significantly smoother, more immersive, and more enjoyable gaming experience. Follow these steps, and you’ll be well on your way to unlocking your gaming setup’s full potential.


