How to keep your game mods stable after official game updates?

For many gamers, mods are an essential part of the experience, extending gameplay, enhancing graphics, or adding entirely new features. However, the joy of a heavily modded game can quickly turn to frustration when an official game update arrives. Updates, while often bringing improvements and bug fixes, frequently break compatibility with existing mods, leading to crashes, glitches, or outright unplayable saves. Keeping your modded game stable requires foresight, careful management, and a bit of patience. This guide will walk you through the best practices to navigate the turbulent waters of game updates and keep your mods thriving.
Understanding the Challenge
Official game updates typically alter core game files, engine versions, or scripting languages. These changes can render mods incompatible because the mod was built to interact with a specific version of those files. When the game engine or its assets are modified, a mod that relies on the old structure will either fail to function correctly or cause the game to crash. Recognizing this fundamental conflict is the first step toward effective mod management.
Pre-Update Preparations: Your Shield Against Instability
The most effective way to deal with game updates is to prepare for them *before* they even happen. Proactive measures can save you hours of troubleshooting later.
Backup Your Game Files and Mods
This is arguably the most crucial step. Before any major game update, or even if you’re just about to install new mods, create backups. This includes:
- Your game save files: Often located in a separate folder (e.g., DocumentsMy Games<Game Name>).
- Your game installation directory: If possible, copy the entire game folder. This ensures you have a working version to revert to if the update breaks everything.
- Your mod manager profiles: Most mod managers allow you to export or backup your current mod loadout and configurations.
Having a clean, working backup means you can always roll back to a stable state if the update or subsequent mod re-enabling goes wrong.
![Backup and Restore Steam Game Files [Tips for Gamer] - EaseUS](/images/aHR0cHM6Ly90czIubW0uYmluZy5uZXQvdGg/aWQ9T0lQLmMydHFGTXNsQXRhdHB0a09mVUNjandIYUVoJnBpZD0xNS4x.webp)
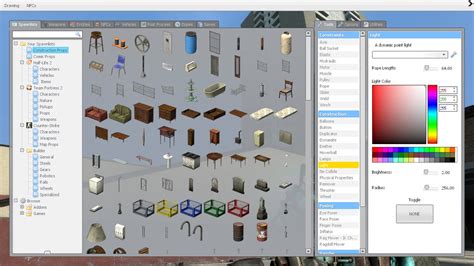
Utilize a Mod Manager
If you’re not using one already, a mod manager (like Vortex, Mod Organizer 2, Nexus Mod Manager, or specific game launchers like the Fallout 4 or Skyrim official mod managers) is indispensable. These tools:
- Isolate mods from the game’s core files, making installation and uninstallation cleaner.
- Allow you to easily enable or disable individual mods or entire profiles.
- Manage load orders, which is vital for preventing conflicts between mods.
A good mod manager is your control center for your modded experience.
Disable Mods Before Updating
When an update is imminent, or before you manually initiate one, disable all your mods through your mod manager. This ensures that the game updates its core files without any mod files interfering or being overwritten incorrectly. Once the update is complete, you can begin the process of re-enabling them systematically.
Post-Update Protocol: The Path to Restoration
The update has landed, and your game is now shiny and new. Here’s how to get your mods back in action safely.
Scrutinize Official Patch Notes
Always read the official patch notes released by the game developers. Pay close attention to any changes made to game mechanics, scripting, user interfaces, or file structures. This information will give you clues as to which types of mods are most likely to be affected (e.g., a UI overhaul update will likely break all UI mods).

Consult Modding Communities and Forums
After an update, the modding community is a hive of activity. Check Nexus Mods, the game’s official forums, Reddit communities, or specific mod author pages. Others will likely be experiencing the same issues or, better yet, sharing information on which mods are updated, working, or confirmed broken. This is an invaluable resource for collective troubleshooting.
Update Your Mods
Patience is a virtue here. Many mod authors are diligent and will release compatibility patches for their mods shortly after a game update. Check your mod manager or the mod’s download page regularly for new versions. Always prioritize updating your most critical or complex mods first.
Troubleshooting and Gradual Re-enablement
If a mod update isn’t available, or if you’re experiencing issues even after updating your mods, it’s time to troubleshoot.
Re-enable Mods Incrementally
Instead of re-enabling all your mods at once, do it in small batches. Start with essential framework mods (like script extenders, if applicable) and then add other mods, group by group. Test the game after each batch. If the game crashes or exhibits problems, you’ll know that the issue lies within the last group of mods you enabled, making it much easier to pinpoint the culprit.
Consider a Clean Installation (Last Resort)
If all else fails, and you can’t get your game running stably with mods, a clean installation might be necessary. This involves:
- Uninstalling the game.
- Manually deleting any leftover game files or folders.
- Reinstalling the game.
- Installing your mod manager (if it was part of the problem).
- Gradually reinstalling and enabling your mods.
This is a time-consuming process but often the most effective way to eliminate deeply rooted conflicts.
Conclusion
Keeping your modded game stable after official updates requires a methodical approach. By proactively backing up your files, utilizing mod managers, staying informed through community resources, and systematically troubleshooting, you can significantly reduce downtime and quickly get back to enjoying your customized gaming experience. Remember, patience and preparedness are your greatest assets in the world of modding.