Actionable tips for resolving mod conflicts after a game patch?
The Inevitable Modding Headache: Post-Patch Conflicts
Ah, the joy of a new game patch! Bug fixes, new content, performance improvements… and the dread of knowing your meticulously curated mod list might just explode. Game patches frequently alter core game files, often rendering your favorite mods incompatible and leading to crashes, glitches, or outright unplayable experiences. But fear not, fellow modders! Resolving these conflicts is a common challenge, and with a systematic approach, you can get your game back in working order.
1. Preparation is Your Best Friend: Before and After the Patch
The best defense is a good offense. Before any major game patch hits, especially for heavily modded games, take a few precautionary steps. Always back up your save files! Many mod managers also offer a feature to back up your entire mod setup. Once the patch is live, resist the urge to jump straight into the game. Read the official patch notes carefully. Developers often mention changes that will impact mods, sometimes even providing guidance or a heads-up for mod authors.
Before launching the game post-patch, disable all your mods. This might seem drastic, but it’s the safest way to ensure the base game runs correctly. If the unmodded game runs fine, you know the problem lies within your mod list, not the patch itself.

2. Identifying the Culprit: The 50/50 Method
Once you’ve confirmed the base game runs, it’s time to find the problematic mod(s). The ’50/50 method’ is a tried-and-true troubleshooting technique. Re-enable half of your mods and test the game. If it crashes, the conflicting mod is in that half. If it runs, the conflict is in the other half. Repeat this process, halving the problematic group each time, until you narrow down the specific mod or small group of mods causing the issue. This method can be time-consuming for large mod lists but is incredibly effective.
Pay close attention to any error messages or crash logs the game provides. While often cryptic, they can sometimes point directly to a file or mod, significantly speeding up the identification process.
3. Update, Update, Update: The Modding Golden Rule
Once you’ve identified a potentially conflicting mod, the first and most crucial step is to check for an update. Mod authors are often very quick to release compatibility patches for new game versions. Visit the mod’s official download page (Nexus Mods, Steam Workshop, etc.) and look for recent updates or specific notes regarding compatibility with the latest game patch.
Always ensure you download the correct version for your game. If an update is available, install it according to the mod author’s instructions. Sometimes, a clean install of the mod is recommended, which means uninstalling the old version completely before installing the new one.
4. Compatibility Patches and Load Order
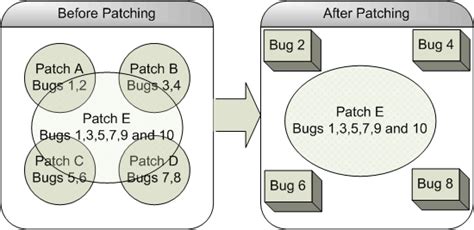
Even with updated mods, conflicts can still arise, especially between mods that alter the same game assets or scripts. Many larger mods have compatibility patches created by the original author or by community members to make them work together. Search for these specifically. For example, ‘Mod A – Mod B Compatibility Patch’.
Your mod load order can also be a critical factor. Some mods need to load after others to function correctly or to override certain game files. Tools like LOOT (Load Order Optimisation Tool) for Bethesda games, or built-in load order managers in games like Cities: Skylines, can help automate this process. Understanding basic load order principles (e.g., smaller bug fix mods often load early, large overhaul mods later) can also prevent many issues.

5. Advanced Troubleshooting: Clean Installs and Manual Edits
If updating and load order adjustments don’t work, you might need to perform a clean install of your game. This involves uninstalling the game, manually deleting any leftover files in the game directory and user data folders, and then reinstalling the game from scratch. Then, add your mods back gradually, testing after each batch.
For more advanced users, some conflicts can be resolved by manually editing mod files using tools provided by the game’s modding community (e.g., xEdit for Skyrim). However, this requires a deep understanding of modding and can potentially break your game further if done incorrectly. Always back up any files before attempting manual edits.
6. Leverage the Modding Community
You’re not alone in this! The modding community is often the best resource for conflict resolution. Check the comments section on the mod’s download page, the mod author’s Discord server, or dedicated modding forums for your game. Chances are, someone else has encountered the exact same issue and a solution has already been discussed.
When asking for help, provide as much detail as possible: your game version, a list of your mods, your load order, and any error messages you received. This helps others quickly diagnose your problem.

Conclusion: Patience and Persistence Pay Off
Resolving mod conflicts after a game patch can be a test of patience, but by following these actionable steps, you’ll significantly increase your chances of success. Start with preparation, systematically identify the problem, prioritize updates, optimize your load order, and don’t hesitate to lean on the vast knowledge of the modding community. Happy modding!