


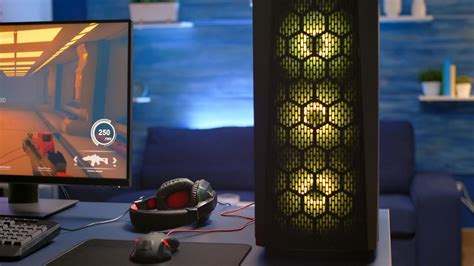
Building a new gaming PC? Best practices for cable management & airflow.

When you’re assembling a new gaming PC, the excitement of seeing your powerful components come together is unparalleled. However, beyond just plugging everything in, two critical factors often overlooked by new builders are cable management and airflow. Mastering these not only enhances your PC’s aesthetics but, more importantly, significantly impacts its performance, thermal efficiency, and overall lifespan.
The Importance of Effective Cable Management
Cable management isn’t just about making your PC look tidy; it’s a foundational step for superior cooling and easier maintenance. A chaotic mess of cables can obstruct airflow, trap heat, and make future upgrades or troubleshooting a nightmare. By neatly routing and securing your cables, you create an unobstructed path for air, leading to lower temperatures and a quieter system.
Key Principles for Cable Management:
- Plan Ahead: Before you even start connecting components, take a moment to visualize cable paths. Identify routing holes in your case, potential tie-down points, and areas where cables might interfere with fans or other components.
- Modular Power Supplies: If possible, invest in a modular or semi-modular power supply. These allow you to only connect the cables you need, drastically reducing clutter.
- Use Case Features: Most modern PC cases come with cutouts, grommets, and channels behind the motherboard tray specifically for routing cables. Utilize these to keep cables out of the main compartment.
- Velcro Ties & Zip Ties: Use Velcro straps for major bundles, as they are reusable and adjustable. Zip ties can be used for more permanent securing of smaller bundles or individual cables, but be mindful not to over-tighten them.
- Route Cables Behind the Motherboard Tray: This is the golden rule. Run as many cables as possible behind the motherboard tray and bring them through grommets only when they need to connect to a component.
- Manage Excess Cable Length: Coil and secure any excess cable length neatly, ideally in less visible areas like the PSU shroud or behind the motherboard tray.
Optimizing Airflow for Peak Performance
Good airflow is the lifeblood of a healthy gaming PC. Your components generate heat, and without efficient heat dissipation, performance can suffer due to thermal throttling, and component lifespan can be shortened. Proper airflow ensures a constant supply of cool air and efficient exhaust of hot air.
Establishing a Positive Pressure Setup:
A positive pressure setup means having more air pushed into your case than pulled out. This helps prevent dust accumulation by forcing air out through small gaps, rather than letting unfiltered air seep in. It typically involves more intake fans than exhaust fans, or intake fans running at a higher RPM.
Key Considerations for Airflow:
- Intake and Exhaust Fans: Generally, you want intake fans at the front and bottom of the case, pulling cool air in. Exhaust fans should be at the rear and top of the case, pushing hot air out.
- Fan Placement & Direction: Pay close attention to the arrows on your fans indicating airflow direction. Most fans push air from the side with the fan hub (frame) to the side with the open blades.
- CPU Cooler Orientation: For tower-style air coolers, ensure they are oriented to blow air towards the rear exhaust fan, creating a smooth front-to-back airflow path.
- GPU Clearance: Modern GPUs can be quite large. Ensure they have adequate space to breathe, especially if they use open-air cooling solutions. Cable management here is crucial to prevent obstruction.
- Dust Filters: Keep your intake fans equipped with dust filters and clean them regularly. This prevents dust buildup inside your system, which can severely impede cooling performance over time.
Putting It All Together: Synergy Between Cables & Air
Cable management and airflow are not independent practices; they are two sides of the same coin. An immaculately managed system allows for unimpeded airflow, which in turn leads to lower component temperatures, quieter fan operation, and a more stable system overall. This synergy ultimately translates into a more reliable and enjoyable gaming experience.
After your initial build, it’s a good practice to monitor your system’s temperatures under load (e.g., during gaming sessions). Tools like HWMonitor or MSI Afterburner can provide valuable data. If temperatures are higher than expected, revisit your cable routing and fan configuration. Small adjustments can often lead to significant improvements.
Conclusion
Building a gaming PC is a rewarding endeavor, and dedicating time to proper cable management and airflow optimization will pay dividends in performance, longevity, and peace of mind. Treat these steps not as afterthoughts, but as integral parts of the building process. A clean, well-cooled PC isn’t just a point of pride; it’s a robust machine ready to tackle any virtual world you throw at it, maintaining optimal performance for years to come.


