How to effectively manage community-made mods for stability & bug reduction?
Navigating the World of Community Mods
Community-made modifications (mods) breathe new life into games, offering endless possibilities for enhanced gameplay, visual overhauls, and entirely new experiences. From minor tweaks to massive expansions, mods enrich the gaming landscape. However, integrating numerous community creations into your game can quickly lead to instability, crashes, and unforeseen bugs if not managed properly. This guide will walk you through effective strategies to enjoy the benefits of mods while minimizing the headaches, ensuring a stable and enjoyable gaming experience.

Understanding the Modding Ecosystem and Its Challenges
The vastness of the modding community means a diverse range of quality, compatibility, and update frequency. Mods can originate from various platforms, including Nexus Mods, Steam Workshop, GitHub, and independent developer websites. While most modders strive for quality, some creations might be outdated, poorly coded, or inherently incompatible with others. Recognizing these potential pitfalls is the first step towards a stable modded game.
- Mod Sources: Stick to reputable platforms known for good moderation and user reviews.
- Mod Types: Differentiate between simple asset replacements, script extenders, and complex gameplay overhauls, as their impact on stability varies.
- Dependencies: Many mods require other specific mods or tools (like script extenders) to function; always check for these.
Strategic Mod Selection and Initial Setup
Before even downloading a mod, thorough research is paramount. Don’t just grab the latest trending mod; delve into its details. Look for:
- Mod Descriptions: Read them carefully for compatibility notes, known issues, and installation instructions.
- User Reviews and Comments: These often highlight common problems, solutions, and overall stability.
- Update History: Regularly updated mods are generally better maintained and less likely to cause issues with newer game versions.
- Compatibility Patches: Some popular mods have specific patches to work with other mods; seek these out.
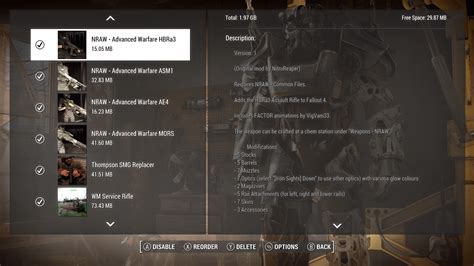
Once selected, use a dedicated mod manager (e.g., Mod Organizer 2, Vortex, NMM) for easier installation, uninstallation, and conflict resolution. Manually installing mods, especially those with many files, can quickly become a tangled mess.
![Mod Manager [v1.x]](/images/aHR0cHM6Ly90czIubW0uYmluZy5uZXQvdGg/aWQ9T0lQLnpIRGhkbnlhNTNFVS1SRThSaF9IZndIYUVLJnBpZD0xNS4x.webp)
Mastering Load Order and Conflict Resolution
The order in which your game loads mods is often the most critical factor for stability. Conflicts arise when two or more mods try to modify the same game file or record. Without proper load order, these conflicts can lead to crashes, broken quests, or visual glitches.
Tools for Load Order Management:
- BOSS/LOOT: These tools automatically sort your load order based on community-sourced rules, flagging potential conflicts and missing dependencies. Always run them after adding new mods.
- Conflict Resolution Patches: Sometimes, manual patching (e.g., using xEdit for Bethesda games) is required to resolve deeper conflicts. This is an advanced technique but essential for heavily modded setups.
Understand that a higher priority mod (loaded later) will typically “win” conflicts, overriding changes from earlier loaded mods. Experimentation and careful observation are key here.
Systematic Testing and Troubleshooting
Adding a large batch of mods simultaneously is a recipe for disaster. Instead, adopt an incremental approach:
- Install 2-3 mods at a time (or one large, complex mod).
- Run your game and test extensively in different areas and scenarios.
- If issues arise, immediately disable the newly added mods to isolate the culprit.
- Use console commands or debug tools (if available) to identify specific errors.
When you encounter a bug, consult the mod’s comment section or bug reports page on its distribution platform. Other users might have already found a solution. Provide clear, concise bug reports if you’re unable to find a fix, including your load order and steps to reproduce the issue.

Ongoing Maintenance and Backup Strategies
Modding isn’t a “set it and forget it” process. Game updates can break mods, and mod authors frequently release new versions with bug fixes or expanded features. Regular maintenance is crucial:
- Keep Mods Updated: Periodically check for updates to your installed mods. Read update notes carefully, as some might require a clean save or specific installation steps.
- Game Version Compatibility: Be aware that a game update might temporarily break many of your mods. It’s often wise to wait for mod authors to update their creations before updating the game itself, or use tools to prevent automatic game updates.
- Backup Your Game and Save Files: Before making significant changes to your mod list or updating your game, always back up your game directory and your save files. This ensures you can revert to a working state if something goes wrong.
Consider using a version control system for your mod list or a simple spreadsheet to track mod versions, installation dates, and any specific notes.

Conclusion
Effectively managing community-made mods transforms the potential chaos of a heavily modded game into a stable and infinitely more enjoyable experience. By adopting a methodical approach – from careful selection and strategic installation to diligent testing and ongoing maintenance – you can harness the full creative power of the modding community without sacrificing stability. Embrace the journey, learn from your experiences, and enjoy the rich, personalized worlds that mods enable.