


How to fix low FPS and game stutter on my high-end gaming PC?
Understanding the Frustration: High-End PC, Low Performance
It’s a perplexing and highly frustrating scenario: you’ve invested significantly in a high-end gaming PC, complete with the latest GPU, a powerful CPU, and ample RAM, only to be met with disappointing frame rates and persistent stuttering in your favorite games. This isn’t just an inconvenience; it can severely impact your gaming experience. While a premium setup should deliver smooth, high-fidelity gameplay, several underlying issues, often software-related or configuration-based, can secretly sabotage your performance. The good news is that most of these problems are fixable with a systematic troubleshooting approach.
Step 1: The Foundation – Software Updates and Drivers
Outdated or corrupted drivers are among the most common culprits for performance woes. Your high-end hardware relies on up-to-date software to communicate efficiently with your operating system and games.
Update Graphics Drivers
- NVIDIA GeForce Experience / AMD Adrenalin Software: Use the official software from NVIDIA or AMD to check for and install the latest graphics drivers. Always perform a clean installation if the option is available to prevent conflicts.
- Display Driver Uninstaller (DDU): For persistent issues, consider using DDU in Safe Mode to completely remove old drivers before installing the newest version. This ensures no remnants interfere with the new installation.
Update Chipset Drivers
Your motherboard’s chipset drivers are crucial for proper communication between components like your CPU, GPU, and storage. Visit your motherboard manufacturer’s website and download the latest chipset drivers for your specific model.
Update Windows
Ensure your Windows operating system is fully up to date. Microsoft frequently releases performance optimizations and bug fixes that can impact gaming.
Step 2: Optimize Background Processes and Overlays
Even powerful PCs can struggle when too many applications are vying for resources.
Close Unnecessary Background Apps
Open Task Manager (Ctrl+Shift+Esc) and go to the “Processes” tab. Identify and close any non-essential applications that are consuming significant CPU, memory, or disk resources. Pay attention to startup apps as well.
Manage Gaming Overlays
While convenient, overlays from Discord, GeForce Experience, Xbox Game Bar, or other software can sometimes cause performance dips and stuttering. Try disabling them temporarily to see if it resolves the issue.

Step 3: Review In-Game and System Power Settings
Incorrect power management or overly aggressive in-game settings can severely limit your PC’s potential.
Adjust In-Game Graphics Settings
- Start with Defaults: If you’ve been tinkering, try resetting game graphics settings to default or recommended.
- Resolution & Scaling: Ensure your game’s resolution matches your monitor’s native resolution. Experiment with resolution scaling; sometimes a slight reduction can yield significant FPS gains without much visual compromise.
- V-Sync/G-Sync/FreeSync: If you have a variable refresh rate monitor, ensure G-Sync/FreeSync is enabled in your GPU control panel and in-game V-Sync is either off or set to “Fast Sync” (NVIDIA) to avoid input lag. If you don’t have VRR, consider enabling V-Sync to prevent screen tearing, but be aware it can introduce input lag.
Windows Power Plan
Set your Windows power plan to “High Performance” or “Ultimate Performance.” This ensures your CPU and other components are not being throttled to save power. You can find this in “Power Options” within the Control Panel.
GPU Power Management
In your NVIDIA Control Panel or AMD Adrenalin Software, ensure the power management mode is set to “Prefer Maximum Performance.”
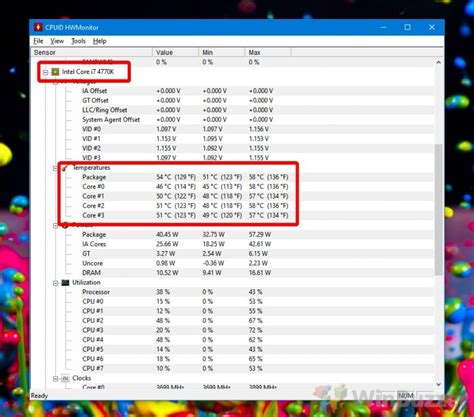
Step 4: Check for Thermal Throttling
High-end components generate a lot of heat. If your cooling solution isn’t adequate or functioning properly, your components will “throttle” (reduce clock speeds) to prevent damage, leading to lower FPS and stutter.
Monitor Temperatures
Use monitoring software like HWMonitor, MSI Afterburner, or NZXT CAM to keep an eye on your CPU and GPU temperatures while gaming. If temperatures consistently hit 85°C-90°C or higher, thermal throttling is a strong possibility.
Improve Airflow and Clean Components
- Clean Dust: Dust accumulation is a prime enemy of cooling. Use compressed air to clean out fans, heatsinks (CPU cooler, GPU heatsink), and case vents.
- Case Airflow: Ensure you have a good balance of intake and exhaust fans in your PC case.
- Reapply Thermal Paste: If your CPU temperatures are consistently high despite cleaning, reapplying fresh thermal paste to your CPU might be necessary.
Step 5: Storage and RAM Considerations
Even fast storage and ample RAM can present issues if not configured correctly or if they are failing.
SSD Health and Game Location
Ensure your games are installed on an SSD for faster loading times and smoother asset streaming. Use tools like CrystalDiskInfo to check the health of your SSDs. While SSDs don’t need defragmenting, ensure there’s enough free space (at least 15-20%) for optimal performance.
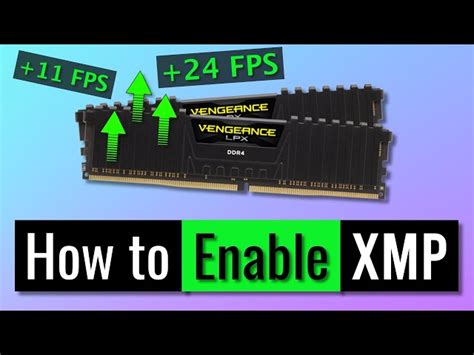
RAM Configuration (XMP/DOCP)
Check your motherboard’s BIOS/UEFI settings to ensure your RAM is running at its advertised speed by enabling its XMP (Intel) or DOCP (AMD) profile. If not enabled, your RAM might be running at a slower default speed, impacting performance.
Test RAM Stability
If you suspect faulty RAM, tools like MemTest86 can help identify issues.
Step 6: Advanced Troubleshooting and System Integrity
If the above steps don’t resolve your issues, delve deeper into system integrity.
Corrupted System Files
Run System File Checker (SFC) and DISM commands to repair potential Windows system file corruption:
sfc /scannow
DISM /Online /Cleanup-Image /RestoreHealth
BIOS/UEFI Update
While generally not recommended unless necessary, updating your motherboard’s BIOS/UEFI can sometimes resolve compatibility issues or improve stability. Proceed with caution and follow your motherboard manufacturer’s instructions precisely.
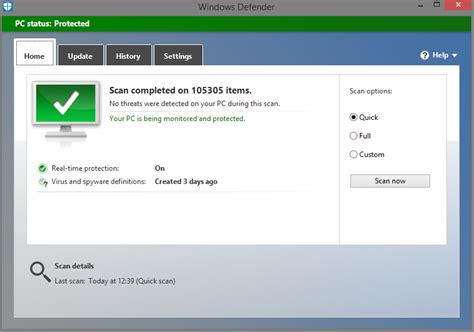
Malware Scan
Perform a full system scan with your preferred antivirus software to rule out any performance-sapping malware or viruses.
Conclusion: Patience and Persistence Pay Off
Diagnosing low FPS and game stutter on a high-end PC can feel like finding a needle in a haystack, but a methodical approach usually yields results. Start with the most common culprits (drivers, background processes) and systematically work your way through the list. Remember to test your games after each significant change to identify the exact fix. With a bit of patience and persistence, you can get your powerful gaming rig running at its peak, delivering the smooth, immersive experience you paid for.


