


How to troubleshoot mod conflicts after game updates effectively?
Game updates, while bringing new features and bug fixes, often introduce unforeseen challenges for players who rely on mods to enhance their experience. One of the most frustrating issues is the sudden emergence of mod conflicts, leading to crashes, freezes, or broken gameplay mechanics. Understanding how to systematically troubleshoot these conflicts is crucial for any dedicated modder. This guide will walk you through an effective process to diagnose and resolve mod conflicts after a game update, getting you back to enjoying your favorite titles.
Why Game Updates Break Mods
Modern games are complex, and mods often interact with core game files, scripts, and assets. When a game developer releases an update, they might change these underlying elements, rendering existing mods incompatible. This can happen due to:
- Changes in Data Structures: The way the game stores information might be altered.
- API Updates: The interface mods use to interact with the game could change.
- Engine Upgrades: Underlying game engine changes can break mod functionality.
- Asset Overhauls: Updated textures, models, or sound files might conflict with modded versions.
Step 1: Preparation and Initial Checks
Before diving into troubleshooting, take some essential precautionary steps:
Back Up Your Saves and Mod Profile
Always create a backup of your game saves and, if your mod manager allows, your entire mod profile. This ensures you can revert to a working state if things go wrong during troubleshooting.
Verify Game Files (Steam/Epic Games)
Use your game client’s “verify integrity of game files” feature. This can fix any corruption or missing files that might be masked by mod issues.
Consult Community Forums and Mod Pages
The first place to look for solutions is often the game’s modding community. Check the official game forums, modding subreddits, and the individual mod pages on Nexus Mods or other platforms. Developers and fellow players often quickly identify common conflicts and provide temporary fixes or update statuses.
Step 2: Isolate the Problematic Mod(s)
This is the most critical and often most time-consuming step. The goal is to narrow down which mod or combination of mods is causing the conflict.
Disable All Mods
Start by disabling all your mods. Launch the game to confirm it runs without issues. If it still crashes, the problem might be with your game installation itself, not the mods.
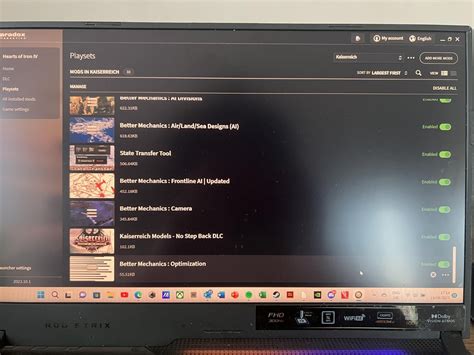
The Binary Search Method (Highly Recommended)
This method drastically reduces the time spent isolating conflicts:
- Re-enable half of your mods.
- Launch the game.
- If the game works, the conflict is in the other half. If it crashes, the conflict is within the half you just enabled.
- Repeat the process, continually halving the problematic group of mods until you identify the single mod or small group of mods causing the issue.
This method works best with a good mod manager that allows easy enabling/disabling of groups of mods.
Step 3: Identify the Type of Conflict and Resolve
Once you’ve identified the problematic mods, you need to understand the nature of the conflict.
Check for Updates to Conflicting Mods
Many mod authors are quick to update their mods after a game patch. Check the mod page for a newer version compatible with the latest game update.
Analyze Load Order (Where Applicable)
Some games (like Bethesda titles) are highly sensitive to load order. Tools like LOOT (Load Order Optimisation Tool) can help automatically sort your mods, but sometimes manual adjustments are necessary. If two mods modify the same record or asset, the one loaded last will “win” and override the other. Experiment with changing the load order of your conflicting mods.
Look for Compatibility Patches
Sometimes, two popular mods will inherently conflict, and a third-party or even the original authors might release a compatibility patch designed to make them work together. Search for “[Mod A] [Mod B] compatibility patch”.
Manual Conflict Resolution (Advanced)
For advanced users, tools like xEdit/FO4Edit for Bethesda games allow you to directly inspect and resolve conflicts by choosing which mod’s changes to prioritize for specific records. This requires a deep understanding of game data and modding tools.
Step 4: Testing and Prevention
Thorough Testing
After resolving conflicts, don’t just jump back into your game. Test thoroughly by loading different saves, visiting various locations, and performing actions that previously caused crashes or issues.
Stay Updated and Informed
Regularly check for updates to your mod manager and your most critical mods. Follow mod authors and community channels to stay informed about potential issues with upcoming game updates.
Read Mod Descriptions Carefully
Always read the full description and requirements of any mod you install. Pay attention to listed incompatibilities and required patches.

Conclusion
Troubleshooting mod conflicts after game updates can be daunting, but with a systematic approach, it becomes a manageable task. By following the steps of preparation, isolation, resolution, and prevention, you can effectively diagnose and fix most issues, ensuring your modded game continues to provide countless hours of entertainment. Remember, patience is key, and the modding community is a valuable resource – don’t hesitate to seek help if you get stuck!