Optimal GPU fan curve settings for lower temps & noise while gaming?
Why Customize Your GPU Fan Curve?
Your graphics card is the heart of your gaming rig, and keeping it cool is crucial for stable performance and longevity. While manufacturers provide default fan curves, these are often a compromise, either prioritizing silence at the cost of higher temperatures or aggressive cooling with noticeable fan noise. A custom GPU fan curve allows you to fine-tune the cooling solution to your specific needs, striking a perfect balance between maintaining optimal temperatures and minimizing distracting fan noise during intense gaming sessions.
Understanding and adjusting your GPU’s fan behavior can lead to a more enjoyable gaming experience, preventing thermal throttling that can reduce frame rates and extending the lifespan of your valuable hardware. This guide will walk you through the process, from choosing the right tools to understanding the principles of effective fan control.
Essential Software Tools for Fan Control
To effectively manage your GPU’s fan curve, you’ll need specialized software. The most popular and feature-rich options include:
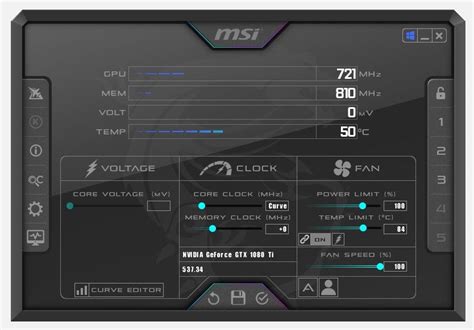
- MSI Afterburner: Widely regarded as the industry standard, Afterburner works with most NVIDIA and AMD GPUs, offering comprehensive monitoring and robust fan curve customization.
- AMD Radeon Software (Adrenalin Edition): For AMD GPU users, the built-in Adrenalin software provides excellent control over fan curves, performance metrics, and various other settings.
- ASUS GPU Tweak II/III, EVGA Precision X1, Gigabyte AORUS Engine: Many GPU manufacturers offer their own branded software, which often provides similar functionality tailored to their hardware. These can sometimes offer unique features but Afterburner is often preferred for its universality.
For this guide, we’ll primarily refer to the concepts applicable to MSI Afterburner, as its interface and functionality are representative of most GPU tuning utilities.
Understanding the Core Principles of Fan Curves
A fan curve maps GPU temperature to fan speed. The goal is to set fan speeds that are just enough to keep temperatures in check without generating excessive noise. Here are the key principles:
- Idle/Low Load: Many modern GPUs support a ‘fan stop’ feature, where fans remain off until a certain temperature (e.g., 50-60°C) is reached. This ensures silent operation for desktop use.
- Gradual Ramp-Up: Fan speeds should increase gradually with temperature. Sudden, drastic jumps in fan speed are more noticeable and irritating than a smooth, progressive increase.
- Target Temperatures: Define your desired maximum gaming temperatures. For most modern GPUs, aiming for under 75-80°C under load is ideal. Some users prefer even lower, around 60-70°C, if noise isn’t a major concern.
- Noise Thresholds: Understand what fan speed percentages begin to become audible and then distracting to you. This is highly subjective and depends on your case, ambient noise, and personal tolerance.
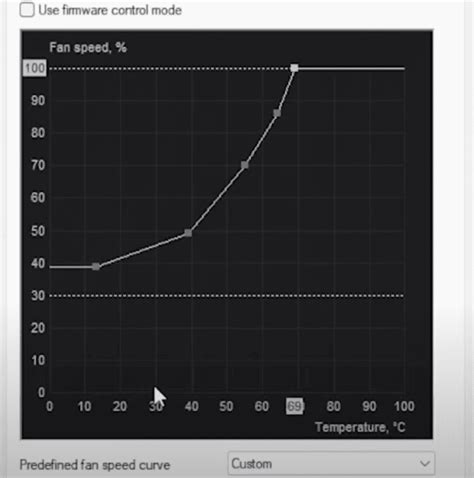
Step-by-Step: Crafting Your Custom Curve
Follow these steps to create an effective fan curve:
- Baseline Monitoring: Before making changes, monitor your GPU temperatures and fan speeds during typical gaming sessions with the stock fan curve. Note down idle temps, max gaming temps, and corresponding fan speeds.
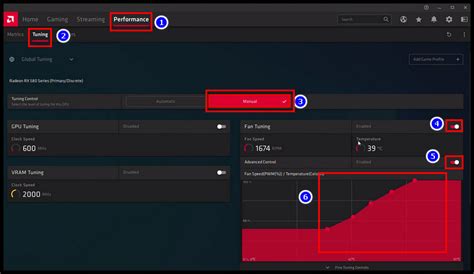
- Enable User-Defined Fan Control: In MSI Afterburner (or your chosen software), go to settings and enable ‘User defined software automatic fan control’ and unlock the fan curve graph.
- Define Your Fan Stop Point (Optional): If your GPU supports it, set the first point on your curve to 0% fan speed up to 50-60°C.
- Create Gradual Steps: Add control points to the graph. A good starting point might be:
- 0% at 50°C (if fan stop)
- 30% at 60°C
- 40% at 65°C
- 50% at 70°C
- 60% at 75°C
- 75% at 80°C (as a safeguard)
- Test and Refine: Apply your new curve and load up a demanding game. Monitor your temperatures and listen to the fan noise.
- Too hot? Increase fan speeds at the corresponding temperature points.
- Too noisy? Decrease fan speeds, especially in the 60-70°C range, and see if temperatures remain acceptable.
Balancing Act: Performance, Acoustics, and Longevity
The optimal fan curve is a personal sweet spot. While lower temperatures are generally better, running fans at 100% all the time isn’t practical or necessary. Modern GPUs are designed to operate safely even at higher temperatures (e.g., 85-90°C), though performance might throttle slightly.
Focus on achieving temperatures that keep your GPU performing consistently without thermal throttling, while keeping fan noise at a level you find tolerable. A slightly higher temperature (e.g., 75°C instead of 65°C) might be a worthy trade-off for significantly reduced noise.
Advanced Considerations for GPU Cooling
- Case Airflow: Your case’s overall airflow significantly impacts GPU temperatures. Ensure you have a good balance of intake and exhaust fans.
- Dust Buildup: Regularly clean your GPU heatsink and fans. Dust acts as an insulator and impedes airflow.
- Thermal Paste/Pads: For experienced users, replacing the stock thermal paste and pads can yield significant temperature improvements, especially on older cards or those with less-than-optimal factory applications.
- Undervolting: Reducing your GPU’s voltage while maintaining its clock speed can drastically lower power consumption and heat output, allowing for quieter fan curves at the same performance levels. This is an advanced technique that requires careful testing.
![PC Case Airflow [What, Why & How] - Tech4Gamers](/images/aHR0cHM6Ly90czEubW0uYmluZy5uZXQvdGg/aWQ9T0lQLjFXYm1kVUtkd1BxRHY2ZjNMUXczOHdIYUczJnBpZD0xNS4x.webp)
Conclusion
Optimizing your GPU fan curve is a rewarding process that can lead to a cooler, quieter, and more stable gaming system. By taking the time to understand the principles and using the right tools, you can tailor your GPU’s cooling to your exact preferences. Experimentation is key; don’t be afraid to make small adjustments, test them, and iterate until you find the perfect balance for your specific hardware and gaming habits. A little effort here can go a long way in enhancing your overall PC gaming experience.